Dynamic NFT with Chainlink automation
Leverage Chainlink for automated NFT mutations.
The Chainlink network can help make autonomous onchain calls and enable truly dynamic NFTs. All of the logic can be created with smart contracts and registered in the Chainlink automation portal, enabling dynamic NFTs using onchain logic, only.
Setup
Before diving in, head over to the Chainlink automation documentation, review the dynamic-nft repo, and then watch the overview video. This tutorial will build upon these basics but leverage mutable Tableland tables + pointers to images on the IPFS network, instead of static metadata JSON files.
Once you're ready, let's set the project up:
-
Create a
dnftfolder and initialize a hardhat project (choose the basic starter template):mkdir dnft && cd dnft
npx hardhat -
Install Tableland, OpenZeppelin, and Chainlink contracts:
npm install @tableland/evm @openzeppelin/contracts @chainlink/contracts -
Get some testnet Chainlink (here).
Be sure to check out the Chainlink examples repo, navigate to the dynamic-nft folder, and find the smart contract at 2_complete.sol — we’ll be using the basics from this code within our project. The assets used by the Chainlink project are being repurposed here. For example, visit the "seed" image at ipfs://QmNpAiQZjkoLCb3MRR8jFJEDpw7YWcSSGMPLzyU5rvNTNg/seed.jpg, which was originally part of the static JSON file at ipfs://QmYaTsyxTDnrG4toc8721w62rL4ZBKXQTGj9c9Rpdrntou/seed.json — we’ll be moving that static JSON file to dynamic Tableland tables!
End result
For context, we’ll end up with the following:
- Dynamic NFT collection: here
- The "seed" NFT will grow into a "bloom" — all of these mutations are handled by onchain table writes that are updated by the Chainlink network
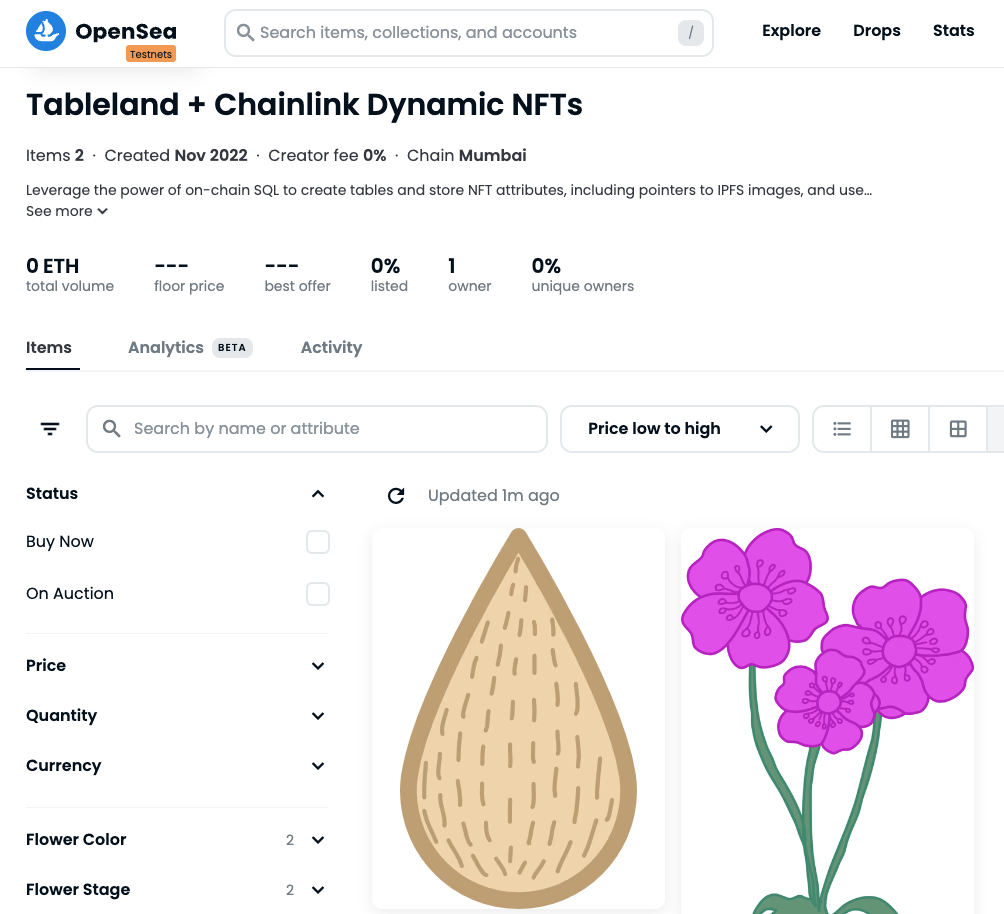
- The "seed" NFT will grow into a "bloom" — all of these mutations are handled by onchain table writes that are updated by the Chainlink network
Repo
The repo can be found on GitHub at the following link: here
Smart contract
First, set up our basic contract. It’ll import from Tableland, OpenZeppelin, and Chainlink, and the constructor allows for the _baseURIString to be set to the Tableland gateway. We’ll also go ahead and create our onERC721Received method. This allows the contract to receive / own an ERC-721 token, and since we’ll be creating tables from our contract, we’ll need the contract to own the Tableland ERC-721 tables.
We’ll use a _tokenIdCounter to track the current token, store "flowers" and "tokens" related table information, create a stage mapping (for reading current NFT state), and some additional configuration information needed for Chainlink or Tableland. Essentially, if you need onchain NFT data, it might be beneficial to track that aspect in contract storage while also virtualized in Tableland tables.
// SPDX-License-Identifier: MIT
pragma solidity >=0.8.10 <0.9.0;

import "@openzeppelin/contracts/token/ERC721/ERC721.sol";
import "@openzeppelin/contracts/token/ERC721/IERC721Receiver.sol";
import "@openzeppelin/contracts/access/Ownable.sol";
import "@openzeppelin/contracts/utils/Counters.sol";
import "@openzeppelin/contracts/utils/Strings.sol";
import "@tableland/evm/contracts/utils/SQLHelpers.sol";
import "@tableland/evm/contracts/utils/TablelandDeployments.sol";
import "@chainlink/contracts/src/v0.8/AutomationCompatible.sol";

/**
 * @dev A dynamic NFT, built with Tableland and Chainlink VRF for mutating an NFT at some time interval
 */
contract dynNFT is ERC721, IERC721Receiver, Ownable, AutomationCompatible {
    // General dNFT and Chainlink data
    using Counters for Counters.Counter;
    Counters.Counter private _tokenIdCounter; // Counter for the current token ID
    uint256 lastTimeStamp; // Most recent timestamp at which the collection was updated
    uint256 interval; // Time (in seconds) for how frequently the NFTs should change
    mapping(uint256=>uint256) public stage; // Track the token ID to its current stage
    // Tableland-specific information
    uint256 private _flowersTableId; // A table ID -- stores NFT attributes
    uint256 private _tokensTableId; // A table ID -- stores the token ID and its current stage
    string private constant _FLOWERS_TABLE_PREFIX = "flowers"; // Table prefix for the flowers table
    string private constant _TOKENS_TABLE_PREFIX = "tokens"; // Table prefix for the tokens table
    string private _baseURIString; // The Tableland gateway URL

    constructor(string memory baseURIString) ERC721("dNFTs", "dNFT") {
        interval = 30; // Hardcode some interval value (in seconds) for when the dynamic NFT should "grow" into the next stage
        lastTimeStamp = block.timestamp; // Track the most recent timestamp for when a dynamic VRF update occurred
        _baseURIString = baseURIString;
    }

		function onERC721Received(address, address, uint256, bytes calldata) override external pure returns (bytes4) {
        return IERC721Receiver.onERC721Received.selector;
    }
}
Table creation
Next, we’ll set up our tables. There will be two needed: a "tokens" and "flowers" table. Once the contract is deployed, the owner should immediately call initTables to create the table setup. Optionally, you can simply include this logic in the constructor; for readability purposes in this walkthrough, it’s been separated as its own method.
The flowers table has a schema of
id int primary key, stage text not null, color text not null, cid text not null, and it stores a set of values that represent various flower stages. Namely, the default stage for the NFT is a "seed," and as it grows (using Chainlink), it’ll mutate into a purple seeding and, lastly, into a purple bloom. Each row has a unique ID for the stage. For example, once an NFT is minted, it’ll also store the value of the NFT’s token ID with its stage ID, which defaults to 0 (seed). It’ll grow into stage 1 (purple seedling) and then 2 (purple bloom).
function initTables() public onlyOwner {
    // Create a "flowers" table to track a predefined set of NFT traits, which will be composed based on VRF-mutated `stage`
    _flowersTableId = TablelandDeployments.get().create(
        address(this),
        SQLHelpers.toCreateFromSchema(
            "id int primary key," // An ID for the trait row
            "stage text not null," // The trait for what flower growth stage (seed, purple_seedling, purple_blooms)
            "color text not null," // The value of the trait's color (unknown, purple, etc.)
            "cid text not null", // For each trait's image, store a pointer to the IPFS CID
            _FLOWERS_TABLE_PREFIX // Prefix (human readable name) for the table
        )
    );
    // Initialize values for the "flowers" table -- do this by creating an array of comma separated string values for each row
    string[] memory values = new string[](3);
    values[0] = "0,'seed','unknown','QmNpAiQZjkoLCb3MRR8jFJEDpw7YWcSSGMPLzyU5rvNTNg'"; // Notice the single quotes around text
    values[1] = "1,'purple_seedling','purple','QmRkq5EeKE5wKAuZNjaDFxtqpLQP3cFJVVWNu3sqy452uA'";
    values[2] = "2,'purple_blooms','purple','QmRkq5EeKE5wKAuZNjaDFxtqpLQP3cFJVVWNu3sqy452uA'";
    // Insert these values into the flowers table
    TablelandDeployments.get().mutate(
        address(this),
        _flowersTableId,
        SQLHelpers.toBatchInsert(
            _FLOWERS_TABLE_PREFIX,
            _flowersTableId,
            "id,stage,color,cid", // Columns to insert into, as a comma separated string of column names
            // Data to insert, where each array value is a comma-separated table row
            values
        )
    );
    // Create a "tokens" table to track the NFT token ID and its corresponding flower stage ID
    _tokensTableId = TablelandDeployments.get().create(
        address(this),
        SQLHelpers.toCreateFromSchema(
            "id int primary key," // Track the NFT token ID
            "stage_id int not null", // Dynamically track the current seed stage; maps to the "flowers" table
            _TOKENS_TABLE_PREFIX
        )
    );
}
Adding Chainlink
Great, the two tables have been created! Now, let’s also add the functionality for Chainlink to call our contract. With checkUpkeep, the Chainlink Keeper network will automatically call this function at the defined interval (set to 30 seconds in the constructor), and if the upkeep returns true, it’ll call the performUpkeep method. This is possible since the contract inherits from the AutomationCompatible contract. It is possible to use the Chainlink Automation without inheriting from this contract, but that would require some addition manual configuration efforts.
The logic within each of these is quite simple: check if the difference between the current timestamp (block.timestamp) and the one stored in the contract (latestTimestamp) is greater than the interval. If so, call the growFlower method for all tokens. Note that the logic in performUpkeep is not very efficient!
/**
 * @dev Chailink VRF function that gets called upon a defined time interval within Chainlink's Upkeep setup
 */
function checkUpkeep(
    bytes calldata /* checkData */
)
    external
    view
    returns (
        bool upkeepNeeded,
        bytes memory /* performData */
    )
{
    upkeepNeeded = (block.timestamp - lastTimeStamp) > interval;
    // We don't use the `checkData` in this example. The `checkData` is defined when the Upkeep was registered.
}

/**
 * @dev If the conditions in `checkUpkeep` are met, then `performUpkeep` gets called and mutates the NFT's value
 */
function performUpkeep(
    bytes calldata /* performData */
) external {
    // Revalidate the upkeep
    if ((block.timestamp - lastTimeStamp) > interval) {
        lastTimeStamp = block.timestamp;
        // Grow the flower for all flowers in the collection
        // Warning -- this is not an efficient since it will iterate across the entire collection; shown for demo purposes
        for(uint256 i; i < _tokenIdCounter.current(); i++) {
            growFlower(i);
        }
    }
    // We don't use the `performData` in this example. The `performData` is generated by the Keeper's call to your `checkUpkeep` function
}
Contract methods
Mint
First, we’ll write a basic mint function. Upon minting the NFT to the caller, it’ll also insert a value into the "tokens" table where the initial stage for the NFT is 0.
function mint(address to) external {
    // Get the current value for the token supply and increment it
    uint256 tokenId = _tokenIdCounter.current();
    _tokenIdCounter.increment();
    // Mint the NFT to the `to` address
    _safeMint(to, tokenId);
    // Insert the metadata into the "tokens" Tableland table with a default "seed" value
    // The seed is in the "flowers" table with a stage ID of `0` -- insert the token ID and this stage ID
    TablelandDeployments.get().mutate(
        address(this),
        _tokensTableId,
        SQLHelpers.toInsert(
            _TOKENS_TABLE_PREFIX,
            _tokensTableId,
            "id," // Token ID column
            "stage_id", // Flower stage column (i.e., it starts as a seed and then grows)
            // Data to insert -- the `tokenId` and `stage` as comma separated values
            string.concat(
                Strings.toString(tokenId),
                ",",
                Strings.toString(0) // Value of `seed` is at `stage_id` `0`
            )
        )
    );
}
Grow flower
This is where Chainlink comes into play! When the Keeper network calls performUpkeep (assuming the conditions are valid), the NFT will be mutated using growFlower by increasing its stage by 1. Recall that a token is minted and inserted into the "tokens" table. With growFlower, this token’s row is mutated to where a new stage_id is assigned within Tableland, and the stage mapping in the contact is also updated with this same value. The purpose of this mirroring allow for the contract to make onchain calls to stage with offchain metadata easily composes the current stage_id into the proper NFT.
function growFlower(uint256 _tokenId) public {
    // The maximum number of stages is set to `2`, so don't mutate an NFT if it's already hit its capacity
    if (stage[_tokenId] >= 2) {
        return;
    }
    // Get the current stage of the flower, and add 1, which moves it to the next stage
    uint256 newVal = stage[_tokenId] + 1;
    // Update the stage within the `stage` mapping
    stage[_tokenId] = newVal;
    // Update the stage within the Tableland "tokens" table, where the `stage_id` will change the `tokenURI` metadata response
    TablelandDeployments.get().mutate(
        address(this),
        _tokensTableId,
        SQLHelpers.toUpdate(
            _TOKENS_TABLE_PREFIX,
            _tokensTableId,
            string.concat("stage_id=", Strings.toString(newVal)), // Column to update
            // token to update
            string.concat(
                "id=",
                Strings.toString(_tokenId)
            )
        )
    );
}
Token URIs
For retrieving and allowing the contract’s owner to set the base URI, the following helper methods are used:
function _baseURI() internal view override returns (string memory) {
    return _baseURIString;
}

function setBaseURI(string memory baseURIString) external onlyOwner {
    _baseURIString = baseURIString;
}
Now, the real magic comes with the tokenURI method. It’s a SQL query to JOIN two tables and compose the metadata across a "tokens" and "flowers" table in ERC-721 compliant schema. Essentially, the metadata is built for each NFT using the tables. As values get updated via growFlower, the associated metadata query will automatically read those values from the table; this tokenURI query is future-proof upon table mutations.
The query forms a json_object with two nested json_object values in a json_array. The top-level metadata fields include the name, image, and attributes, where the attributes hold the composed data from the "tokens" and "flowers" tables. For the image, there were images previously uploaded to IPFS and stored in the format <IPFS_CID>/<stage>.jpg. This string is recreated using SQL concatenation with ||.
Here’s the full SQL statement, and the <tokens_table> and <flowers_table> are values that should be replaced with the actual table names (prefix_tableId_chainId) within the contract:
select
json_object(
  'name', 'Friendship Seed #' || <tokens_table>.id,
  'image', 'ipfs://' || cid || '/' || stage || '.jpg',
  'attributes', json_array(
      json_object(
          'display_type','string',
          'trait_type','Flower Stage',
          'value',stage
      ),
      json_object(
            'display_type','string',
           'trait_type','Flower Color',
           'value',color
       )
   )
)
from
<tokens_table>
join <flowers_table> on <tokens_table>.stage_id = <flowers_table>.id
where <tokens_table>.id = <tokenId>
URI encoding is required to make this accessible by marketplaces. We’ve performed the encoding (see the URI encoding docs) and added it to the contract as the query variable:
function tokenURI(uint256 tokenId)
    public
    view
    virtual
    override
    returns (string memory)
{
    // Ensure the token exists
    require(
        _exists(tokenId),
        "ERC721Metadata: URI query for nonexistent token"
    );
    // Set the `baseURI`
    string memory baseURI = _baseURI();
    if (bytes(baseURI).length == 0) {
        return "";
    }

    // Create references to the Tableland table names (`prefix_tableId_chainId`) for the "tokens" and "flowers" tables
    string memory tokensTable = SQLHelpers.toNameFromId(_TOKENS_TABLE_PREFIX, _tokensTableId);
    string memory flowersTable = SQLHelpers.toNameFromId(_FLOWERS_TABLE_PREFIX, _flowersTableId);
    // Create the read query noted above, which forms the ERC-721 compliant metadata
    string memory query = string.concat(
        "select%20json_object%28%27name%27%2C%27Friendship%20Seed%20%23%27%7C%7C",
        tokensTable,
        "%2Eid%2C%27image%27%2C%27ipfs%3A%2F%2F%27%7C%7Ccid%7C%7C%27%2F%27%7C%7Cstage%7C%7C%27.jpg%27%2C%27attributes%27%2Cjson_array%28json_object%28%27display_type%27%2C%27string%27%2C%27trait_type%27%2C%27Flower%20Stage%27%2C%27value%27%2Cstage%29%2Cjson_object%28%27display_type%27%2C%27string%27%2C%27trait_type%27%2C%27Flower%20Color%27%2C%27value%27%2Ccolor%29%29%29%20from%20",
        tokensTable,
        "%20join%20",
        flowersTable,
        "%20on%20",
        tokensTable,
        "%2Estage_id%20%3D%20",
        flowersTable,
        "%2Eid%20where%20",
        tokensTable,
        "%2Eid%3D"
    );
    // Return the `baseURI` with the appended query string, which composes the token ID with its metadata attributes
    return
        string(
            abi.encodePacked(
                baseURI,
                query,
                Strings.toString(tokenId),
                "%20group%20by%20",
                tokensTable,
                "%2Eid"
            )
        );
}
Lastly, we’ll include a totalSupply method that simply returns the current token count:
function totalSupply() external view returns(uint256) {
    return _tokenIdCounter.current();
}
Deployment
Awesome — our contract is ready! Within your project, update the deploy script (scripts/deploy.js) and deploy your contract. There are some environment variables set up in the hardhat.config.js file which allow hardhat to import a custom tablelandHost object; this simply points to the Tableland gateway, depending on the environment (local or testnet, in this example).
const { ethers, network, tablelandHost } = require("hardhat");

async function main() {
  const [account] = await ethers.getSigners();
  // We get the contract to deploy
  const DynNFT = await hre.ethers.getContractFactory("dynNFT");
  // Tableland gateway -- we'll only need `localhost` or `testnet` gateways, but a `mainnet` option is in the config
  let baseURIString =
    network.name === "localhost"
      ? tablelandHost.localhost // `http://localhost:8080/query?extract=true&unwrap=true&statement=`
      : tablelandHost.testnet; // `https://testnets.tableland.network/query?extract=true&unwrap=true&statement=`
  // Note the base URI has `extract=true`, `unwrap=true`, and `statement` (for the SQL)
  // These are needed for creating ERC-721 compliant metadata

  // Deploy the NFT with the base URI defined
  const dynNFT = await DynNFT.deploy(baseURIString);
  await dynNFT.waitForDeployment();
  // Log the address and save this for verification purposes
  console.log("dynNFT deployed to:", dynNFT.address);

  // Initialize the Tableland tables
  let tx = await dynNFT.initTables();
  let receipt = await tx.wait();

  // For demonstration purposes, mint an NFT and log its token URI
  tx = await dynNFT.mint(account.address);
  receipt = await tx.wait();
  let [event] = receipt.events ?? [];
  let tokenId = event.args?.tokenId;
  let tokenUri = await dynNFT.tokenURI(tokenId);
  console.log(tokenUri);
}

main()
  .then(() => process.exit(0))
  .catch((error) => {
    console.error(error);
    process.exit(1);
  });
Run the hardhat deploy script, and save the contract address (in hardhat.config.js under config.contractAddress) for verification and Chainlink purposes! Here, we’re deploying to Polygon, but you can also choose to use local-tableland by running npx local-tableland and setting the network to localhost. For setup information, see the Local Tableland documentation.
npx hardhat run scripts/deploy.js --network polygon-amoy
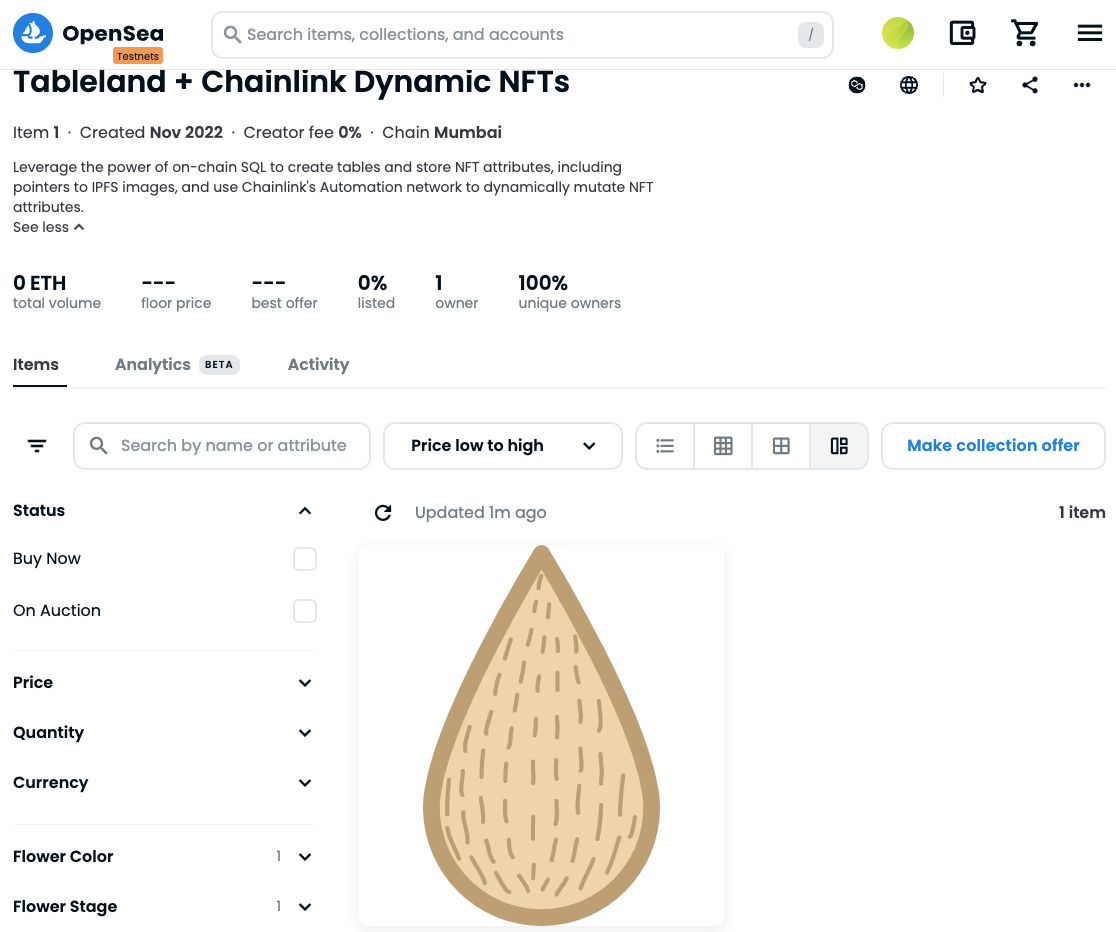
You should now be able to see the NFT minted and viewable on marketplaces — here’s an example of the tutorial minted on Polygon + OpenSea (see here). If your collection is not showing, please be sure to verify the collection:
npx hardhat run scripts/verify.js --network polygon-amoy
Chainlink Automation
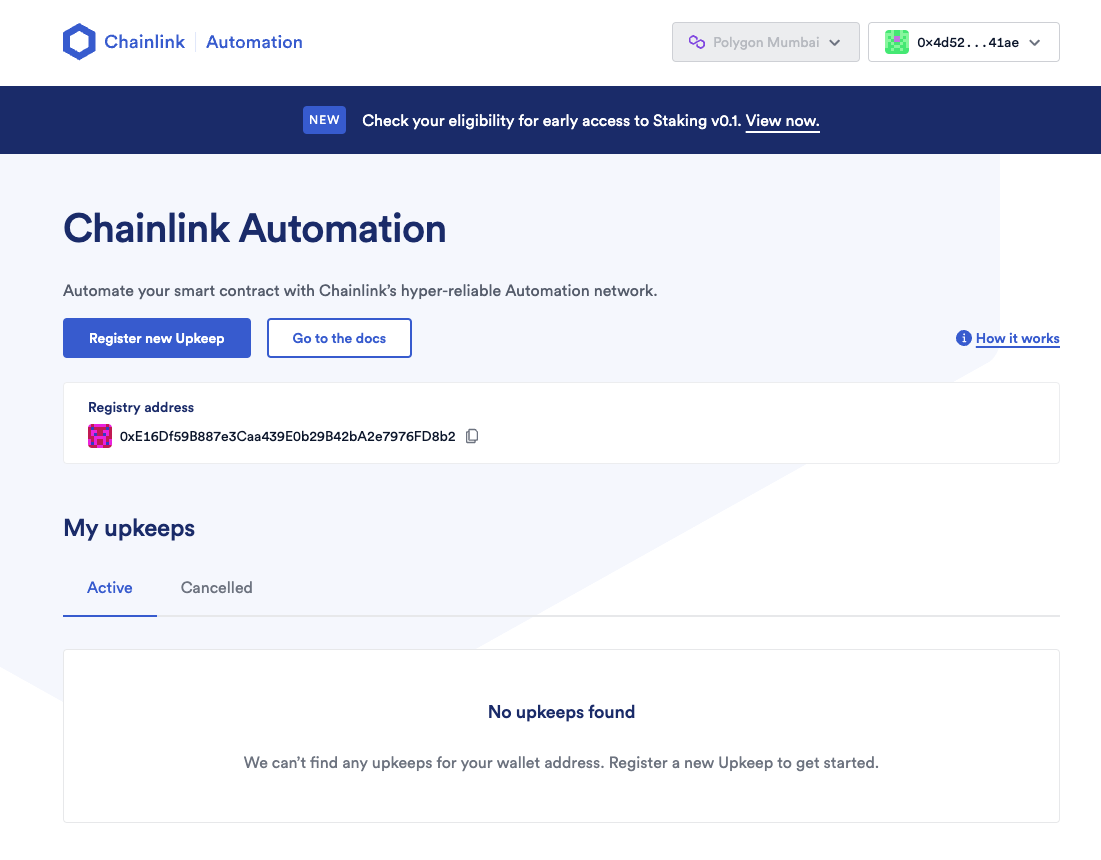
Once you deploy the contract, you’ll need to set up automation so that the Chainlink Keeper network performs upkeep and grows your flower. Here’s what’s required:
-
Navigate to Chainlink Automation: https://automation.chain.link/, click "Register New Upkeep," and select "Custom Logic"
-
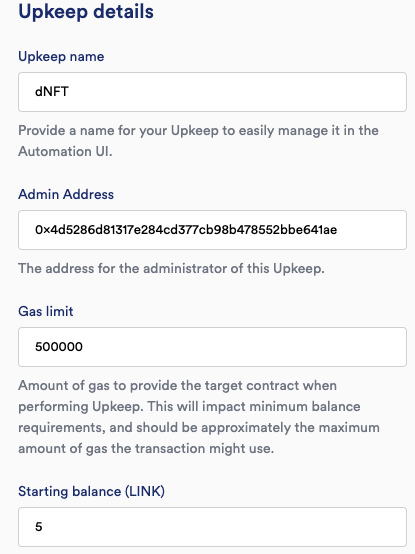
Enter your contract’s address and click "Next"
-
Update the "Upkeep name" and deposit Chainlink (e.g., 5 LINK) by inputting a value under "Starting balance (LINK)"
-
Once ready, click "Register Upkeep"
By depositing LINK, the Keeper network will be incentivized to make smart contract calls. Just make sure you have enough LINK to continue to pay for the network actions!
Dynamic NFT updates
Now that Chainlink Automation is set up, the Keeper network will performUpkeep every 30 seconds, which is the values configured in our original contract. When the NFT is intially minted, it will have metadata for the "seed".
{
  "name": "Friendship Seed #0",
  "image": "ipfs://QmNpAiQZjkoLCb3MRR8jFJEDpw7YWcSSGMPLzyU5rvNTNg/seed.jpg",
  "attributes": [
    {
      "display_type": "string",
      "trait_type": "Flower Stage",
      "value": "seed"
    },
    {
      "display_type": "string",
      "trait_type": "Flower Color",
      "value": "unknown"
    }
  ]
}
Once the NFT updates, the metadata values will change.
{
  "name": "Friendship Seed #0",
  "image": "ipfs://QmRkq5EeKE5wKAuZNjaDFxtqpLQP3cFJVVWNu3sqy452uA/purple_blooms.jpg",
  "attributes": [
    {
      "display_type": "string",
      "trait_type": "Flower Stage",
      "value": "purple_blooms"
    },
    {
      "display_type": "string",
      "trait_type": "Flower Color",
      "value": "purple"
    }
  ]
}
You’ll notice how the Flower Stage and Flower Color both changed!
This was a very simple example of using Tableland + Chainlink Automation to dynamically change an NFT. The assets were stored on IPFS where the pointers to these NFT images were stored in tables, and the metadata mutations were made possible by the Keeper network.