Parse JSON into tables for NFTs
Take local JSON files, parse them into tables, and deploy the data as an NFT collection on Polygon.
Tableland is a web3-native database that can be used to store data in relational tables. One of the most exciting use cases is using Tableland for NFT metadata—which is a challenging problem in web3, especially for novel dynamic NFT use cases. Developers must make tradeoffs between:
- Expensive onchain storage with very limited query-ability
- Centralized storage, which doesn’t enable web3 paradigms
- Decentralized storage (e.g., IPFS), which is great for file/image storage, but immutable files (CIDs) pose a challenge for novel NFT metadata use cases
New to NFTs? Check out the page on how to build an NFT, including additional resources for defining an optimal SQL table structure or building a dynamic NFT in Solidity.
Overview
Tableland solves the web3 metadata problem with ERC721-based tables that are powered by smart contracts. Create, insert, and update tables, all using smart contracts and/or libraries built on top of the Tableland protocol. Although not covered in this walkthrough, the metadata can also be dynamic and change based on user interactions or onchain events. The Tableland contracts are currently deployed on Polygon mainnet & Amoy testnet, as well as a number of other chains—this tutorial will use Polygon’s Amoy testnet.
All in all, this tutorial will walk through:
- Reading NFT images locally and uploading them to IPFS using NFT.Storage
- Writing the CID to metadata JSON files & objects
imagevalues - Transforming the NFT metadata to prepare it for a relational data (SQL statements)
- Creating tables & inserting metadata into Tableland tables—into two tables
You can use one or more tables for metadata and compose them through a read query (SELECT & JOIN statements) the NFT’s tokenURI (e.g., a "main" and "attributes" tables).
If you’d like to follow along in a video walkthrough, check out the following workshop:
Using Polygon
This tutorial will walk through deploying an NFT to Polygon’s testnet. What is Polygon? Polygon is a popular L2 scaling solution called a sidechain. It has low transaction costs and high transaction speed & throughput, so many developers choose Polygon when designing cost effective applications that require a high transaction throughput or speed.
For comparison, Polygon supports 7k tx/s compared to Ethereum’s 15 tx/s and ~10000x lower costs per transaction than Ethereum. It’s important to note that sidechains do use different security assumptions than the L1; it’s what allows Polygon to architect its network in a way that enables all of these benefits for developers. Nevertheless, it’s a great scaling solution.
Prerequisites
Before getting started, be sure to do the following:
- A basic understanding of Ethereum/Polygon, smart contracts, Solidity, and JavaScript.
- Have a private key from your wallet handy, such as exporting it via MetaMask—and have saved this locally in a
.envfile (more on this below). - Have testnet MATIC in your wallet—get some from the Polygon Amoy faucet.
- Signed up for an NFT.Storage account and make a note of the API key (also placed in
.env).- Since Tableland is not a file storage solution, using IPFS (or persisted file solutions like Filecoin) is still a best practice—NFT.Storage is a great file "pinning" solution.
- Signed up for an Alchemy account for interacting with the Polygon Amoy testnet.
- (Optional) Signed up for a Polygonscan account and created an API key (in
.env)
NEVER share your .env file publicly—ensure that it is specified in a .gitignore file.
Example Output & Repo
See the following for the final product, which includes an NFT collection on Polygon:
- Repo: here
- Listing on OpenSea (Polygon Amoy testnet): here
- NFT metadata on Tableland: here
- Contract address:
0xDAa7F50C50018D7332da819be275693cA9604178, verified & viewable on Polygonscan - Main table creation transaction: 0x2016f295221c235f62d89b44f8d6a51096a58c0a2722e93f2c2133e5471d0737
- Attributes table creation transaction: 0x9f8e874bec740dc1299fe0357a9b093f1938272311948437072de8a2b91c5f04
Project flow & structure
The purpose of each file is described below. Basically, the entry point is deployTwoTables, which is ran with npx hardat run scripts/deployTwoTables.js --network "polygon-amoy". This will use the helper prepareSql to create SQL INSERT statements, which uses metadataProcessing to read files from the images and metadata directories. Lastly, the TwoTablesNFT contract is an ERC721 NFT contract, which leverages the Tableland gateway at the NFT’s tokenURI. A relational data model is used to easily compose data at the tokenURI across a main and attributes table deployed in the deployTwoTables with all of the corresponding metadata.
├── contracts
│   └── TwoTablesNFT.sol
├── hardhat.config.js
├── images
│   ├── 0.jpeg
│   └── 1.jpeg
├── metadata
│   ├── 0
│   └── 1
├── package-lock.json
├── package.json
├── scripts
│   ├── deployTwoTables.js
│   ├── metadataProcessing.js
│   ├── prepareSql.js
│   ├── utils.js
│   └── verifyTwoTables.js
└── test
│   └── test.js
└── .env
The following identifies what the final structure should look like; it may be helpful to reproduce this scaffolding ahead of time and also clone the repo to get the images and metadata files:
images⇒ A couple of sample images, but any images/amount can be included—these will be uploaded to IPFS. Note that these will be related to the NFT'stokenId.metadata⇒ The corresponding metadata files for each image, which lack the "image" field value (empty string by default). The metadata files will have their "image" values overwritten by the image'sCIDupon IPFS upload. These JSON files must have a 1:1 relationship to images, with matching names (e.g.,0.jpegfor the image, and0for the JSON, omitting the extension).contracts⇒ The NFT smart contract (TwoTablesNFT), which will mint tokens & allow for thebaseURIto be set that points to the Tableland network.TwoTablesNFTis the "recommended" way to do things where two Tableland tables (main and attributes) are used and composed with SQL.hardhat.config.js⇒ Some useful deployment configs, including gateways to the proper Alchemy node provider on Polygon Amoy testnets -- and also loading the private key from.envfor live testnet deployment.scripts:metadataProcessing.js⇒ Look for images inimages, upload images to IPFS, parse themetadatafiles, write these CIDs to the corresponding JSON/object, and also, return the built object for metadata preparation.prepareSql.js⇒ Take the output fromuploadMetadataToIpfs.jsand build SQL statements.deployTwoTables.js⇒ Deploy theTwoTablesNFTcontracts, using the output fromprepareSql.js—and set thebaseURI&tokenURIto the Tableland gateway (testnets.tableland.network).verifyTwoTables.js⇒ Although optional, an additional script that can be used to verify a contract on Polygonscan.
test⇒ Includes some simplechaitests withethersas well, including testing out thetokenURIis correct..env⇒ Private variables to store locally, so do not expose these publicly; examples are provided in.env.example
Working with metadata files
Many coming from the world of NFTs & metadata are familiar with the ERC721 metadata format, recommended by OpenSea. Traditionally, NFTs will deploy this as a JSON file on IPFS. As such, we’ll assume a metadata JSON file has been created using this format—and the files have been provided in the repo itself:
{
  "name": "TableNFT Rigs #0",
  "description": "A Tableland NFT demo -- deploying metadata on Tableland",
  "image": "",
  "attributes": [
    {
      "trait_type": "Fleet",
      "value": "Foils"
    },
    {
      "trait_type": "Role",
      "value": "Admin"
    }
  ]
}
Notice the highly structured nature of this file. There are top-level keys (name, description, image, and attributes) and objects contained in the attributes array itself. This is a key point to understand. We will be creating two tables—one that contains all of the top-level fields, and one that is dedicated to the attributes. In other words, a main table will contain column headers of name, description, and image, and a separate table named attributes will contain column headers of trait_type and value.
Also, notice how the image field is an empty string—the assumption is that you have the images (provided in the repo), but you have not taken these images and added them to your metadata itself. Namely, we’ll need to upload images to IPFS and then use these CIDs to write to the metadata itself.
Here are the example images—we’ll be using a couple of the Tableland Rigs assets:
Initial Setup
Before getting started, let’s spin up a hardhat project. First, create a directory and then run the npx hardhat command within the directory itself (choose "Create a basic sample project").
mkdir table-nft-tutorial && cd table-nft-tutorial && npx hardhat
Then, install the following dependencies:
- npm
- Yarn
- pnpm
npm install @tableland/sdk node-fetch @openzeppelin/contracts dotenv nft.storage mime files-from-path
yarn add @tableland/sdk node-fetch @openzeppelin/contracts dotenv nft.storage mime files-from-path
pnpm add @tableland/sdk node-fetch @openzeppelin/contracts dotenv nft.storage mime files-from-path
@tableland/sdk⇒ The Tableland JavaScript SDK.node-fetch⇒ Tableland uses a modernfetchAPI—when working in Node, it is necessary to use a version of Node that supports fetch, or provide global access tonode-fetchto use the SDK.@openzeppelin/contracts⇒ OpenZeppelin library for widely implemented smart contracts.dotenv⇒ Protect our keys and load them in files.nft.storage⇒ IPFS pinning services for NFT images.mime&files-from-path⇒ Used when parsing files & while usingnft.storage, as outlined in their docs.
Also, install some prettier development dependencies and @nomicfoundation/hardhat-verify for contract verification:
npm i -D @nomicfoundation/hardhat-verify prettier prettier-plugin-solidity
Note that the .env file should resemble the following and be placed in the project’s root:
### Gateway to IPFS
NFT_STORAGE_API_KEY=your_api_key

### Gateway to the Polygon testnet
ALCHEMY_POLYGON_AMOY_API_KEY=your_polygon_amoy_api_key

### API key for (optional) contract verification
POLYGONSCAN_API_KEY=your_polygonscan_api_key

### Wallet/account private key
PRIVATE_KEY=your_private_key
Metadata file & image processing
The first step we’ll walk through is dealing with local metadata files and images. If you haven’t already, clone the repo so that you can get the metadata JSON files and the assets themselves. Technically, any image or set of metadata values will work, assuming it follows the same format.
Namely, the image filenames in the images directory align with the filenames in metadata—these will actually end up being our NFT’s tokenId:
- Image
0.jpeg⇒ metadata file0(note—ensure there is no extension needed on the metadata file itself, which is a common practice with metadata + IPFS, in general) - Image
1.jpeg⇒ metadata file1 - etc.
Let’s first get the project set up. Create a file named metadataProcessing.js in scripts and insert the following code:
const { NFTStorage, File } = require("nft.storage");
const { getFilesFromPath } = require("files-from-path");
const mime = require("mime");
const fs = require("fs");
const path = require("path");
const dotenv = require("dotenv");
dotenv.config();

// The NFT.Storage API token, passed to `NFTStorage` function as a `token`
const nftStorageApiKey = process.env.NFT_STORAGE_API_KEY;
These imports include NFT.Storage (for uploading/pinning the images to IPFS), various related file system libraries / helpers (for reading/writing files), and dotenv for loading any account private keys or API keys from the .env file. Additionally, the nftStorageApiKey will be used during the IPFS uploading process, which reads from this .env file.
We’ll want to create a few helpers for reading the metadata directory’s files as well as the images in images. With fileFromPath, it allows you to pass a file’s path and reads the data itself, using the mime library to help guess the filetype, then, returning the as filesystem File.
There are number of steps involved to get the data ready using prepareMetadata. These helpers will make a little more sense once that function is written, but let’s walk through them anyways.
fileFromPath & uploadImageToIpfs
This helper will then be used by uploadImageToIpfs, which, well, uploads an image to IPFS. Note that it take both an id (name of the image file that matches the metadata file, e.g., 0) and imagesDirPath (the path to the images directory)—it returns the IPFS CID of the uploaded image.
/**
 * Helper to retrieve a single file from some path.
 * @param {string} filePath The path of a file to retrieve.
 * @returns {File} A fs File at the specified file path.
 */
async function fileFromPath(filePath) {
  const content = await fs.promises.readFile(filePath);
  const type = mime.getType(filePath);
  return new File([content], path.basename(filePath), { type });
}

/**
 * Upload the image to IPFS and return its CID.
 * @param {number} id The id of the NFT, matching with the `images` and `metadata` directories.
 * @param {string} imagesDirPath The `path` to the directory of images.
 * @returns {string} Resulting CID from pushing the image to IPFS.
 */
async function uploadImageToIpfs(id, imagesDirPath) {
  // Find & load the file from disk
  const imagePath = path.join(imagesDirPath, `${id}.jpeg`);
  const image = await fileFromPath(imagePath);
  // Upload to IPFS using NFT Storage
  const storage = new NFTStorage({ token: nftStorageApiKey });
  const imageCid = await storage.storeBlob(image);
  // Return the image's CID
  return imageCid;
}
parseMetadataFile
From there, it’s time to parse the metadata JSON files. Start by passing the id (i.e., this will be 0 or 1 from the example directories) as well as the corresponding file paths to the metadata and images directories. The parseMetadataFile method will do a few things:
- Call
uploadImageToIpfsand get the corresponding image’s CID. - Search the
metadataDirPathfor a matching image inimages—hence, why the naming convention is important for having a 1:1 relationship withmetadata:images. - Parse the metadata file and save it to an object named
metadataJson. - Use the image’s CID to overwrite the empty
imagefield in the metadata to the NFT.Storage link (i.e., ashttps://${imageCid}.ipfs.nftstorage.link/) - Additionally, write the
imagefiled in the actual metadata JSON file—not just themetadataJsonobject- Note: this step isn’t required for Tableland usage, but it’s potentially helpful for tutorial / demonstration to help see what the final metadata looks like.
- Lastly, return the
metadataJsonobject, which consists of the fields parsed from the file inmetadataas well as the overwrittenimagevalue, which is now the image’s CID at the NFT.Storage gateway.
/**
 * Update the existing metadata file, changing the 'image' to the `{imageCid}` interpolated in the NFT.Storage gateway URL.
 * @param {number} id The id of the NFT, matching with the `images` and `metadata` directories.
 * @param {string} metadataDirPath The `path` to the metadata directory of JSON files.
 * @param {string} imagesDirPath The `path` to the images directory of JSON files.
 * @returns {Object} Object of parsed metadata JSON file with CID written to 'image' field.
 */
async function parseMetadataFile(id, metadataDirPath, imagesDirPath) {
  // Retrieve CID from uploaded image file
  const imageCid = await uploadImageToIpfs(id, imagesDirPath);
  // Find the corresponding metadata file (matching `id`)
  const metadataFilePath = path.join(metadataDirPath, `${id}`);
  let metadataFile;
  try {
    metadataFile = await fs.promises.readFile(metadataFilePath);
  } catch (error) {
    console.error(`Error reading file in metadata directory: ${id}`);
  }
  // Parse metatadata buffer (from 'readFile') to an object
  const metadataJson = JSON.parse(metadataFile.toString());
  // Overwrite the empty 'image' with the IPFS CID at the NFT.Storage gateway
  metadataJson.image = `https://${imageCid}.ipfs.nftstorage.link/`;
  // Write the file to the metadata directory. This is not essential for Tableland
  // purposes, but it's handy to see what the output looks like for those coming
  // from background where metadata files are deployed on IPFS, not just images.
  const metadataFileBuffer = Buffer.from(JSON.stringify(metadataJson));
  try {
    await fs.promises.writeFile(metadataFilePath, metadataFileBuffer);
  } catch (error) {
    console.error(`Error writing file in metadata directory: ${id}`);
  }

  // Return metadata as an object
  return metadataJson;
}
prepareMetadata
Lastly, we’re going to prepare the metadata by using the methods above. The metadataDirPath and imagesDirPath are hardcoded here, and all of the files from these paths are processed accordingly. The main callout is that an id field is added to the object, which will later be used while processing the SQL statements. The id itself is parsed using from the metadata file’s name:
let id = file.name.replace(/^\//, "");
// Retrieve the metadata files as an object, parsed from the metadata files
let metadataObj = await parseMetadataFile(id, metadataDirPath, imagesDirPath);
// Add a new field called `id`, which will be used during INSERTs as a unique row `id`
metadataObj.id = Number(id);
Basically, the for...of loop will iterate through all files in the directory defined as metadataFiles. It takes each metadata file, gets its name (using replace(/^\//, "")), creates a metadata object (with the IPFS CID), and inserts the new id field. Lastly, every metadata objet is stored in a finalMetadata array, which is returned by the function.
/**
 * Prepare metadata as an array of metadata objects.
 * @returns {Array<Object>} Metadata files parsed to objects, including the overwritten `image` with a CID.
 */
async function prepareMetadata() {
  // An array that contains all metadata objects
  const finalMetadata = [];
  // Set the `metadata` & `images` directory path, holding the metadata files & images
  const metadataDirPath = path.join(__dirname, "..", "metadata");
  const imagesDirPath = path.join(__dirname, "..", "images");
  // Retrieve the updated files -- pass the metadata directory and strip off the `metadata` prefix, leaving only the file name
  const metadataFiles = await getFilesFromPath(metadataDirPath, {
    pathPrefix: path.resolve(metadataDirPath),
  });
  for await (const file of metadataFiles) {
    // Strip the leading `/` from the file's `name`, which is
    let id = file.name.replace(/^\//, "");
    try {
      // Retrieve the metadata files as an object, parsed from the metadata files
      let metadataObj = await parseMetadataFile(
        id,
        metadataDirPath,
        imagesDirPath
      );
      // Add a new field called `id`, which will be used during INSERTs as a unique row `id`
      metadataObj.id = Number(id);
      finalMetadata.push(await metadataObj);
    } catch (error) {
      console.error(`Error parsing metadata file: ${id}`);
    }
  }

  // Return metadata files
  return finalMetadata;
}

module.exports = prepareMetadata;
The finalMetadata object will then be used when preparing SQL statements. Hence, the only export from this file is the prepareMetadata since it leverages all of the preceding helpers.
SQL time
Great, now we’re ready for some SQL; no more working with files or directories! Recall we’ve done the following:
- Read files from
imagesandmetadatadirectories - Uploaded
imagesto IPFS - Created objects from the files in the
metadatadirectory - Pushed the objects into an array called
finalMetadata
Let’s create a new file called prepareSql.js. We’ll start out by importing dotenv (for reading .env) and the prepareMetadata function:
const prepareMetadata = require("./metadataProcessing");
const dotenv = require("dotenv");
dotenv.config();
Traditionally, metadata is often pushed to something like IPFS or stored in some centralized database as a JSON file. Tableland believes that structured data is a better solution, considering the ERC721 metadata spec itself is structured. This data is meant for tables, so let’s create two of them—one for "main" metadata fields (all of the top-level fields, except attributes), and one for the objects contained in the attributes field. Using SQL and JOINs, these two tables can be combined into a single object that is ERC721 metadata compliant.
prepareSqlForTwoTables
Next, we’ll put together a function to prepare the metadata for Tableland by creating SQL INSERT statements. When this function is called, it will be passed two parameters: a mainTable and an attributesTable. Later in our deployTwoTables.js script, we’ll actually create the tables that will use these statements. For reference, this is what our schema will look like—the main table has all of our NFT tokens, and attributes is linked to this table using main_id:
/* main */
id int primary key, name text, description text, image text
/* attributes */
main_id int not null, trait_type text not null, value text
Let’s walk through the flow:
-
The function calls
prepareMetadata, which returns an array of metadata objects (including the image’s CID) and saves this as the variablemetadata. -
An array
sqlInsertStatementsis initialized to hold all of the SQL INSERT statements produced. -
The main metadata values are destructured from each value in the array returned from
prepareMetadataand then used to create SQL statements:scripts/prepareSql.jsconst { id, name, description, image, attributes } = obj;
// INSERT statement for a 'main' table that includes some shared data across any NFT
// Schema: id int, name text, description text, image text
let mainTableStatement = `INSERT INTO ${mainTable} (id, name, description, image) VALUES (${id}, '${name}', '${description}', '${image}');`;
// Iterate through the attributes and create an INSERT statement for each value, pushed to `attributesTableStatements`- Notice the usage of single quotes (
') around the strings but not the number.
- Notice the usage of single quotes (
-
The attributes metadata values follow similar logic, but since there will be more than one attribute per token, it is necessary to hold these in an array called
attributesTableStatements:scripts/prepareSql.jsconst attributesTableStatements = [];
for await (let attribute of attributes) {
// Get the attirbutes trait_type & value;
const { trait_type, value } = attribute;
// INSERT statement for a separate 'attributes' table that holds attribute data, keyed by the NFT tokenId
// Schema: id int, trait_type text, value text
const attributesStatement = `INSERT INTO ${attributesTable} (main_id, trait_type, value) VALUES (${id},'${trait_type}', '${value}');`;
attributesTableStatements.push(attributesStatement);
} -
Lastly, the statement are built into a
statementobject—that is, eachstatementwill have both the main table’s statement and the attributes table statement. These are captured in an array calledsqlInsertStatements, which is what is finally returned—an array of objects where each object has all of the necessary SQL INSERT statements.
Putting it all together:
// prepareSql.js
/**
* Prepare metadata for Tableland as SQL insert statements but in two tables ('main' and 'attributes').
* @param {string} mainTable The name of the main metadata table in Tableland (id int, name text, description text, image text).
* @param {string} attributesTable The name of the attributes table in Tableland (id int, trait_type text, value text).
* @returns {{main: string, attributes: string[]}} SQL statements for metadata table writes.
*/
async function prepareSqlForTwoTables(mainTable, attributesTable) {
// Prepare the metadata (handles all of the IPFS-related actions & JSON parsing).
const metadata = await prepareMetadata();
// An array to hold interpolated SQL INSERT statements, using the metadata object's values.
const sqlInsertStatements = [];
for await (let obj of metadata) {
// Destructure the metadata values from the passed object
const { id, name, description, image, attributes } = obj;
// INSERT statement for a 'main' table that includes some shared data across any NFT
// Schema: id int, name text, description text, image text
let mainTableStatement = `INSERT INTO ${mainTable} (id, name, description, image) VALUES (${id}, '${name}', '${description}', '${image}');`;
// Iterate through the attributes and create an INSERT statement for each value, pushed to `attributesTableStatements`
const attributesTableStatements = [];
for await (let attribute of attributes) {
// Get the attributes trait_type & value;
const { trait_type, value } = attribute;
// INSERT statement for a separate 'attributes' table that holds attribute data, keyed by the NFT tokenId
// Schema: id int, trait_type text, value text
const attributesStatement = `INSERT INTO ${attributesTable} (main_id, trait_type, value) VALUES (${id},'${trait_type}', '${value}');`;
attributesTableStatements.push(attributesStatement);
}
// Prepare the statements as a single 'statement' object
const statement = {
main: mainTableStatement,
attributes: attributesTableStatements,
};
// Note the need above to stringify the attributes
sqlInsertStatements.push(statement);
}
// Return the final prepared array of SQL INSERT statements
return sqlInsertStatements;
}
module.exports = { prepareSqlForTwoTables };
SQL JOINs
When constructing the ERC721 compliant metadata, we’ll actually be using SQL to JOIN two tables. This will actually happen within the smart contract, but let’s see what the query will be:
SELECT json_object(
    'id', id,
    'name', name,
    'description', description,
		'image', image,
    'attributes', json_group_array(
      json_object(
        'trait_type',trait_type,
        'value', value
      )
    )
  )
FROM {mainTable} JOIN {attributesTable}
    ON {mainTable}.id = {attributesTable}.main_id
WHERE id = <main_id>
GROUP BY id
The <main_id> will be the tokenId of the minted NFT, which will be constructed in the tokenURI at the smart contract. There are a lot of cool SQL features, such as json_group_array and json_object, which help construct the proper JSON output. If we review the query, it is basically saying that from the main and attributes table, join them on the matching id and main_id, create a JSON object (main table data) with an attributes field. This field is created with a JSON array with JSON objects (the attributes).
TwoTablesNFT smart contract
Now, before we can wrap things up and deploy these tables, we’ll need to create our NFT contract. This is a rather basic implementation; it simply imports some OpenZeppelin contracts and helpers. Note that some of the implementations are not best practices but used for demonstration purposes (e.g., certain public state variables that should be internal).
Start by creating a TwoTablesNFT.sol file in the contracts directory and add some state variables:
// SPDX-License-Identifier: MIT
pragma solidity ^0.8.4;

import "@openzeppelin/contracts/token/ERC721/ERC721.sol";
import "@openzeppelin/contracts/utils/Strings.sol";

contract TwoTablesNFT is ERC721 {
  /// A URI used to reference offchain metadata.
  // This will use the Tableland gateway: https://testnets.tableland.network/query?unwrap=true&extract=true&statement=
  // See the `query?unwrap=true&extract=true&statement=` appended -- a SQL query `statement` and mode to format to ERC721 standard
  string public baseURIString;
  /// The name of the main metadata table in Tableland
  // Schema: id int primary key, name text, description text, image text
  string public mainTable;
  /// The name of the attributes table in Tableland
  // Schema: main_id int not null, trait_type text not null, value text
  string public attributesTable;
  /// A token counter, to track NFT tokenIds
  uint256 private _tokenIdCounter;
  /// A max number of tokens
  uint256 private _maxTokens;

  /**
    *  @dev Must override the default implementation, which returns an empty string.
    */
  function _baseURI() internal view override returns (string memory) {
    return baseURIString;
  }

  /**
    *  @dev Returns the total number of tokens in existence.
    */
  function totalSupply() public view returns (uint256) {
    return _maxTokens;
  }
}
Let’s review the state variables:
baseURIString⇒ The base URI for our NFTs; this will be the Tableland gateway. Note that it is in the formathttps://testnets.tableland.network/query?unwrap=true&extract=true&statement=where appendedquery?allows for SQL read queries (SELECT * …) and theunwrap=true&extract=trueformats the response as ERC721 compliant metadata.mainTable⇒ This will be the name of the main table that holds all NFT top-level metadata, except for the attributes, which will be joined in thetokenURImethod.attributesTable⇒ For all attributes that are typically an array of objects that havetrait_typeandvaluekeys._tokenIdCounter&_maxTokens⇒ A counter for NFT tokenIds and the corresponding max that can be minted.
Most of these will be set in the constructor. The totalSupply method is used by block explorers and marketplaces, and the _baseURI function simply returns the baseURIString, which is used when constructing the NFT’s metadata. Now, the interesting part!
tokenURI
Every NFT has a tokenURI that points to the NFT�’s metadata. This response must conform to the ERC721 format (see OpenSea for more details). When we deploy our main and attributes tables, we’ll actually be using SQL in the smart contract to compose these two tables. Note that in this tutorial, both tables are being deployed to Polygon. It is possible to have cross-chain JOINs for true multi-chain composability!
Recall that from the SQL section above, we’re using SQL functions like json_group_array and json_object to compose the data with a SELECT + JOIN statement. The first half of the function is some standard requirements / boilerplate; the latter half is where things get interesting.
Check out the query variable—it is creating the SQL statement mentioned above and composing our NFT’s metadata! This is what allows NFT marketplaces to render the NFT metadata, such as the traits and images. It may be helpful to programmatically (using JavaScript native encodeURIComponenet method) or manually URL encode the SQL statement itself (use an online encoding tool), creating an output like SELECT%20json_object%28%27id…).
function tokenURI(uint256 tokenId)
  public
  view
  virtual
  override
  returns (string memory)
{
  require(
    _exists(tokenId),
    "ERC721Metadata: URI query for nonexistent token"
  );
  string memory baseURI = _baseURI();

  if (bytes(baseURI).length == 0) {
    return "";
  }

  /*
      A SQL query to JOIN two tables to compose the metadata accross a `main` and `attributes` table
    */
  string memory query = string(
    abi.encodePacked(
      "SELECT%20json_object%28%27id%27%2Cid%2C%27name%27%2Cname%2C%27description%27%2Cdescription%2C%27image%27%2Cimage%2C%27attributes%27%2Cjson_group_array%28json_object%28%27trait_type%27%2Ctrait_type%2C%27value%27%2Cvalue%29%29%29%20FROM%20",
      mainTable,
      "%20JOIN%20",
      attributesTable,
      "%20ON%20",
      mainTable,
      "%2Eid%20%3D%20",
      attributesTable,
      "%2Emain_id%20WHERE%20id%3D"
    )
  );
  // Return the baseURI with a query string, which looks up the token id in a row.
  // `&unwrap=true&extract=true` formats into the proper JSON object expected by metadata standards.
  return
    string(
      abi.encodePacked(
        baseURI,
        "unwrap=true&extract=true",
        query,
        Strings.toString(tokenId),
        "%20group%20by%20id"
      )
    );
}
Lastly, the mint function allows users to mint a token. It simply checks a token counter and ensure the max has not been reached:
function mint() public {
  require(
    _tokenIdCounter < _maxTokens,
    "Maximum number of tokens have been minted."
  );
  _safeMint(msg.sender, _tokenIdCounter);
  _tokenIdCounter++;
}
Putting everything together, we’ve created our TwoTablesNFT smart contract that will leverage Tableland for web3-native metadata.
Table time + Polygon
Time for creating tables and deploying our NFT to Polygon! A quick recap—we:
- Read/parsed local metadata JSON files and images, turning them into JavaScript objects
- Used these metadata objects to create SQL INSERT statements
- Created a smart contract that will allow users to mint an NFT, using the data defined above
The missing piece is the tables that actually hold the metadata as well as the smart contract deployment. Let’s being with the tables.
Creating tables
We’ll first start by creating our deploy script in scripts, called deployTwoTables.js. This will basically take the default hardhat script and customize it for Tableland functionality. First, import the required packages, including @tableland/sdk:
// Standard `ethers` import for blockchain operations, plus `network` for logging the flagged network
const { ethers, network } = require("hardhat");
// The script required to upload metadata to IPFS
const { prepareSqlForTwoTables } = require("./prepareSql");
// Import Tableland
const { Database, Registry, helpers } = require("@tableland/sdk");
// Import 'node-fetch' and set globally -- needed for Tableland to work with CommonJS
const fetch = (...args) =>
  import("node-fetch").then(({ default: fetch }) => fetch(...args));
globalThis.fetch = fetch;
// Optionally, do contract verification (for demo purposes, but this could be as a separate script `verify.js`)
require("@nomicfoundation/hardhat-verify");
Next, we’ll add all of our functionality in the main function, which will be called when we run the deploy script. One of the most important aspects actually will come in our hardhat.config.js, so let’s take a look at that real quick. In the root of the project, update hardhat.config.js. The primary call outs:
- The
hardhatkey can be helpful when running things locally withnpx hardhat nodeduring development. We’re going to skip right to the testnet! - For
networks, many can be added, but here, we’re only going to deploy to Polygon Amoy. ThePRIVATE_KEYis from the.envfile, which is the key to the development wallet being used. - Optionally, we can also verify contracts on Polygonscan—this is where some optional aspects come into play, but it’s a fun exercise.
// hardhat.config.js

require("@nomiclabs/hardhat-waffle");
// Optionally, import for contract verification on Polygonscan
require("@nomicfoundation/hardhat-verify");
const dotenv = require("dotenv");
dotenv.config();

/**
 * Config sets the gateways to the proper node provider on Polygon Amoy testnets & loads the private key from `.env`
 */
module.exports = {
  solidity: "0.8.4",
  hardhat: {},
  networks: {
    "polygon-amoy": {
      url: `https://polygon-amoy.g.alchemy.com/v2/${process.env.ALCHEMY_POLYGON_AMOY_API_KEY}`,
      accounts: [`${process.env.PRIVATE_KEY}`],
    },
  },
  // Set the API keys where the keys are defined by: `npx hardhat verify --list-networks`
  etherscan: {
    apiKey: {
      polygonAmoy: process.env.POLYGONSCAN_API_KEY,
    },
  },
};
Back to deploying TwoTablesNFT and creating Tableland tables. We’ll first start by using ethers.getSigners() to retrieve the accounts from our hardhat.config.js when deploying to Polygon. We’ll also specify a couple of Tableland specifics:
- In Tableland’s
Database, there is asignerpassed that defines the connected EVM account and chain. - The variables
mainSchema,attributesSchema,mainPrefix, andattributesPrefixare all declared. These are used when minting a Tableland TABLE from theTablelandTablesregistry contract.
Recall the schemas correspond to all of our previous write statements:
// Define the account that will be signing txs for table creates/writes & contract deployment
const [signer] = await ethers.getSigners();

// Connect to Tableland database and validator API
const chainId = helpers.getChainId(await signer.getChainId());
const baseUrl = helpers.getBaseUrl(chainId);
const db = new Database({ signer, baseUrl });
const validator = new Validator({ baseUrl });
// Define the 'main' table's schema as well as the 'attributes' table; a primary key should exist
// Recall that declaring a primary key must have a unique combination of values in its primary key columns
const mainSchema = `id int primary key, name text, description text, image text`;
// Should have one `main` row (a token) to many `attributes`, so no need to introduce a primary key constraint
const attributesSchema = `main_id int not null, trait_type text not null, value text`;
// Define the (optional) prefix, noting the main & attributes tables
const mainPrefix = "table_nft_main";
const attributesPrefix = "table_nft_attributes";
Then, we’ll call create and pass the mainSchema and a prefix to specify the table’s human readable name. Also, be sure to use the receipt method to validate if the transaction was successfully created or not. We’ll also repeat this exact process for the attributes table.
When using create, there returned values include a couple of useful fields in which we’ll save for later usage:
name⇒ The name of the table, which is multi-chain unique identifier in the format{prefix}_{chainId}_{tableId}; this is essential to save. Without it, you won’t know what table to insert data into nor the smart contract won’t know either.txnHash⇒ Upon the transaction being confirmed, the value will be returned; combine it withreceiptto verify everything worked as expected.
// deployTwoTables.js

// Create the main table and retrieve its returned `name` and onchain tx as `txnHash`
const { name: mainName, txn: mainTxn } = await db
  .prepare(`CREATE TABLE ${mainPrefix} ${mainSchema}`)
  .run();
const { mainTxnHash } = mainTxn;
// Wait for the main table to be "officially" created (i.e., tx is included in a block)
// If you do not, you could be later be inserting into a non-existent table
let receipt = await validator.receiptByTransactionHash({
  chainId,
  mainTxnHash,
});
if (receipt) {
  console.log(`Table '${mainName}' has been created at tx '${mainTxnHash}'`);
} else {
  throw new Error(
    `Create table error: could not get '${mainName}' transaction receipt: ${mainTxnHash}`
  );
}

// Create the attributes table and retrieve its returned `name` and onchain tx as `txnHash`
const { name: attributesName, txn: attributesTxn } = await db
  .prepare(`CREATE TABLE ${attributesPrefix} ${attributesSchema}`)
  .run();
const { attributesTxnHash } = attributesTxn;
// Wait for the attributes table to be "officially" created
// If you do not, you could be later be inserting into a non-existent table
receipt = await validator.receiptByTransactionHash({
  chainId,
  attributesTxnHash,
});
if (receipt) {
  console.log(
    `Table '${attributesName}' has been created at tx '${attributesTxnHash}'`
  );
} else {
  throw new Error(
    `Create table error: could not get '${attributesName}' transaction receipt: ${attributesTxnHash}`
  );
}
Woo! We finally have our tables! Now, it’s time to insert some data and finally deploy the contracts.
Inserting metadata
Recall that our method prepareSqlForTwoTables allowed use to pass a main and attributes table name. These were created in the steps above and returned from the create method. Each object in the array sqlInsertStatements represents a single NFT—each object has both the main and attributes table INSERT statements. Since our previous work helped prepare these SQL statements, the steps are rather straightforward:
- The
sqlInsertStatementsis iterated over and destructured intomainandattributesvariables, which are the SQL statement for each table. - Using the
writemethod, the main table is written to, and thereafter in another loop, the attributes table is written to (twice, since our metadata had twotrait_types). We could get more efficient here on write queries and JavaScript logic, but let’s keep it simple. - The
writemethod will return the onchain transaction’shash—this can be used withreceiptto make sure everything worked as expected.
// Prepare the SQL INSERT statements, which pass the table names to help prepare the statements
// It returns an object with keys `main` (a single statement) and `attributes` (an array of statements)
// That is, many `attributes` can be inserted for every 1 entry/row in `main`
const sqlInsertStatements = await prepareSqlForTwoTables(
  mainName,
  attributesName
);
// Insert metadata into both the 'main' and 'attributes' tables, before smart contract deployment
console.log(`\nWriting metadata to tables...`);
for await (let statement of sqlInsertStatements) {
  const { main, attributes } = statement;
  // Call `write` with both INSERT statements; optionally, log it to show some SQL queries
  // Use `receipt` to make sure everything worked as expected
  let { txn: mainWriteTxn } = await db.prepare(main).run();
  const { transactionHash: mainWriteTxnHash } = mainWriteTxn;
  receipt = await validator.receiptByTransactionHash({
    chainId,
    mainWriteTxnHash,
  });
  if (receipt) {
    console.log(`${mainName} table: ${main}`);
  } else {
    throw new Error(
      `Write table error: could not get '${mainName}' transaction receipt: ${mainWriteTx}`
    );
  }
  // Recall that `attributes` is an array of SQL statements for each `trait_type` and `value` for a `tokenId`
  for await (let attribute of attributes) {
    let { txn: attrWriteTxn } = await db.prepare(attribute).run();
    const { transactionHash: attrWriteTxnHash } = attrWriteTxn;
    receipt = await validator.receiptByTransactionHash({
      chainId,
      attrWriteTxnHash,
    });
    if (receipt) {
      console.log(`${attributesName} table: ${attribute}`);
    } else {
      throw new Error(
        `Write table error: could not get '${attributesName}' transaction receipt: ${attrWriteTx}`
      );
    }
  }
}
And now the tables have some life! The metadata has been written to the tables as a pre-deploy action. Note that it is possible to perform SQL INSERTs as part of the smart contract itself. For example, a common pattern is to create a table and insert into it in the constructor function of a smart contract. Here, we’re doing things in JavaScript instead.
Deploying to Polygon
Time for the main event—getting our TwoTablesNFT deployed on Polygon to then leverage Tableland for composable metadata! We’ll first start off by defining the base URI to be used by the smart contract and the tokenURI. This will be the Tableland gateway with the appended query (which enables SQL statements to be appended) and unwrap=true&extract=true (formatting as ERC721 compliant): https://testnets.tableland.network/query?unwrap=true&extract=true&statement=.
Next, we’ll deploy the smart contract using an ethers method called getContractFactory, which simply takes the name of the smart contract. Calling the deploy method the returned valued from the factory (variable declared as TwoTablesNFT) will do just that—deploy the smart contract. The smart contract itself took a few parameters in the constructor—the parameters passed to the deploy function should match with what was defined in the smart contract.
// Set the Tableland gateway as the `baseURI` where a `tokenId` will get appended upon `tokenURI` calls
// Note that `unwrap=true&extract=true` will format the metadata per the ERC721 standard
const tablelandBaseURI = `https://testnets.tableland.network/query?unwrap=true&extract=true&statement=`;
// Get the contract factory to create an instance of the TwoTablesNFT contract
const TwoTablesNFT = await ethers.getContractFactory("TwoTablesNFT");
// Deploy the contract, passing `tablelandBaseURI` in the constructor's `baseURI` and using the Tableland gateway
// Also, pass the table's `name` to write to storage in the smart contract
const twoTablesNFT = await TwoTablesNFT.deploy(
  tablelandBaseURI,
  mainName,
  attributesName
);
await twoTablesNFT.waitForDeployment();
Boom! Table time. Double table time, to be exact. We will have some tables on Polygon, shortly! One follow up step is provided for sake of demonstration. This is best served in a testing scenario where you can write tests in the tests directory and run npx hardhat test to run them. Here, we’re going to do a pseudo-test for fun—minting a token in the deploy script itself.
We can call the smart contract directly, such as seeing what the public getter on baseURIString is…just for fun. Afterward, we can also mint a token by calling mint(). The subsequent logic after that function call also reads some events from the blockchain, including getting the minted tokenId and using that to check out the tokenURI's return value…which points to Tableland!
// deployTwoTables.js

// Log the deployed address and call the getter on `baseURIString` (for demonstration purposes)
console.log(
  `\nTwoTablesNFT contract deployed on ${network.name} at: ${twoTablesNFT.address}`
);
const baseURI = await twoTablesNFT.baseURIString();
console.log(`TwoTablesNFT is using baseURI: ${baseURI}`);

// For demonstration purposes, mint a token so that `tokenURI` can be called
const mintToken = await twoTablesNFT.mint();
const mintTxn = await mintToken.wait();
// For demonstration purposes, retrieve the event data from the mint to get the minted `tokenId`
const mintReceipient = mintTxn.events[0].args[1];
const tokenId = mintTxn.events[0].args[2];
console.log(
  `NFT minted: tokenId '${tokenId.toNumber()}' to owner '${mintReceipient}'`
);
const tokenURI = await twoTablesNFT.tokenURI(tokenId);
console.log(
  `\nSee an example of 'tokenURI' using token '${tokenId}' here:\n${tokenURI}`
);
Verifying Our Contract
Okay, final "optional" step before we mint our tables and deploy the TwoTablesNFT contract. Ensure you’ve signed up for a Polygonscan account, created an API key, and saved it to .env as POLYGONSCAN_API_KEY. Since we’ve already installed @nomicfoundation/hardhat-verify, we just need to write the simple script.
This verification logic has been included in deployTwoTables.js, but it may be useful to do this as a separate step. As such, verifyTwoTables.js is provided for those who wish to separate roles of responsibility accordingly. The main consideration is to—just as the deploy method required—pass the constructor arguments. This includes the Tableland gateway and those previously saved variable for table names in the format {prefix}_{chainId}_{tableId}.
await run("verify:verify", {
  address: twoTablesNFT.address,
  constructorArguments: [tablelandBaseURI, mainName, attributesName],
});
Actually, Deploying
Whew…we’re finally ready to put everything together. All that’s left is to run the hardhat script—the main callout here is that we’re passing "polygon-amoy" as the network, which we previously defined in the hardhat.config.js file:
npx hardhat run scripts/deployTwoTables.js --network "polygon-amoy"
If you followed along and performed all of the optional actions and kept the associated logging, the output in the console should have looked something like this:
Deploying to network 'polygon-amoy' with account 0x4D5286d81317E284Cd377cB98b478552Bbe641ae
Table 'table_nft_main_80002_1510' has been created at tx '0x2016f295221c235f62d89b44f8d6a51096a58c0a2722e93f2c2133e5471d0737'
Table 'table_nft_attributes_80002_1511' has been created at tx '0x9f8e874bec740dc1299fe0357a9b093f1938272311948437072de8a2b91c5f04'

Writing metadata to tables...
table_nft_main_80002_1510 table: INSERT INTO table_nft_main_80002_1510 (id, name, description, image) VALUES (0, 'TableNFT Rigs #0', 'A Tableland NFT demo -- deploying metadata on Tableland', 'https://bafkreieqzca4qd5quruezfcwnrzgx5j62xww4ud34k6upp2utuicp2m6ky.ipfs.nftstorage.link/');
table_nft_attributes_80002_1511 table: INSERT INTO table_nft_attributes_80002_1511 (main_id, trait_type, value) VALUES (0, 'Fleet', 'Foils');
table_nft_attributes_80002_1511 table: INSERT INTO table_nft_attributes_80002_1511 (main_id, trait_type, value) VALUES (0, 'Role', 'Admin');
table_nft_main_80002_1510 table: INSERT INTO table_nft_main_80002_1510 (id, name, description, image) VALUES (1, 'TableNFT Rigs #1', 'A Tableland NFT demo -- deploying metadata on Tableland', 'https://bafkreibijrzbzy44dxmroq7jvbtka4oxgrejdtzsgu2qqsiugeb3he56pi.ipfs.nftstorage.link/');
table_nft_attributes_80002_1511 table: INSERT INTO table_nft_attributes_80002_1511 (main_id, trait_type, value) VALUES (1, 'Fleet', 'Tumblers');
table_nft_attributes_80002_1511 table: INSERT INTO table_nft_attributes_80002_1511 (main_id, trait_type, value) VALUES (1, 'Role', 'User');

TwoTablesNFT contract deployed on polygon-amoy at: 0xDAa7F50C50018D7332da819be275693cA9604178
TwoTablesNFT is using baseURI: https://testnets.tableland.network/query?unwrap=true&extract=true&statement=

NFT minted: tokenId '0' to owner '0x4D5286d81317E284Cd377cB98b478552Bbe641ae'
See an example of 'tokenURI' using token '0' here:
https://testnets.tableland.network/query?unwrap=true&extract=true&statement=SELECT%20json_object%28%27id%27%2Cid%2C%27name%27%2Cname%2C%27description%27%2Cdescription%2C%27image%27%2Cimage%2C%27attributes%27%2Cjson_group_array%28json_object%28%27trait_type%27%2Ctrait_type%2C%27value%27%2Cvalue%29%29%29%20FROM%20table_nft_main_80002_1510%20JOIN%20table_nft_attributes_80002_1511%20ON%20table_nft_main_80002_1510%2Eid%20%3D%20table_nft_attributes_80002_1511%2Emain_id%20WHERE%20id%3D0%20group%20by%20id

Verifying contract...
Nothing to compile
Successfully submitted source code for contract
contracts/TwoTablesNFT.sol:TwoTablesNFT at 0xDAa7F50C50018D7332da819be275693cA9604178
for verification on the block explorer. Waiting for verification result...

Successfully verified contract TwoTablesNFT on Etherscan.
https://amoy.polygonscan.com/address/0xDAa7F50C50018D7332da819be275693cA9604178#code
Testing
It goes without saying that testing should be part of any deployment process. It’s especially important with Tableland where SQL is a new concept in terms of web3-native functionality (of course, SQL has been around for decades). As such, doing dry runs and sanity checks is crucial and deserves the proper attention. Some common issues include properly escaping single/double quotes, ensuring all text is surrounded by single quotes, and following general SQL syntax guidelines (for anyone that’s a little newer to SQL).
In terms of testing smart contracts, hardhat has built in features to do this with chai. A very basic test script has been provided, which does a couple of simple checks, like minting a token, transferring it, and validating if the Tableland tokenURI is in the correct format. Basically, set up some top-level variables in describe (so that they can be re-used in subsequent tests). Sample values have been provided, and upon running npx hardhat test, this test (as well as the others provided) will all run…and pass!
it("Should return `tokenURI` for a valid `tokenId`", async function () {
  // Mint an NFT to the calling `owner` & wait until the transaction is mined
  const mintTx = await twoTablesNFT.connect(owner).mint();
  await mintTx.wait();

  // Validate the `tokenURI` of id `0`
  let tokenURI = await twoTablesNFT.tokenURI(0);
  expect(await tokenURI).to.equal(
    `${tablelandGatewayURI}SELECT%20json_object%28%27id%27%2Cid%2C%27name%27%2Cname%2C%27description%27%2Cdescription%2C%27image%27%2Cimage%2C%27attributes%27%2Cjson_group_array%28json_object%28%27trait_type%27%2Ctrait_type%2C%27value%27%2Cvalue%29%29%29%20FROM%20${mainTable}%20JOIN%20${attributesTable}%20ON%20${mainTable}%2Eid%20%3D%20${attributesTable}%2Emain_id%20WHERE%20id%3D0%20group%20by%20id`
  );
});

// twoTablesNFT
// ✔ Should mint a token to the caller address and allow a transfer (151ms)
// ✔ Should return `tokenURI` for a valid `tokenId` (78ms)
// ✔ Should fail if more than 2 tokens are attempted to be minted (59ms)

// 3 passing (1s)
Recap & review
Let’s review everything we accomplished:
- Read metadata JSON files from a local directory, pushed images to IPFS, and then created JS objects as a combination of the two.
- Prepared a bunch of SQL insert statements—for both a main and attributes table.
- Created tables for both a main and attributes, which is a much more optimal way to do metadata and enables endless use cases for mutability thereafter (if desired).
- Inserted the prepared metadata as part of the same deploy script as the creates.
- Deployed an NFT smart contract to Polygon Amoy and verified the on Polygonscan using a script.
- Lastly, since Polygon’s testnet is supported by OpenSea, it’s possible to view everything from this tutorial as you would any other NFT collection (well, any other testnet collection).
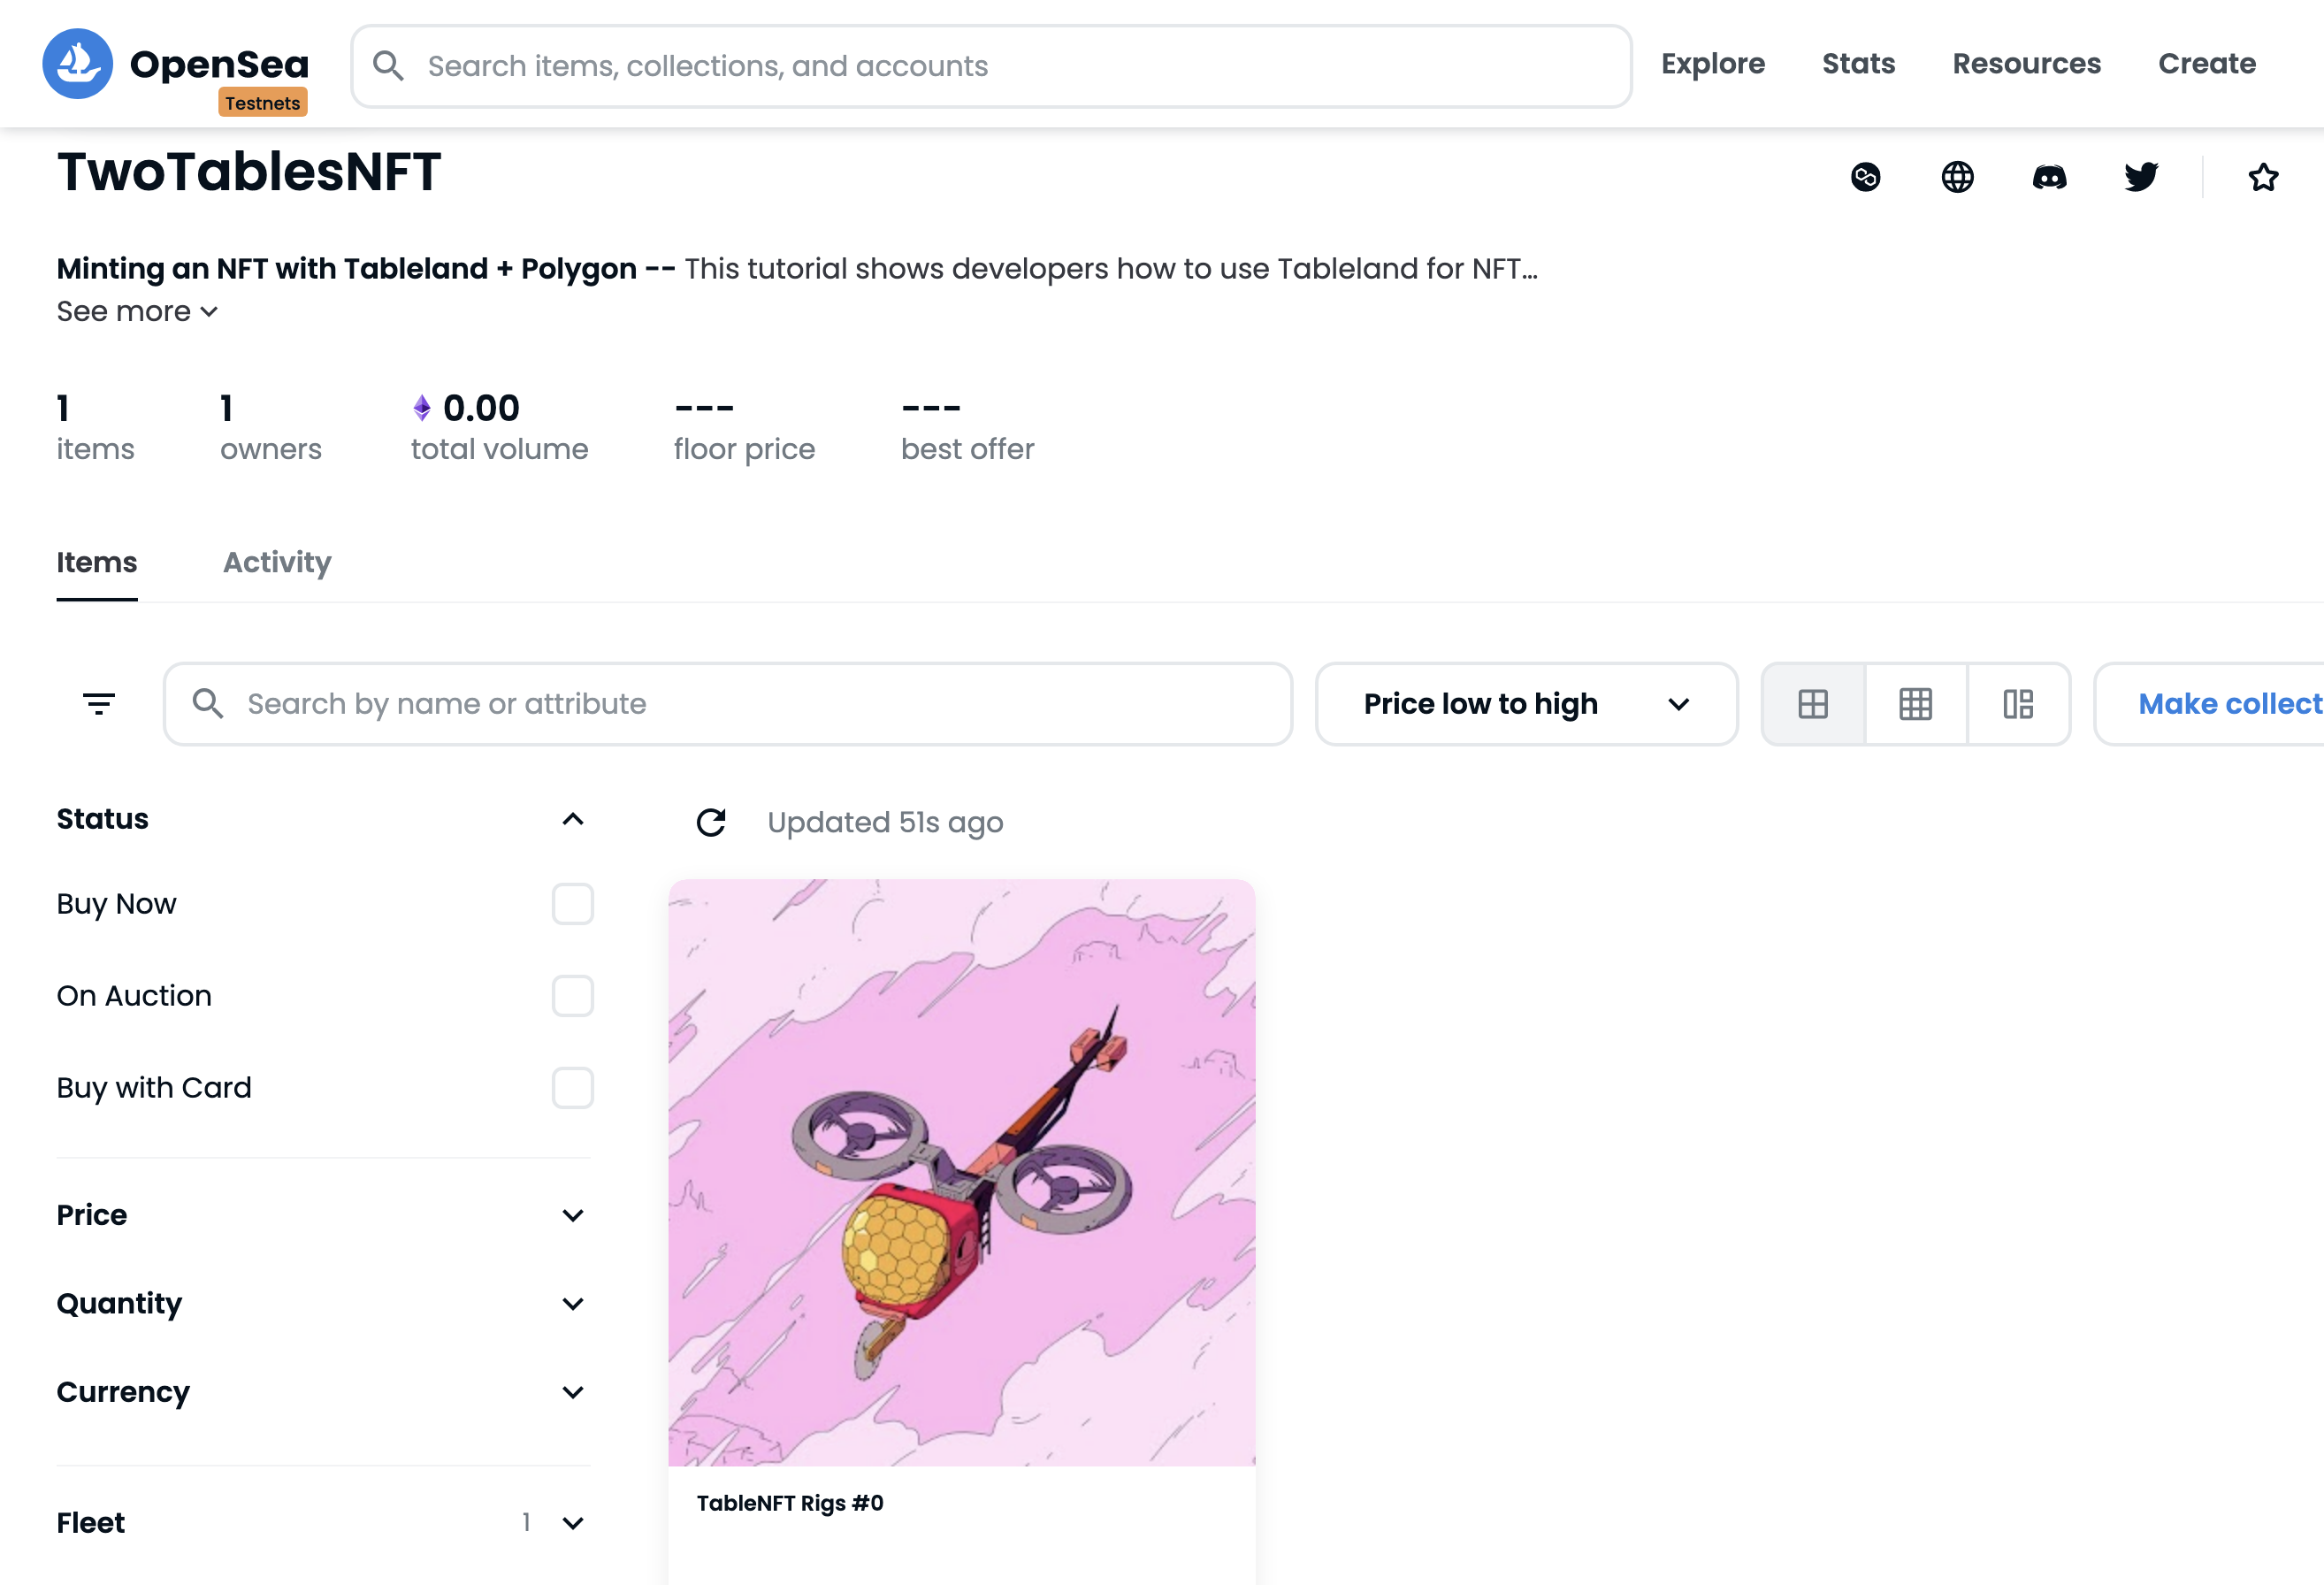
View it on OpenSea
And lastly, the collection is "live" on OpenSea (testnet)! You can even set up custom banners and verification as desired, and you can view the collection here. Here’s what it looks like: