Using Remix
An online IDE that makes it easy to tinker with and deploy smart contracts.
Remix is a useful tool whenever you need to test out Solidity contracts locally, curiously inspect gas costs, or even deploy actual contracts to live chain deployments.
Understanding Remix
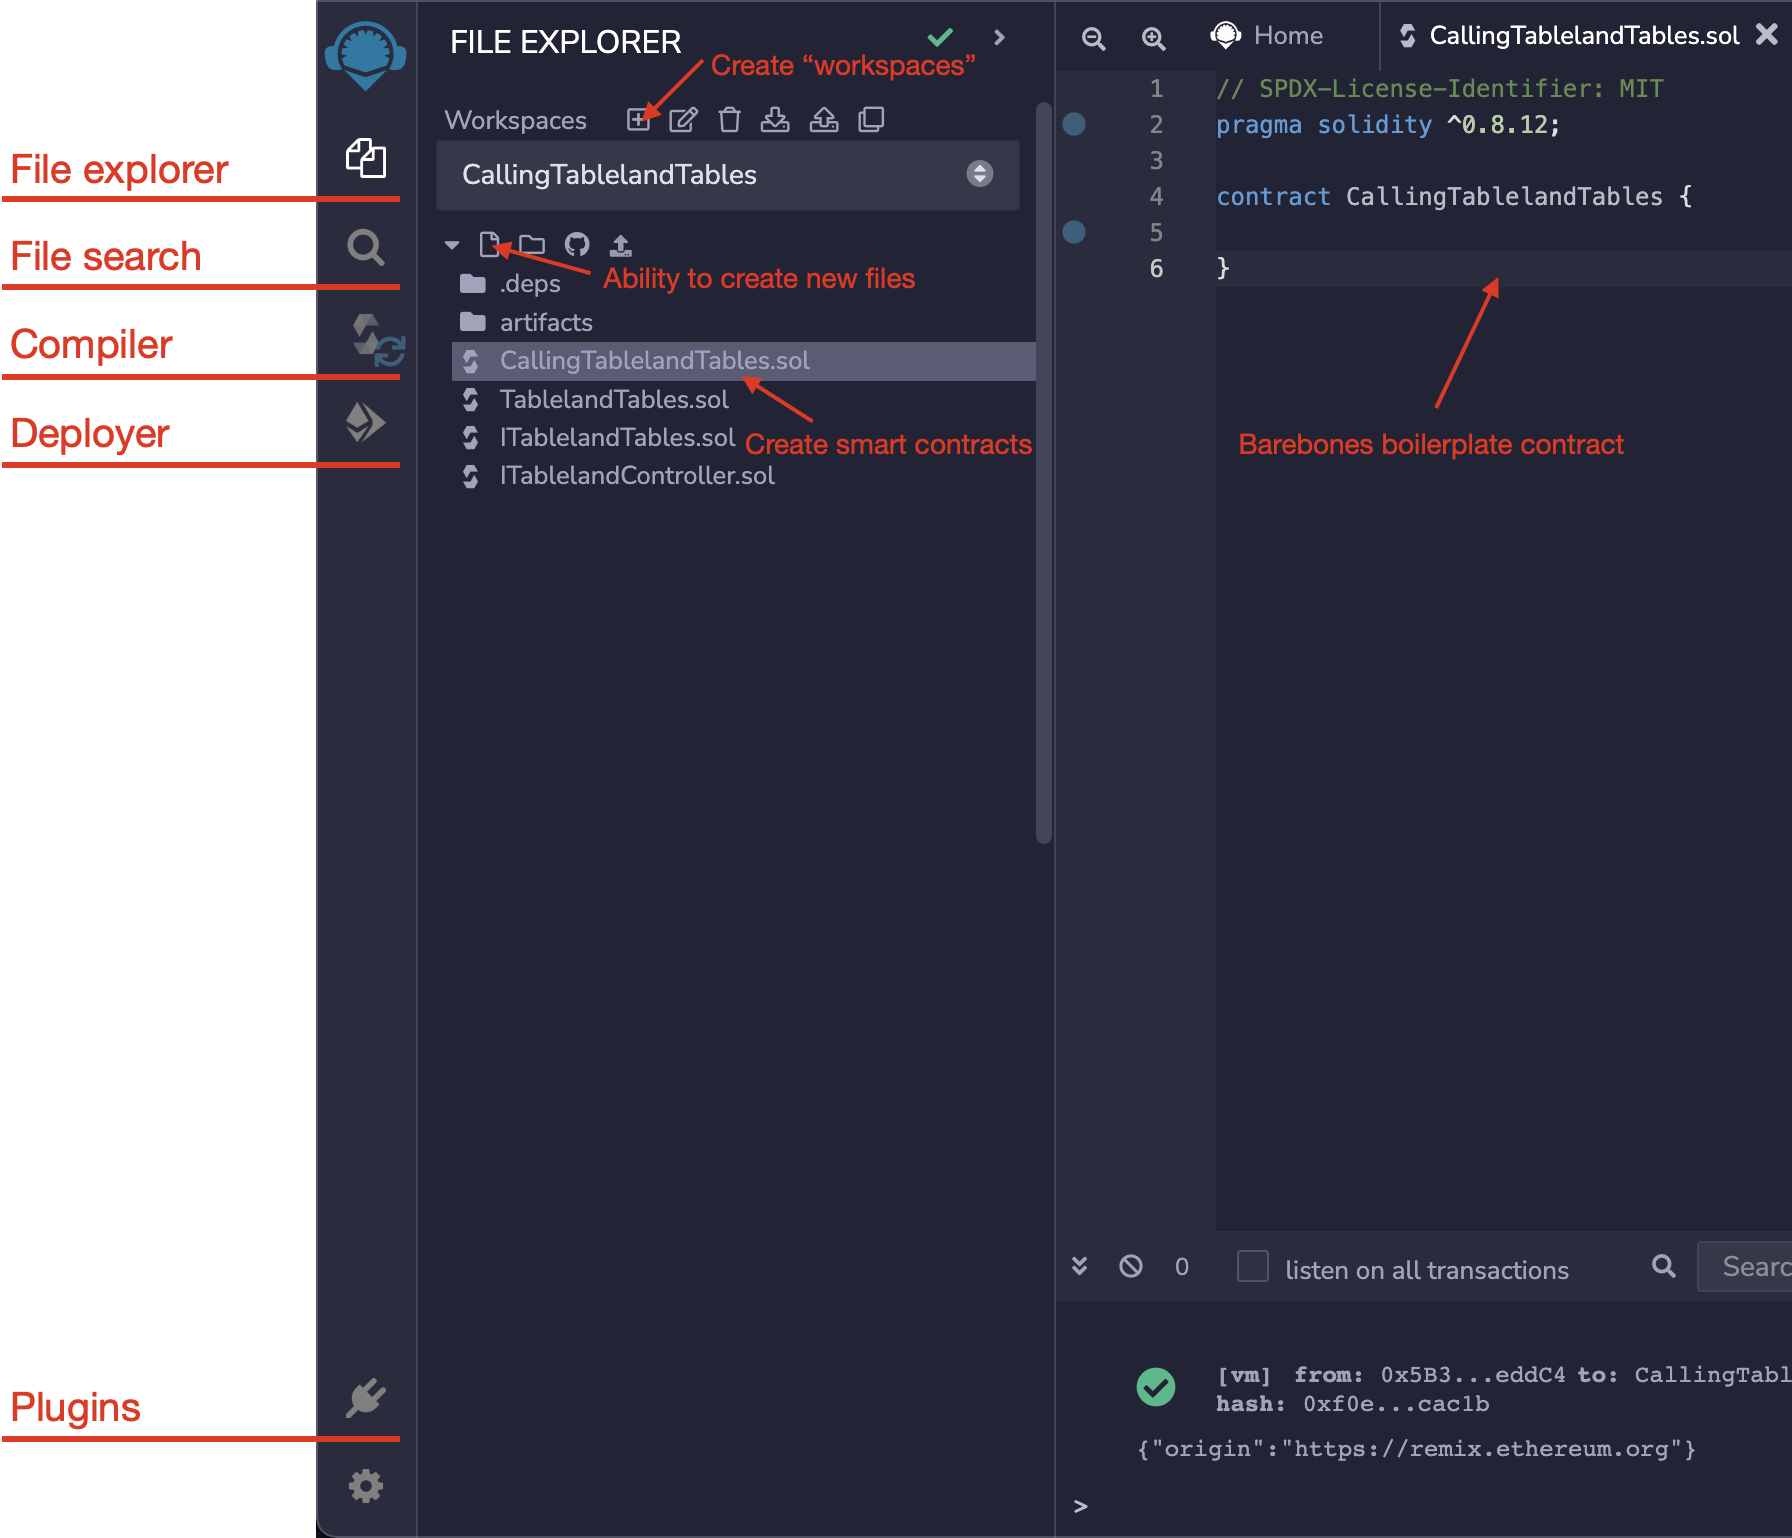
Let’s review the primary capabilities:
- File explorer—Create workspaces and files.
- File search—Search for files.
- Compiler—Compiles the desired smart contracts (if possible, try for at least
0.8.12since this introduced string concatenation bug fixes, which is used in writing SQL). - Deployer—Deploy and interact / transact with contracts.
There are also a number of useful plugins that you could choose to install, including:
- Debugger—Helps when debugging contracts.
- Solhint Linter—Shows linting errors that can help with compilation issues.
- Solidity Unit Testing—Write & run unit tests in Solidity.
- Flattener—Used for manual contract verification on block explorers.
Creating & deploying on Remix
When doing quick development in Remix, the most typical pattern is to:
- Create a workspace.
- Create a contract (or many of them).
- Compile.
- Deploy.
The first two steps are straightforward; simply, click the Create Workspace button, and after creating one, click the New File button and create a smart contract (.sol extension).
It's a lot easier to use Local Tableland to develop locally. To do this with Remix, you'll have to deploy the registry contract since it doesn't exist, yet, and all you're doing is contract-only interactions. Note that if you were to use a live testnet, this wouldn't be needed.
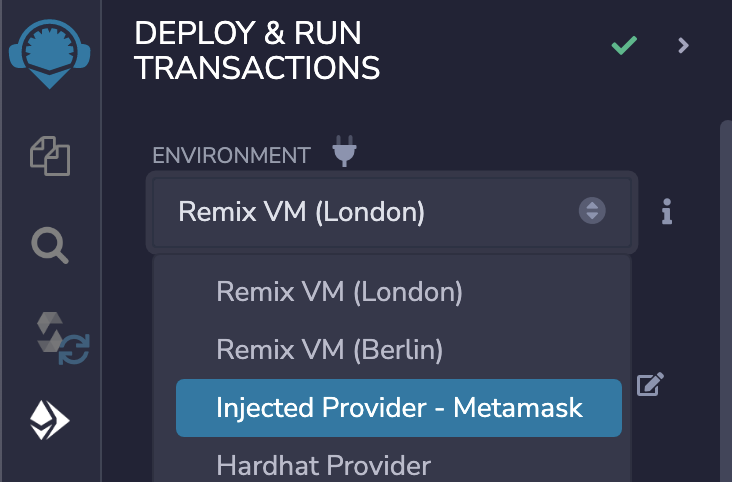
Thus, you’ll want to import and copy / paste the required Tableland smart contracts, write your custom smart contract, and compile them separately (with a version that matches the pragma in the file). Lastly, the contract deployment defaults to a local testnet (Remix VM), but you can select Injected Provider to use a wallet provider and deploy contracts to testnets or mainnets. The Injected Provider leverages your actual wallet’s accounts.
Using TablelandTables locally
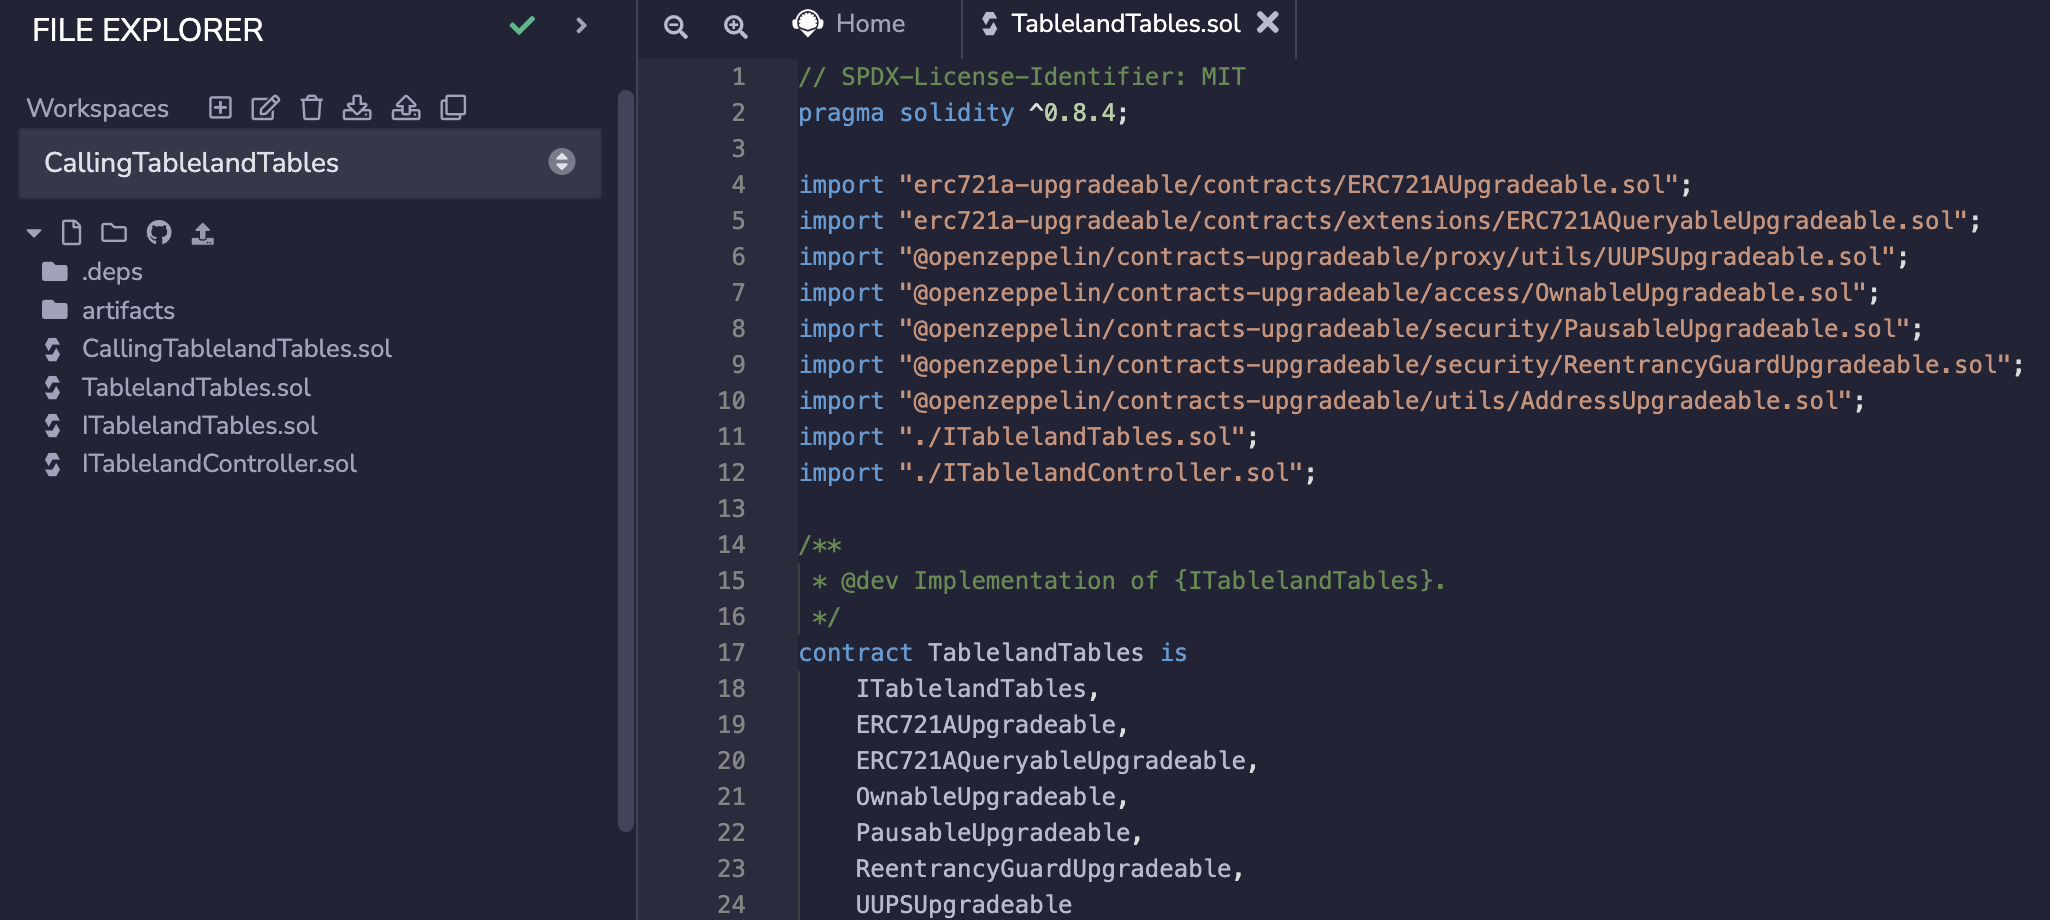
For local development environment setup, please ensure the following contracts are created in the same directory.
TablelandTables.solITablelandTables.solITablelandController.sol
Thus, your environment should resemble the following—but creating the contracts noted above is only needed if you plan to do local environment testing where you call the registry contract.
Separately, your custom smart contract may look like the following, where it instantiates and subsequently calls the registry using an interface ITablelandTables. Namely, contracts are imported from @tableland/evm, and you can also choose to import @openzeppelin/contracts and ERC721Holder for smart contract owned NFTs. The TablelandDeployments makes calling the contract easy.
// SPDX-License-Identifier: MIT
pragma solidity ^0.8.12;

import "@openzeppelin/contracts/token/ERC721/utils/ERC721Holder.sol"; // Required for contracts to receive ERC721 tokens
import "@tableland/evm/contracts/utils/TablelandDeployments.sol";

contract CallingTablelandTables is ERC721Holder {

    function create() public payable {
        TablelandDeployments.get().create(/* do create logic */);
    }

    function writeToTable() public payable {
        TablelandDeployments.get().mutate(/* do write logic */);
    }
}
When deploying, first compile & push the TablelandTables contract, and note its address. Then, compile & deploy the custom CallingTablelandTables, passing that address to it.
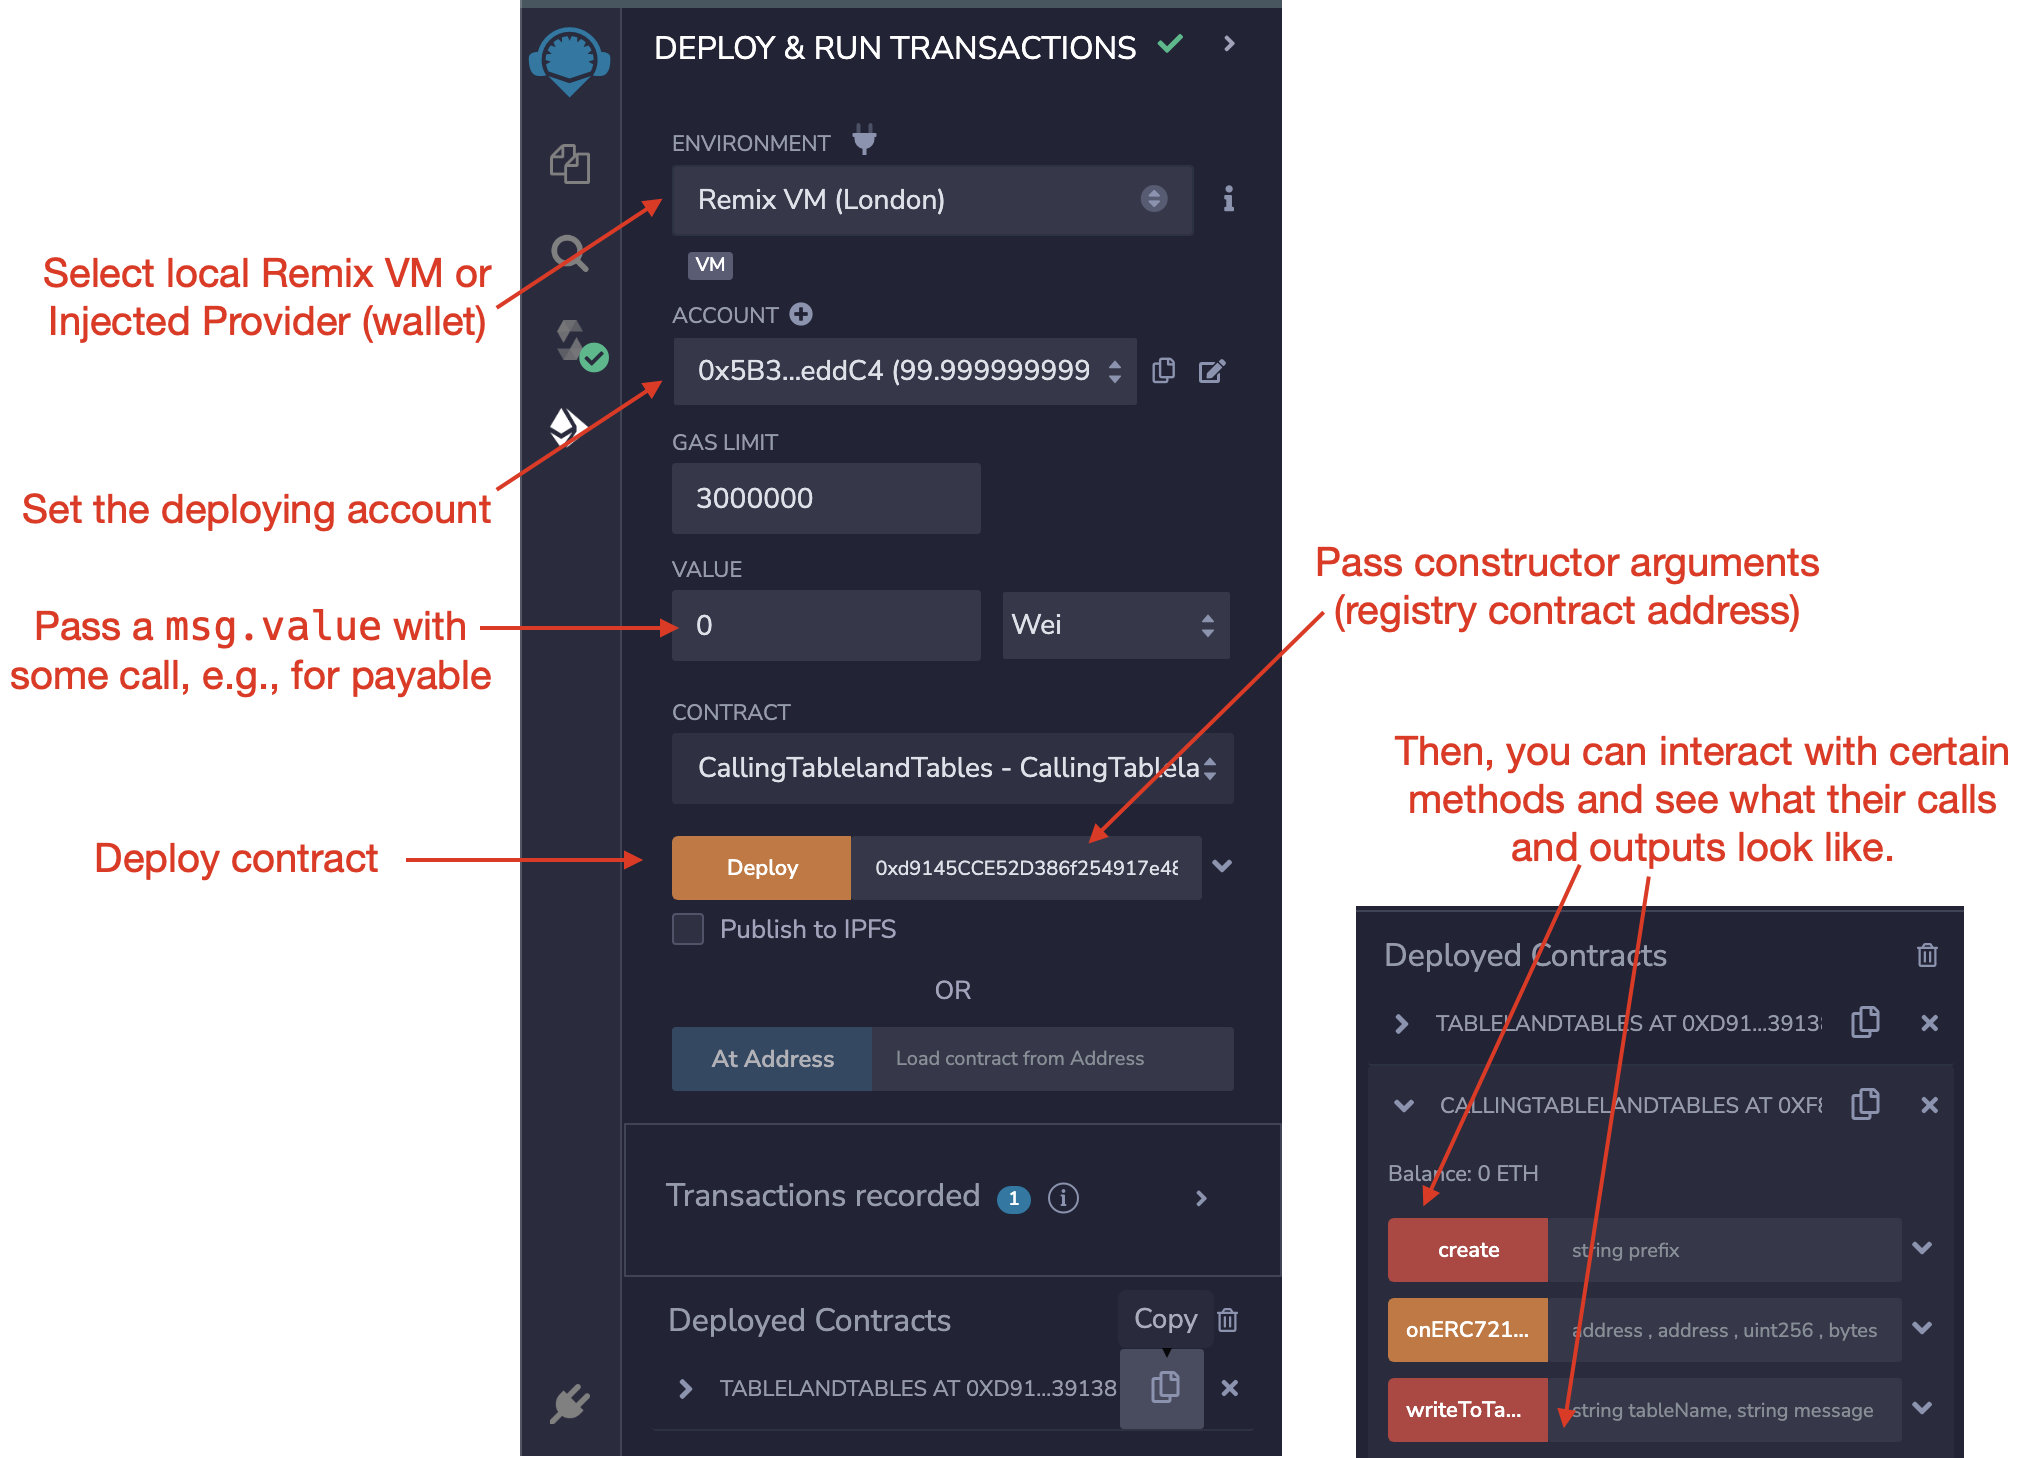
The process of compiling, deploying, and calling is very useful when writing quick & dirty contracts for testing some Tableland contract interactions.
Using a TablelandController
A much simpler Remix use case is to deploy a TablelandController contract. This could follow the same design above—just create a new contract that imports and implements the ITablelandController. For detailed information on the controller, please read the documentation on configuring table write access.
Let’s also take the use case where you want to quickly deploy a controller without the additional setup work. This is all that’s required:
- Create a contract.
- Import
ITablelandController.sol; optionally, thePolicieslibrary. - Implement
ITablelandControllerand itsPolicyfunctionality. - Compile & deploy.
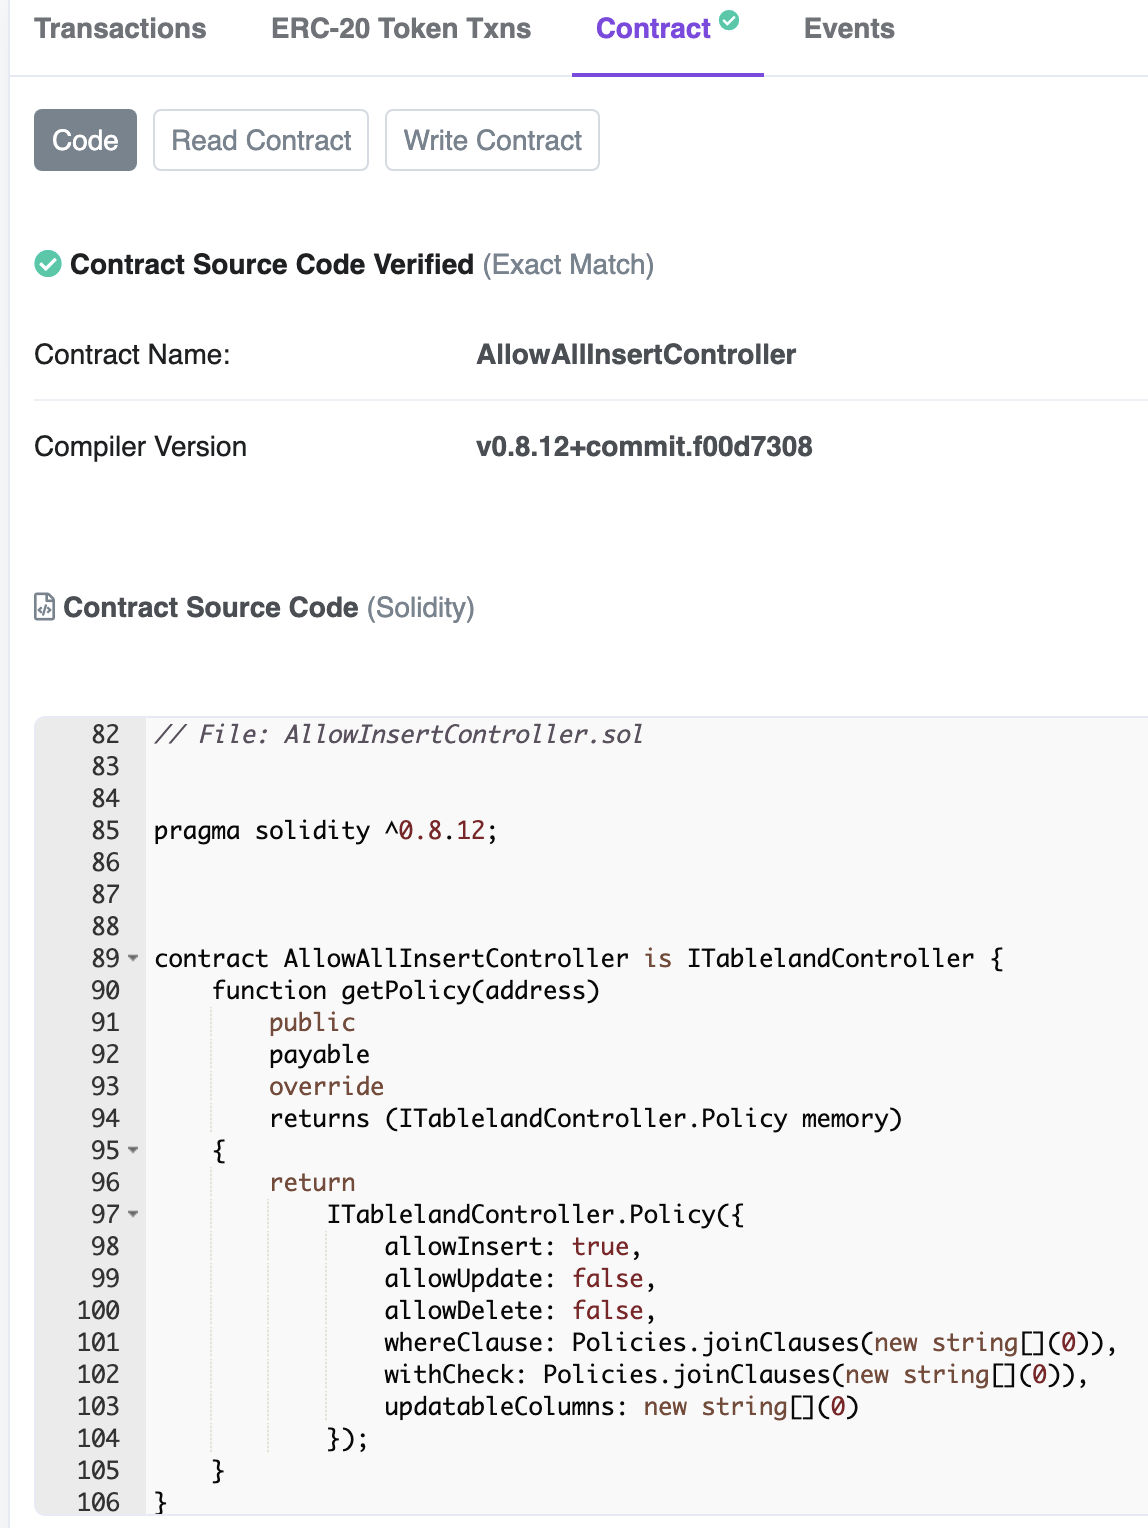
For example, the following shows an "allow all inserts" controller, which means that any address can insert into the table, but the update and delete policies are set to false to prevent table alterations. The main requirement is to implement the getPolicy method and return the desired Policy object.
// SPDX-License-Identifier: MIT
pragma solidity ^0.8.12;

import "@tableland/evm/contracts/ITablelandController.sol";
import "@tableland/evm/contracts/policies/Policies.sol"; // Optional

contract AllowAllInsertController is ITablelandController {
    function getPolicy(address)
        public
        payable
        override
        returns (ITablelandController.Policy memory)
    {
        return
            ITablelandController.Policy({
                allowInsert: true,
                allowUpdate: false,
                allowDelete: false,
                whereClause: Policies.joinClauses(new string[](0)), // Can use an empty string, instead: `""`
                withCheck: "", // Example using an empty string vs. the `Policies` library
                updatableColumns: new string[](0) // Must be a string array; this one is empty
            });
    }
}
From there, you can deploy this contract to a live testnet—the example below pushes this contract to Polygon Amoy and logs some useful information:
- Transaction hash: 0xd3734304ff14c76381fea39378dcbff5adb9a8094e61a86e415a68fcc5ffe0fb
- Contract address (bottom left corner): 0x5019661C0436e4F5539470940AD67b5EDB3481E8
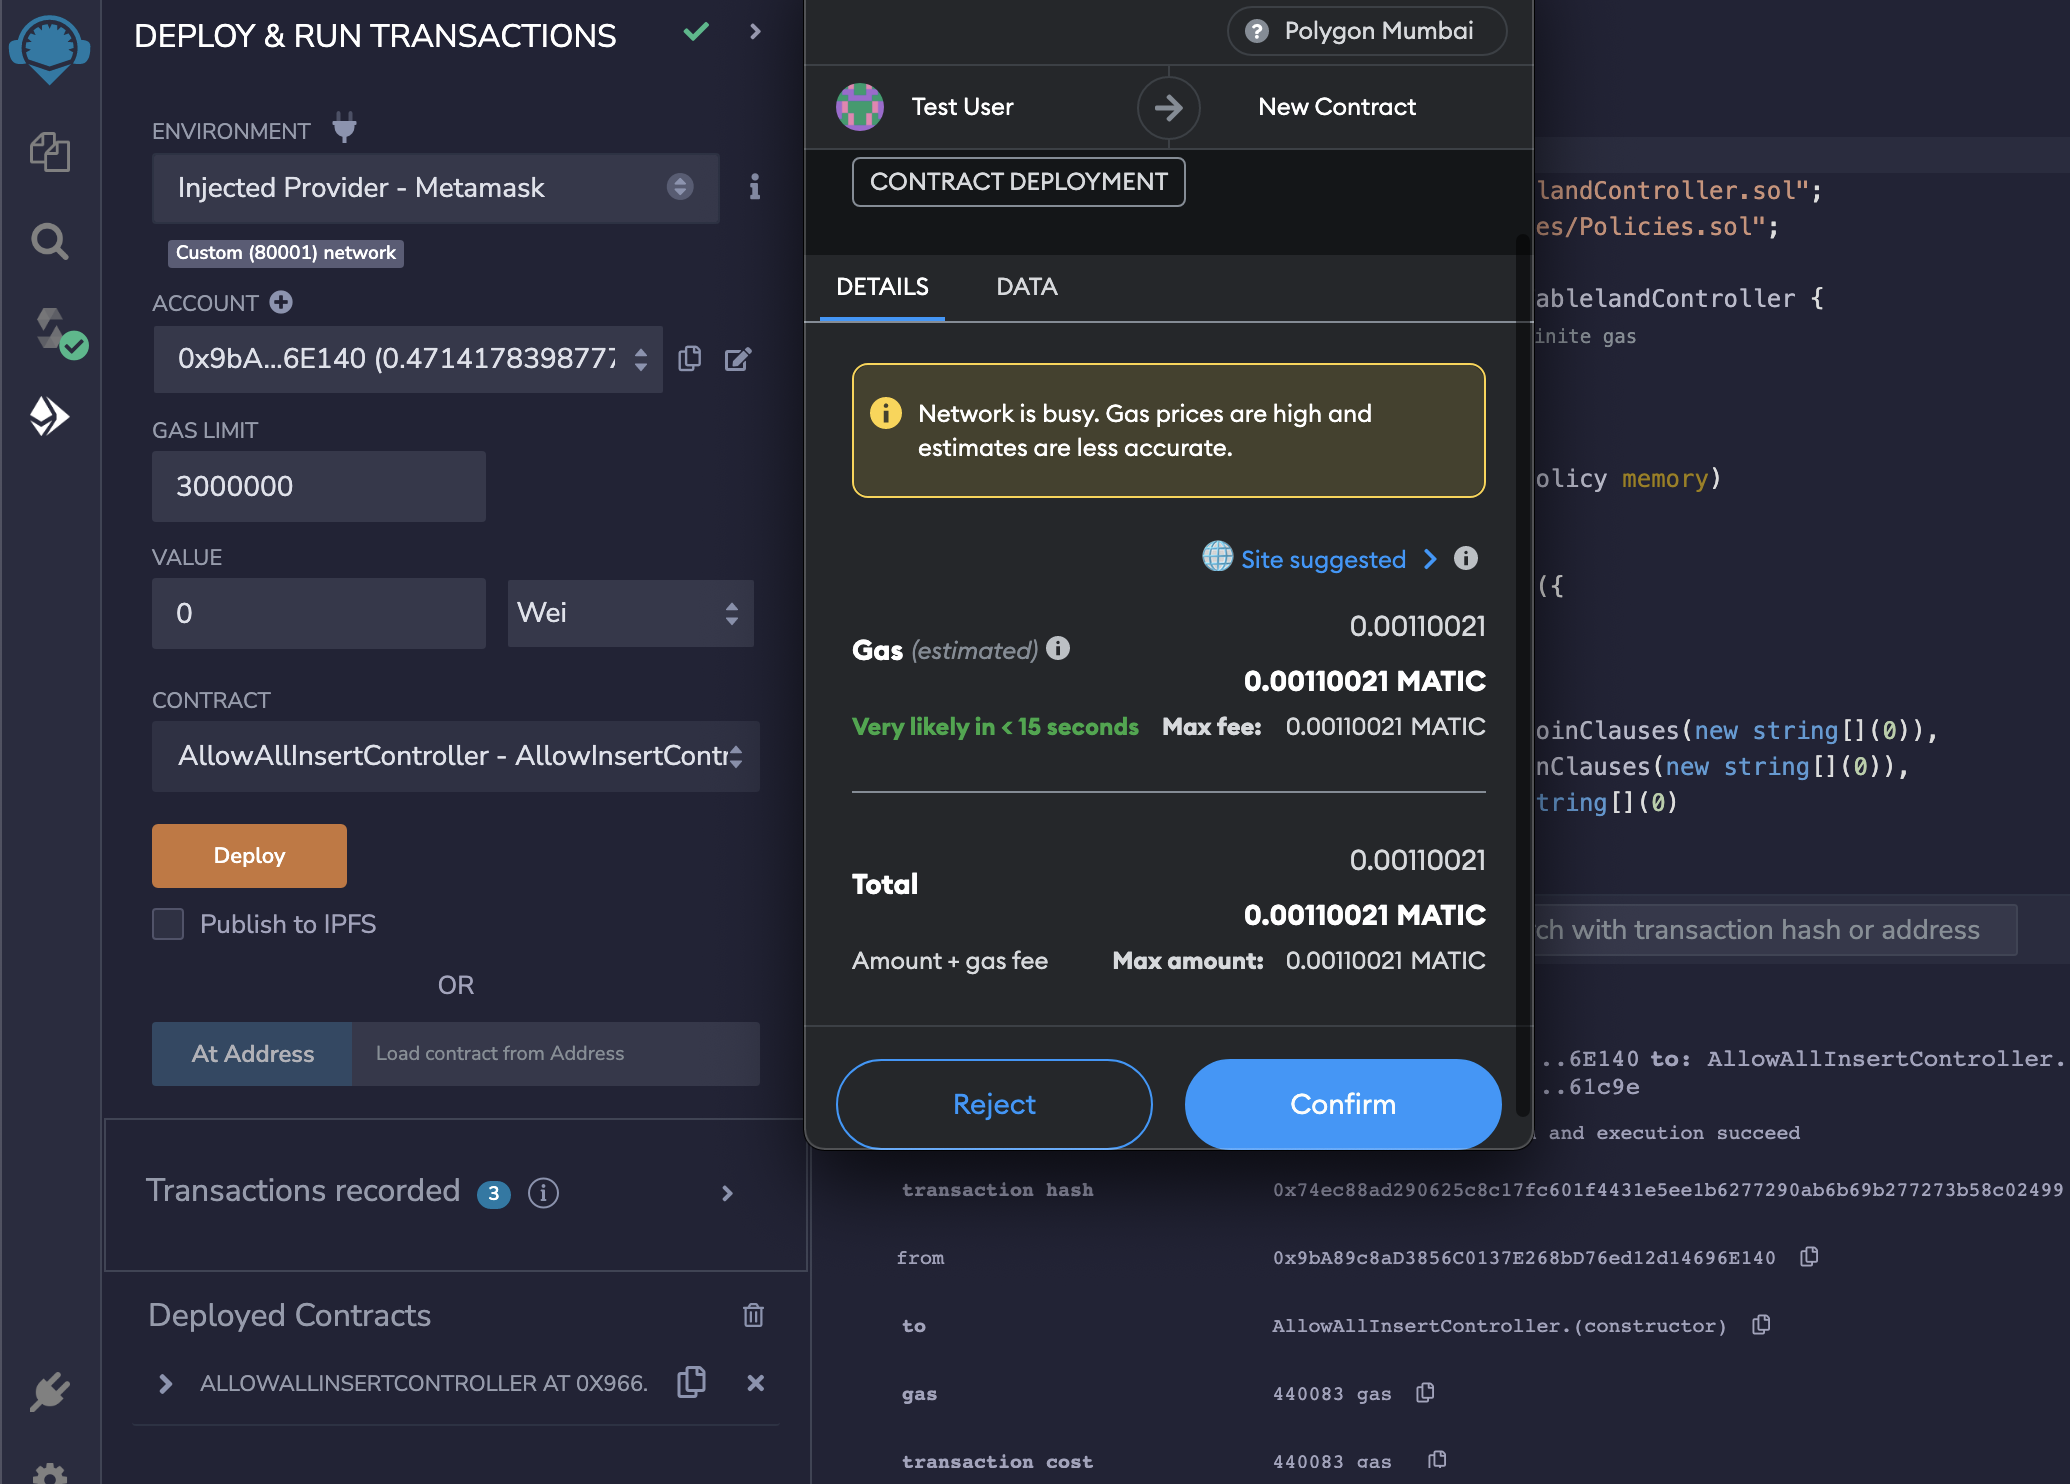
An example of sending an onchain testnet transaction and deploying the controller contract.
Setting the controller
You can then use tools like Etherscan to manually call the smart contract’s setController method from a UI. Alternatively, this same method is made available in direct smart contract calls, SDK, and CLI.
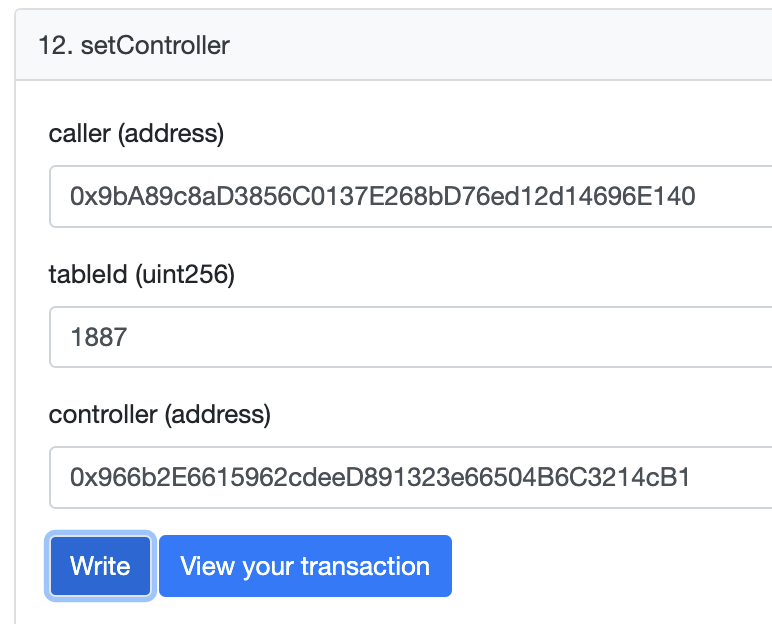
Here, we set the controller to 0x5019661C0436e4F5539470940AD67b5EDB3481E8 (transaction hash here, for reference) for the table tbl_calls_80002_152 (i.e., tableId is 1887), owned by the address 0x4D5286d81317E284Cd377cB98b478552Bbe641ae.
You can test it out yourself—try and successfully insert some row into tbl_calls_80002_152 but updates or deletes will fail! You could try the following by replacing <your_address> with your address or some message string, and then view the results via a read query.
INSERT INTO
    tbl_calls_80002_152 (message)
VALUES
    ('0xYOUR_EVM_ADDRESS');
Verifying Remix contracts
There does exist an Etherscan Remix verification tool, which requires an API key from the Etherscan website. As an alternative, the flattener plugin can be used to create a single flat Solidity file; this can be used to verify a contract manually.
-
Navigate to Verify & Publish on the block explorer where
<0x_contract_address>should be replaced with the deployed contract’s address and fill out the required information.https://amoy.polygonscan.com/verifyContract?a=<0x_contract_address>- Please select Compiler Type ⇒ Solidity (Single Part).
- Please select Compiler Version ⇒ Whatever was used for compilation, e.g.,
*v0.8.12+commitf00d7308*. - Please select Open Source License Type ⇒ Often, it’ll be MIT License (MIT).
- Click Continue
-
Back in Remix, navigate to the installed Flattener plugin, click Flatten (while your screen is opened / highlighting the desired contract), click Save, and then copy the flattened file to your clipboard.
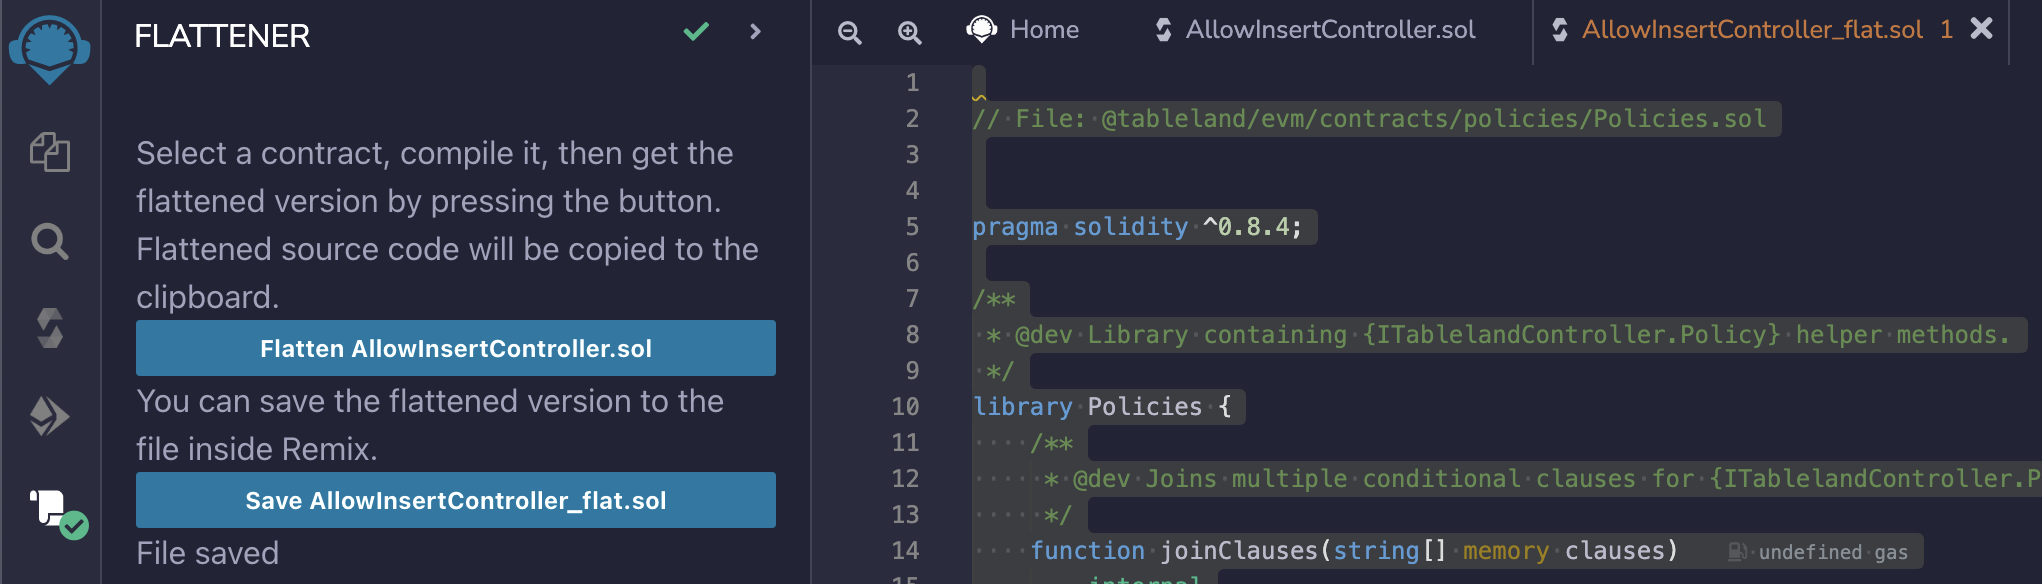
An example of how to manually flatten a file for contract verification purposes.
-
Back in the block explorer, paste the flattened file in the text area (Enter the Solidity Contract Code below), and then click Verify & Publish.
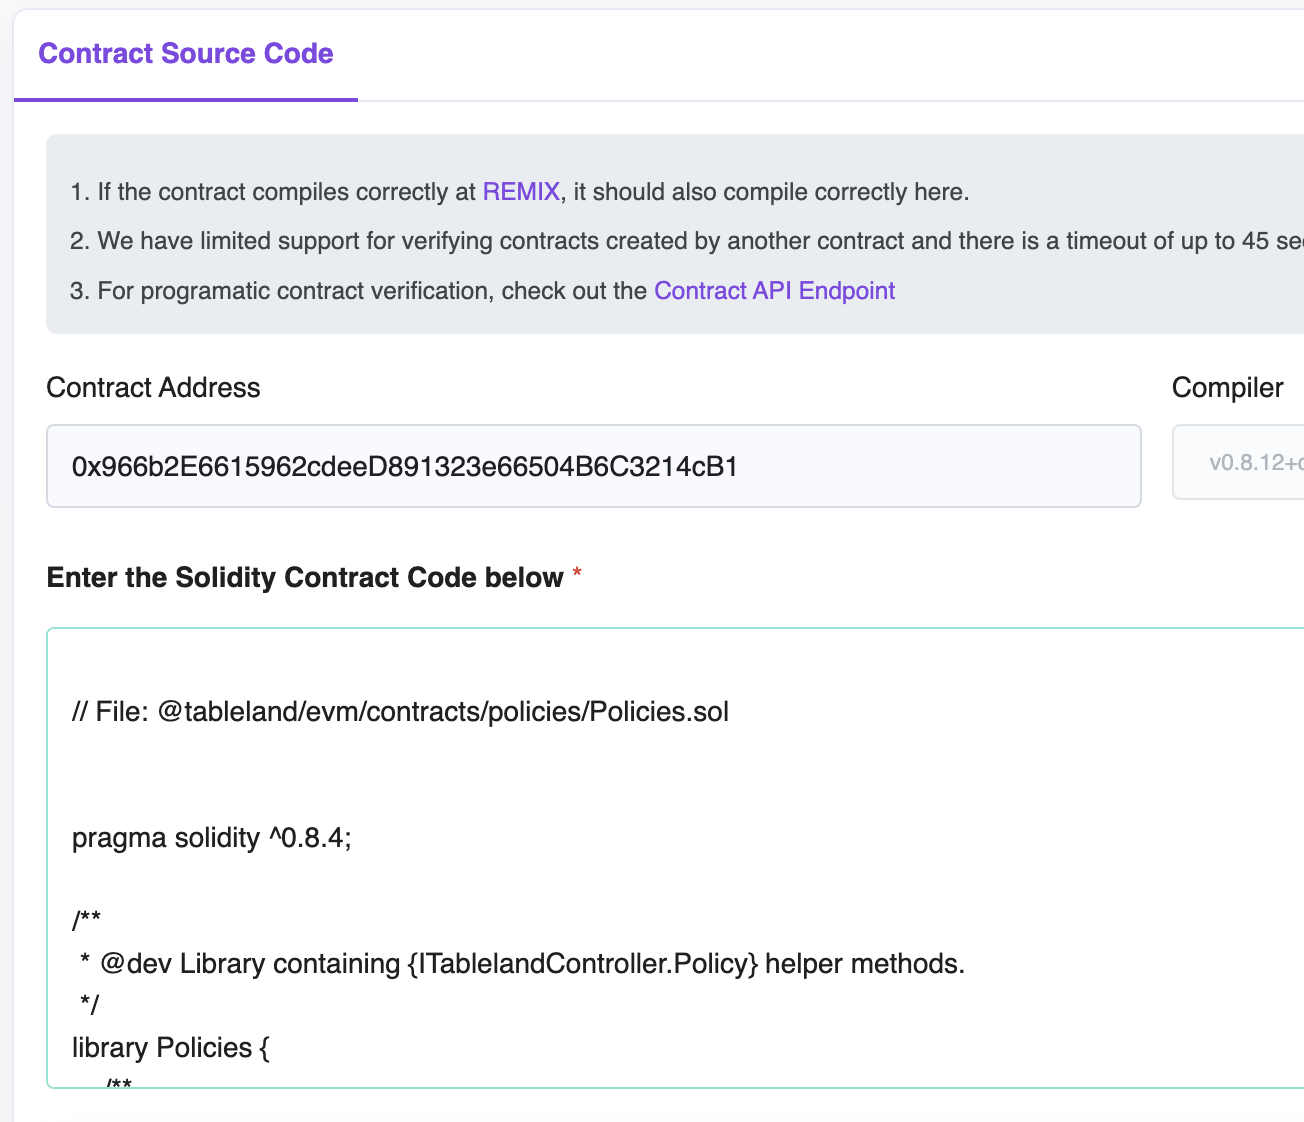
- Contract is verified and easily readable! See it here.
Connecting local projects to Remix
A nice npm package called @remix-project/remixd allows you to connect to Remix from your local project. For example, let’s say you’ve spun up a hardhat project (or some local folder with .sol files) from your machine. With a simple command, you can open that project up on Remix and interact with the contract directly in the Remix UI!
-
Install
remixd.- npm
- Yarn
- pnpm
npm install -g @remix-project/remixdyarn global add @remix-project/remixdpnpm add -g @remix-project/remixd -
From the root of your project’s directory, connect to remix.
remixd -s . -u https://remix.ethereum.org -
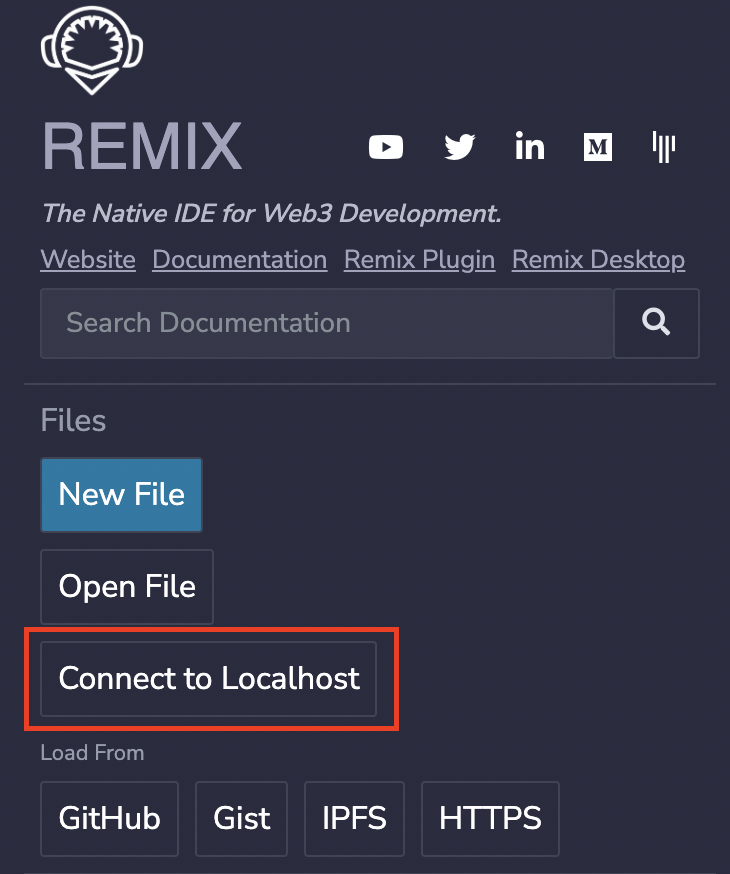
On Remix, connect to
localhost, and then you’ll have access to your project and can deploy everything using Remix (e.g., using hardhat accounts or injected providers)!