Share & collaborate
Developers can easily share project links or provision access to others using shared teams.
Once you've created a project, there are a couple of ways to share it with others. You can either share a link to the project or create a new, collaborative team and provision access to others to view or edit the project.
Sharing via link
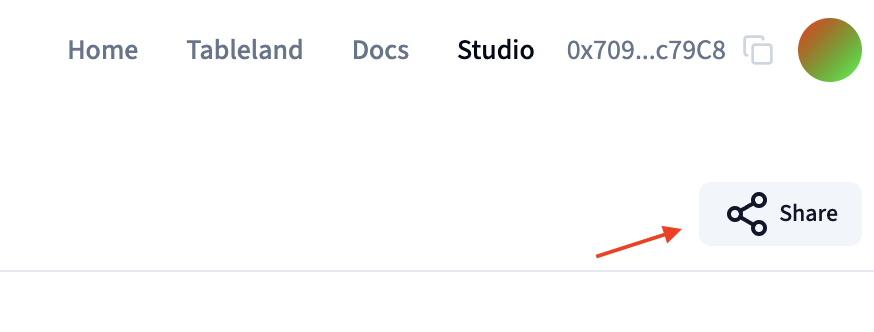
A project link is a great way to share a project with others. You can share a link to a project by clicking the Share button in the top right corner of the project homepage.
- Navigate to your project homepage, and then click on the share button in the top right corner.
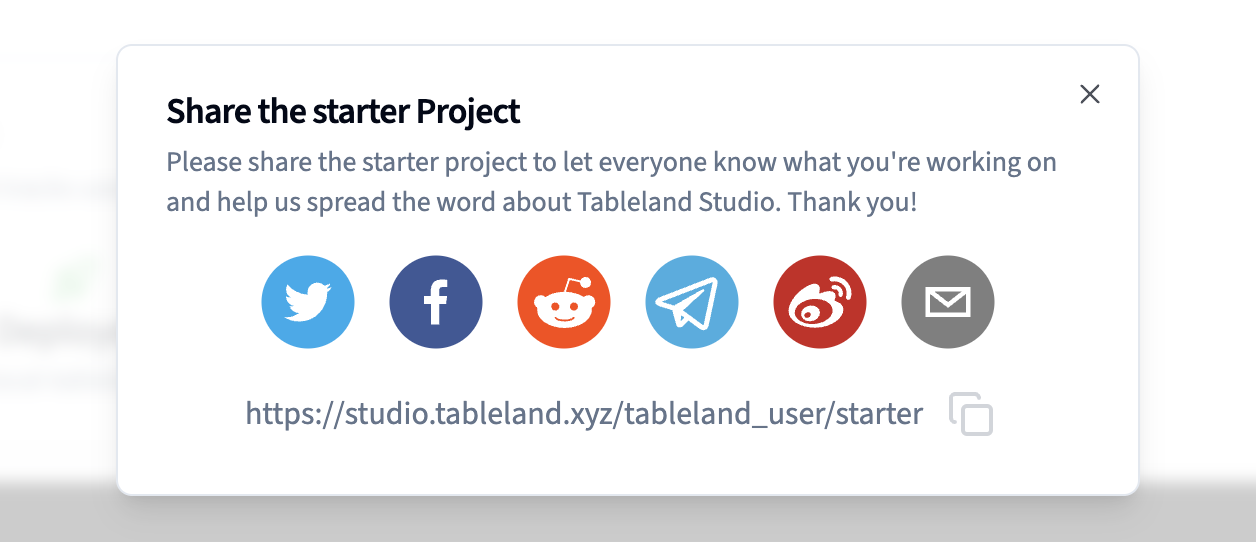
- Once you click this, a modal will pop up and let you click/copy a link to your Studio project. You can also share this on various social media as well. The key point is that this will be a view-only link, unless you're working on a project that has collaborators who can edit the project.
Collaborative teams
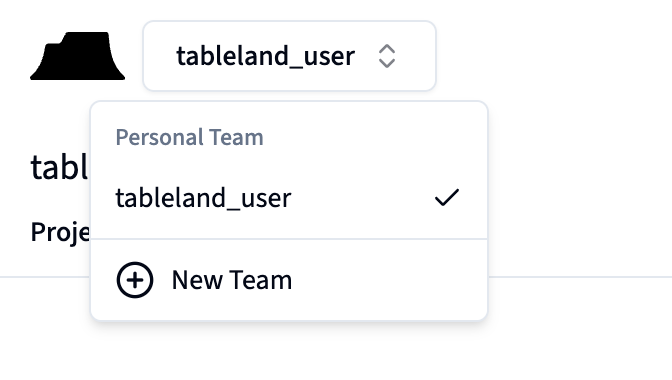
If you're working with others, you can create new teams and invite external stakeholders to underlying projects. Recall that by default, your first team is a personal team, which means only you can have access to all of the projects within that team. However, you can create new teams and invite others to collaborate on projects within that team.
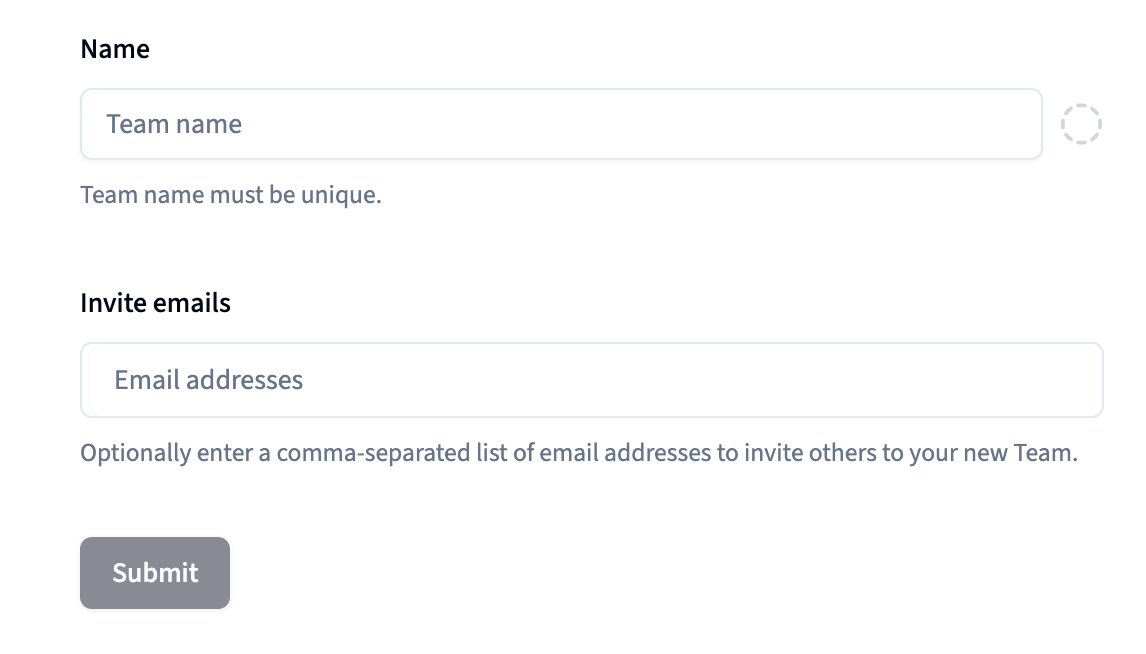
- In the top right corner, click the teams button, and then click Create Team. We'll then be prompted to enter in team info—we'll call this team "collaborate" since we'll be using it to collaborate with others! Optionally, you can enter a comma separated list of email addresses to send team invites.
- Once you've created a team, you can click on the team name to view the team's homepage. From here, you can click on the People tab to view a list of team members. Here, you can click on the Invite button to invite new collaborators.
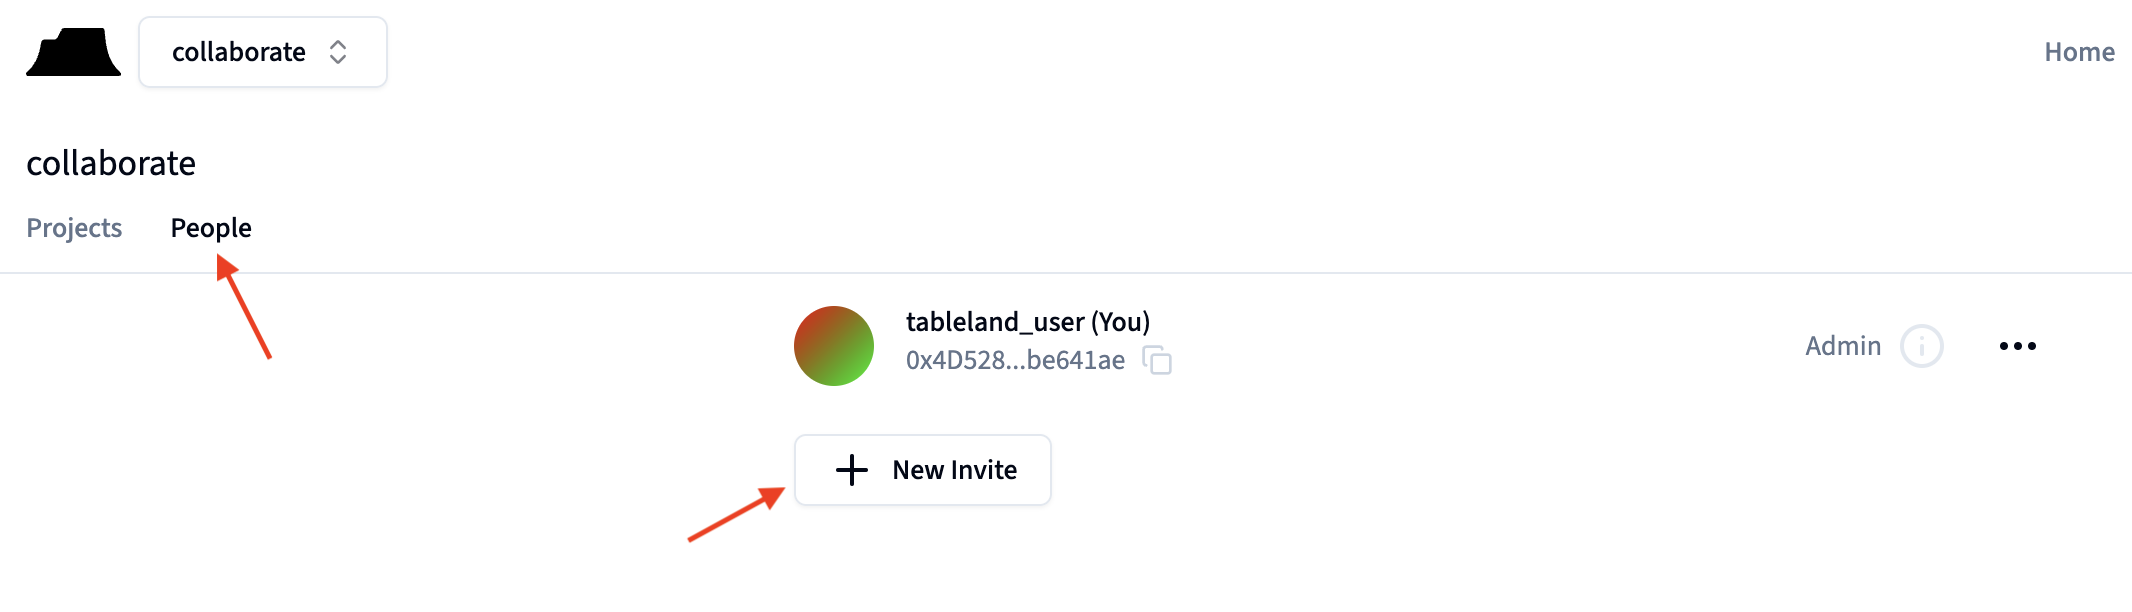
- To invite new members, simply enter the email address of the person you'd like to invite. This will send them an email with a button/URL they can follow to the Studio web app.


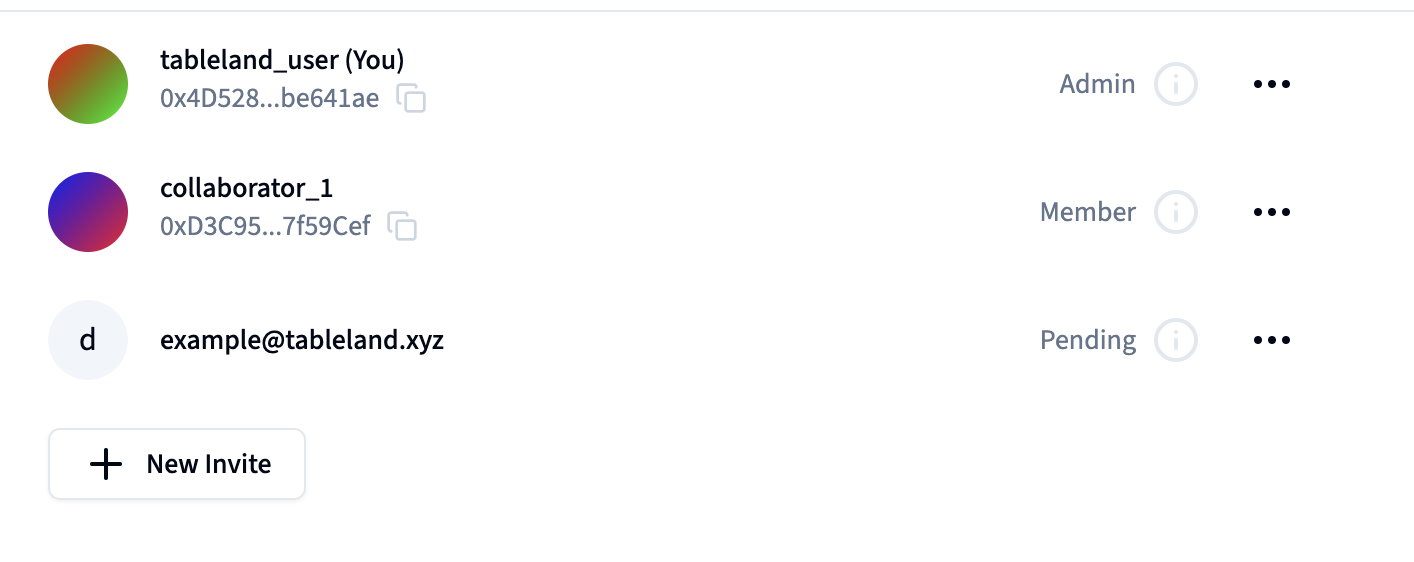
- After a user has accepted the invite, you can view the team members by clicking on the People tab again. The status of each person you've invited will be shown—e.g., if the user accepted the invite, they will have created a username for themselves and be listed as a Member. Pending invites will be shown as well.
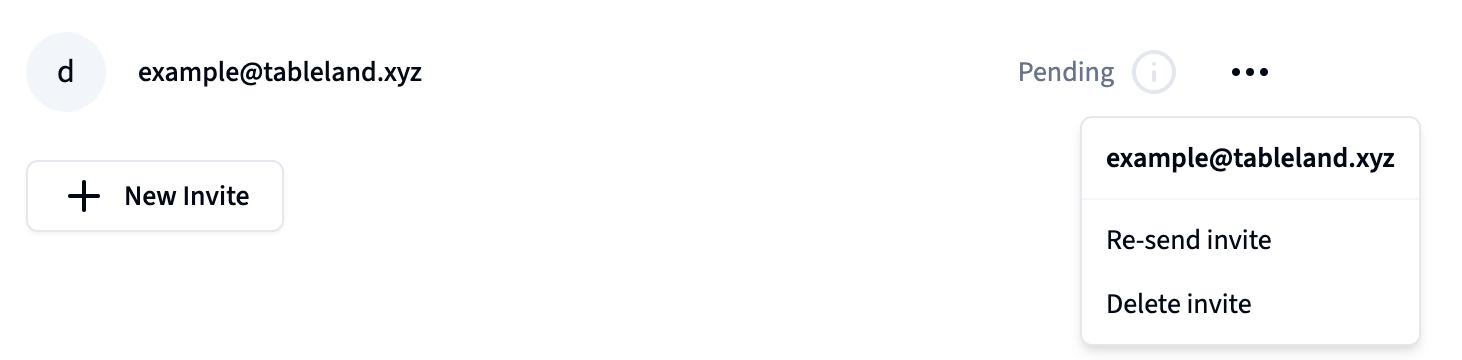
- If at any point you want to re-send invitations or remove a user from a team, you can click the three dots icon next to the invitee's name and select the appropriate action.
Next steps
That covers the basics of the Studio web app! From there, you can check out the Studio CLI docs for more details, such as importing local data into your tables and much more.