Get started
Learn how to login in and set up your first project.
When using the Studio, the first step is to connect, login, and create a team. This will allow you to create projects and deploy tables to supported EVM chains. Note that by default, personal teams are created, which can only be accessed by you. If you'd like to create collaborative teams, you'll need to create a new team and invite others to collaborate on projects within that team.
Connect, sign in, & create a team
-
Start by going to the Studio in your browser. You'll go through a process of connecting your wallet and signing up with a username/email—this will create a personal team by default.
-
In the top right corner, click the Connect Wallet button. Once connected, the button should now show Sign In, along with the connected wallet address.

-
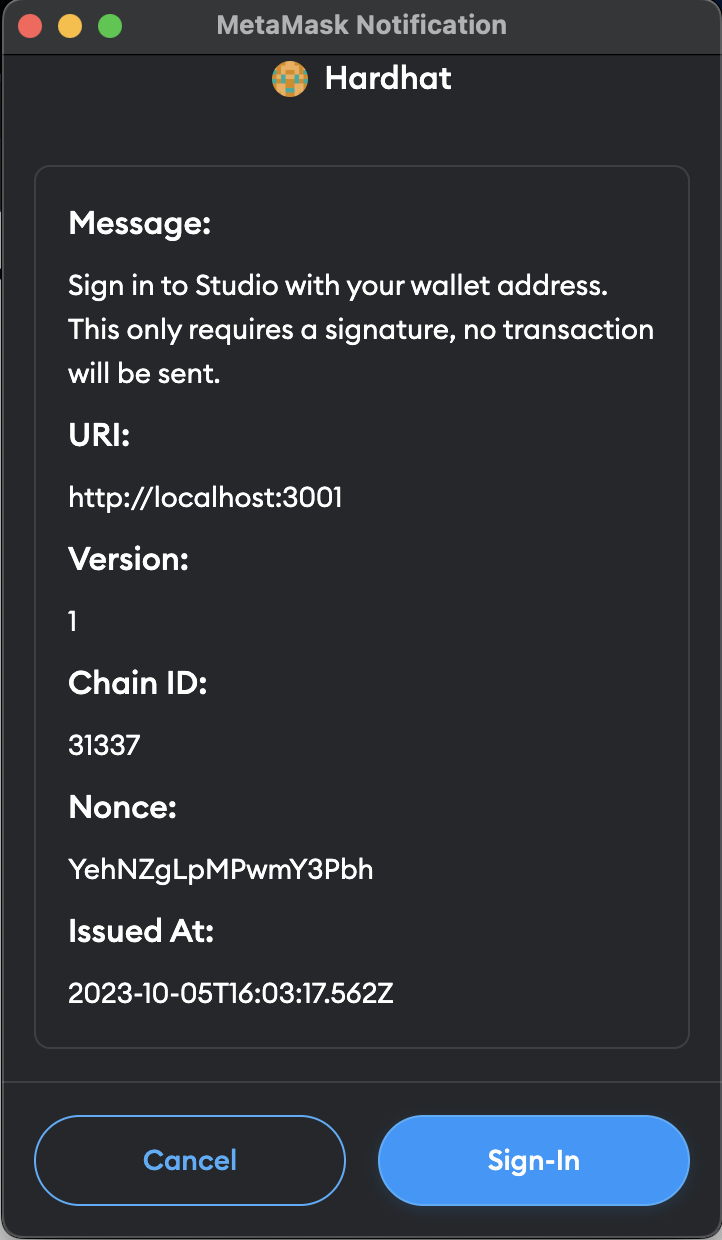
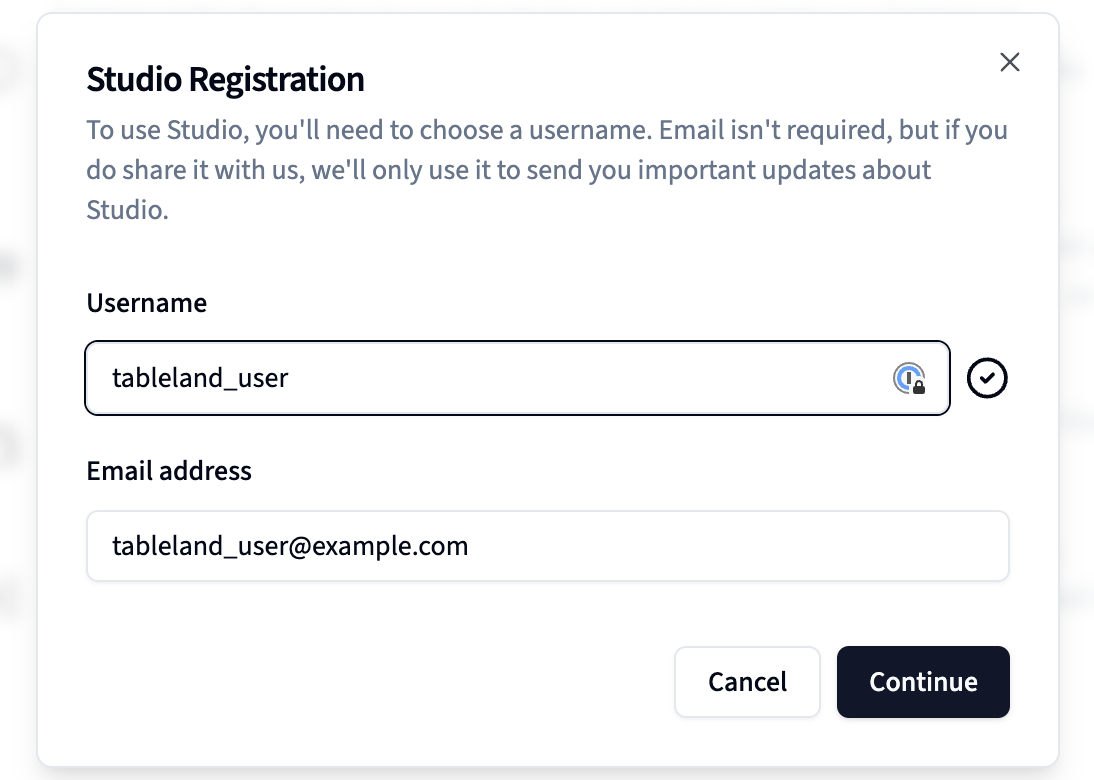
Click Sign In, which will open a popup model to create a username and email address—submit these once complete. Note that first, this will prompt you to sign a message—no transaction fees are required here, it’s just a signature!
- You should now have a username and default personal team created, giving you a landing page that will let you create projects. If you'd like to create collaborative projects, this will require you to create a New Team, located in the top left corner.
Create a project
Now that you've done the initial setup steps, you're ready to start building. You should be on the landing page, which will show you a list of projects. If you haven't created any yet, you'll see a button to New Project. —let's begin!
- On the landing page, click New Project in the top right corner.

- This will bring you to a page where you can enter in project information, including the name and description— we'll call our project "starter" and the click Submit to set this project up for deployment.
Next steps
With a team and project in place, you now have the necessary framework to create and interact with tables!