Create a table
Create a blueprint & deploy your table to a supported EVM chain.
When using the Studio, the first step is to connect, login, and create a team. This will allow you to create projects and deploy tables to supported EVM chains.
Create a table blueprint
Now that you've created a project, you can create a table and deploy it to a supported EVM chain. For this example, we'll use the starter project we just created and create a simple "messages" table. The first step is to create a table blueprint, which is a table definition that is not yet deployed but staged to be.
-
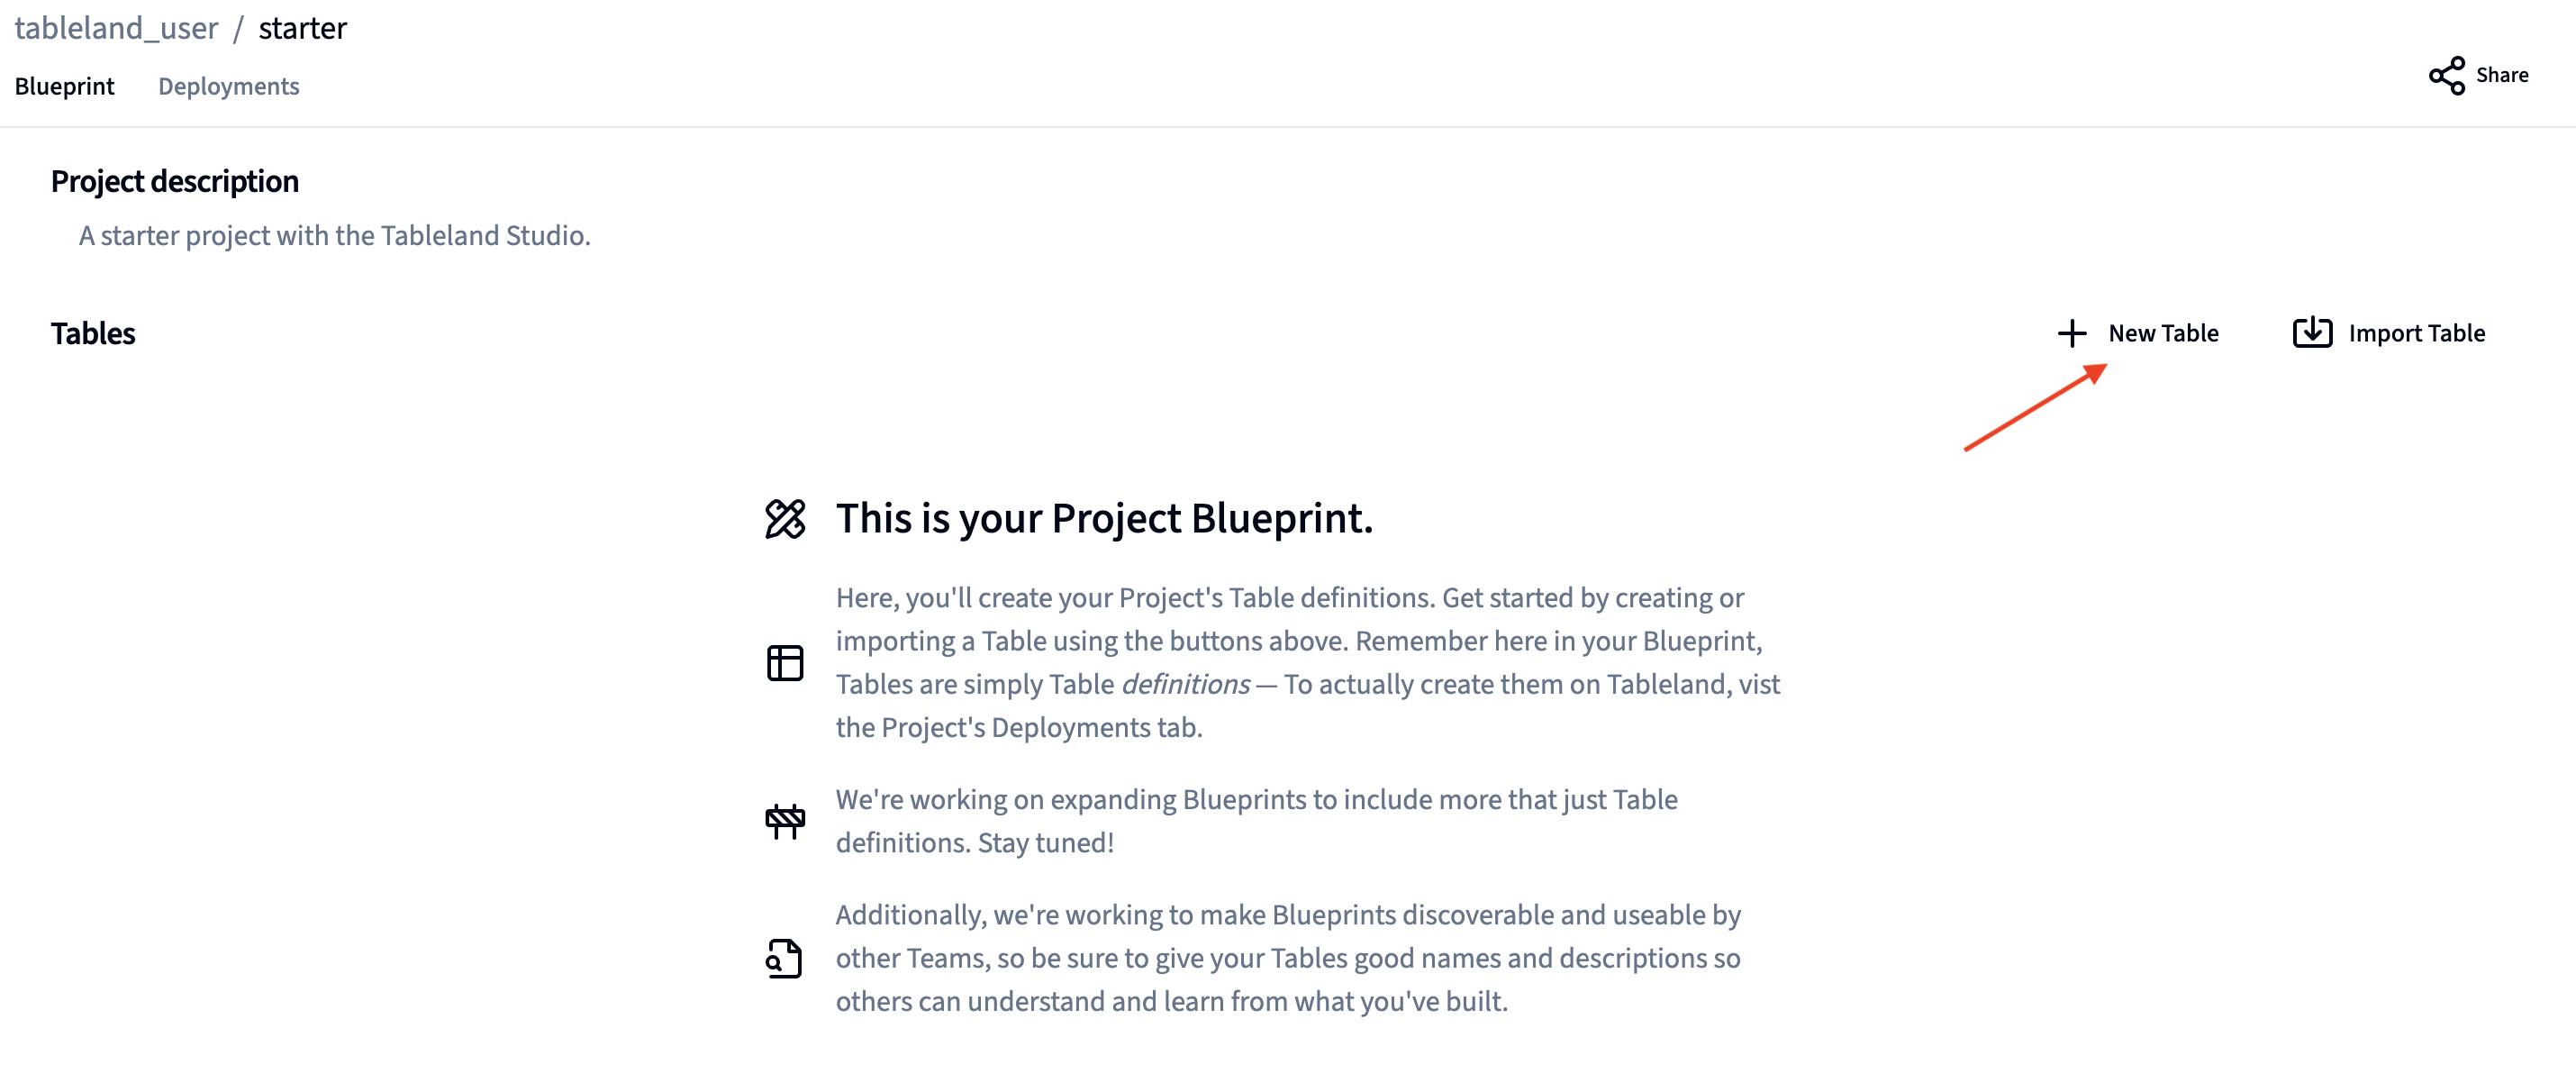
Your project landing should now let you create a project blueprint (table definition placeholders for deployment) or import existing deployed tables—we’ll start with table definitions by clicking New Table.
-
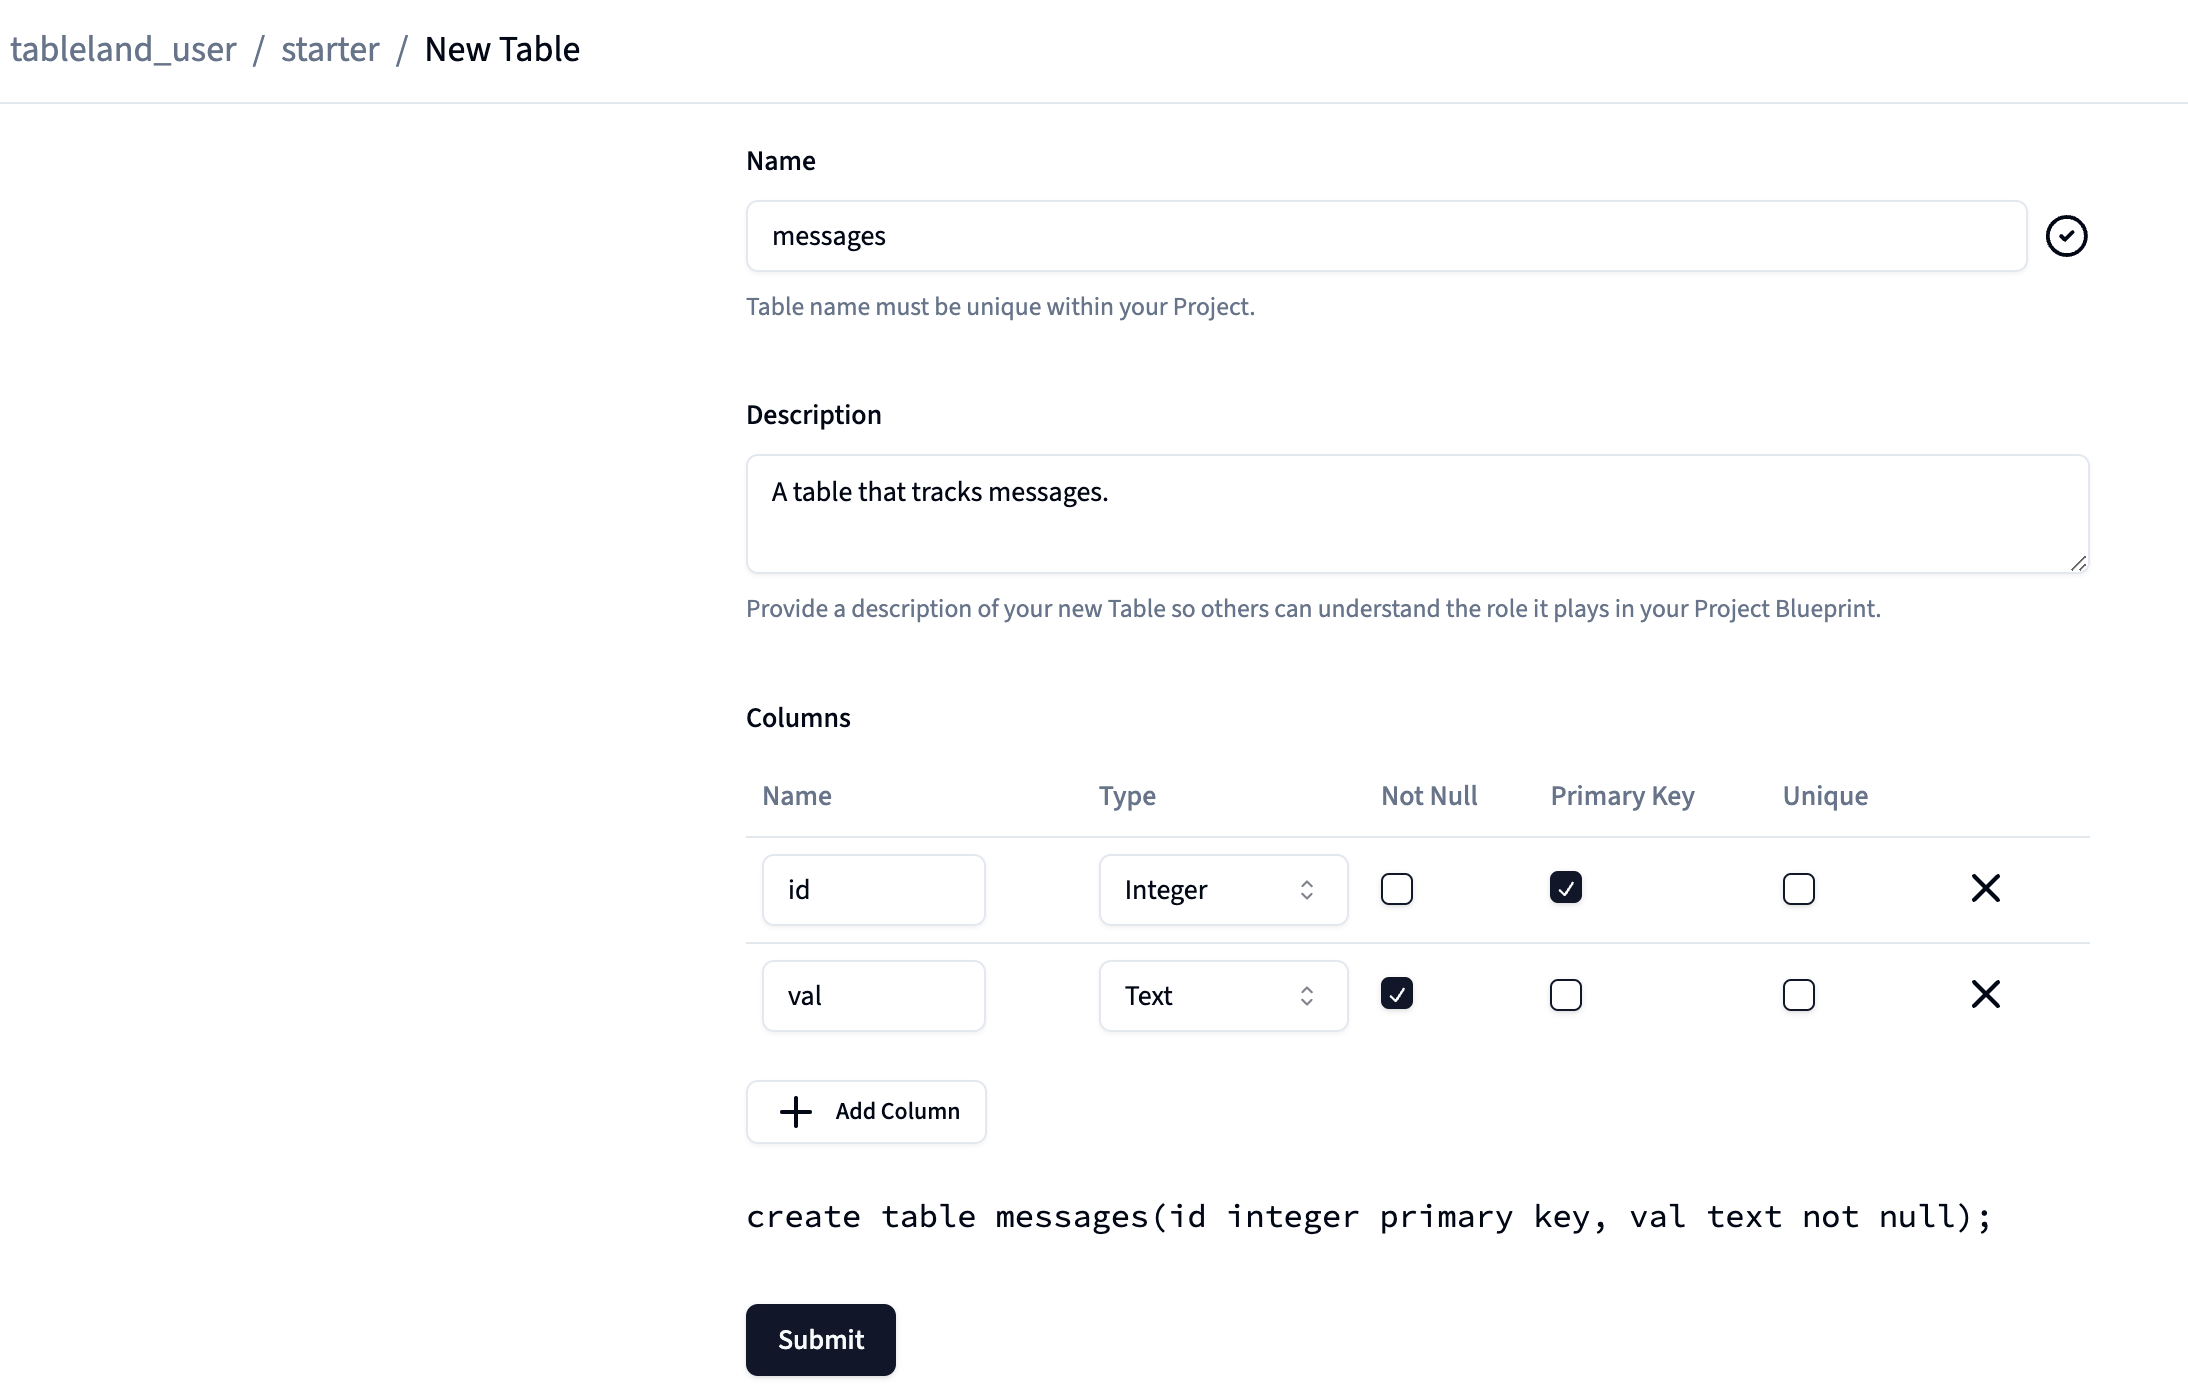
Now, we can define our table's name. Note that this is really an alias for the full, universally unique table name that's in the format
{prefix}_{chainId}_{tableId}—but in the Studio, we abstract away the_{chainId}_{tableId}portion to make it easier to interact with the table once deployed. For this example, we'll call our table "messages" while defining its columns, constraints, and description.
- Then, clicking Submit will bring you back to the project homepage and show the table blueprint that's ready for deployment.
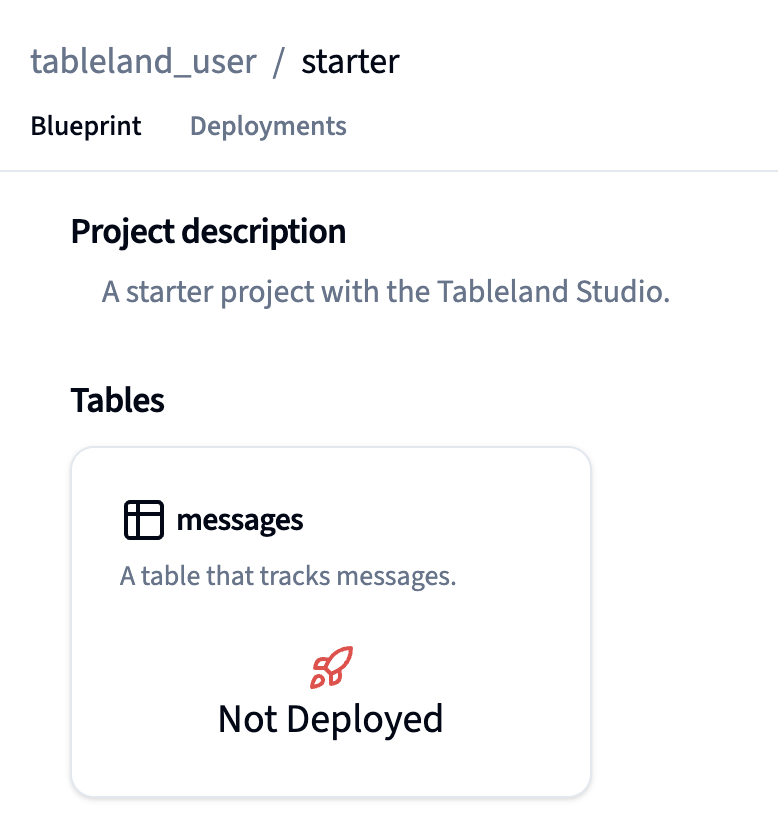
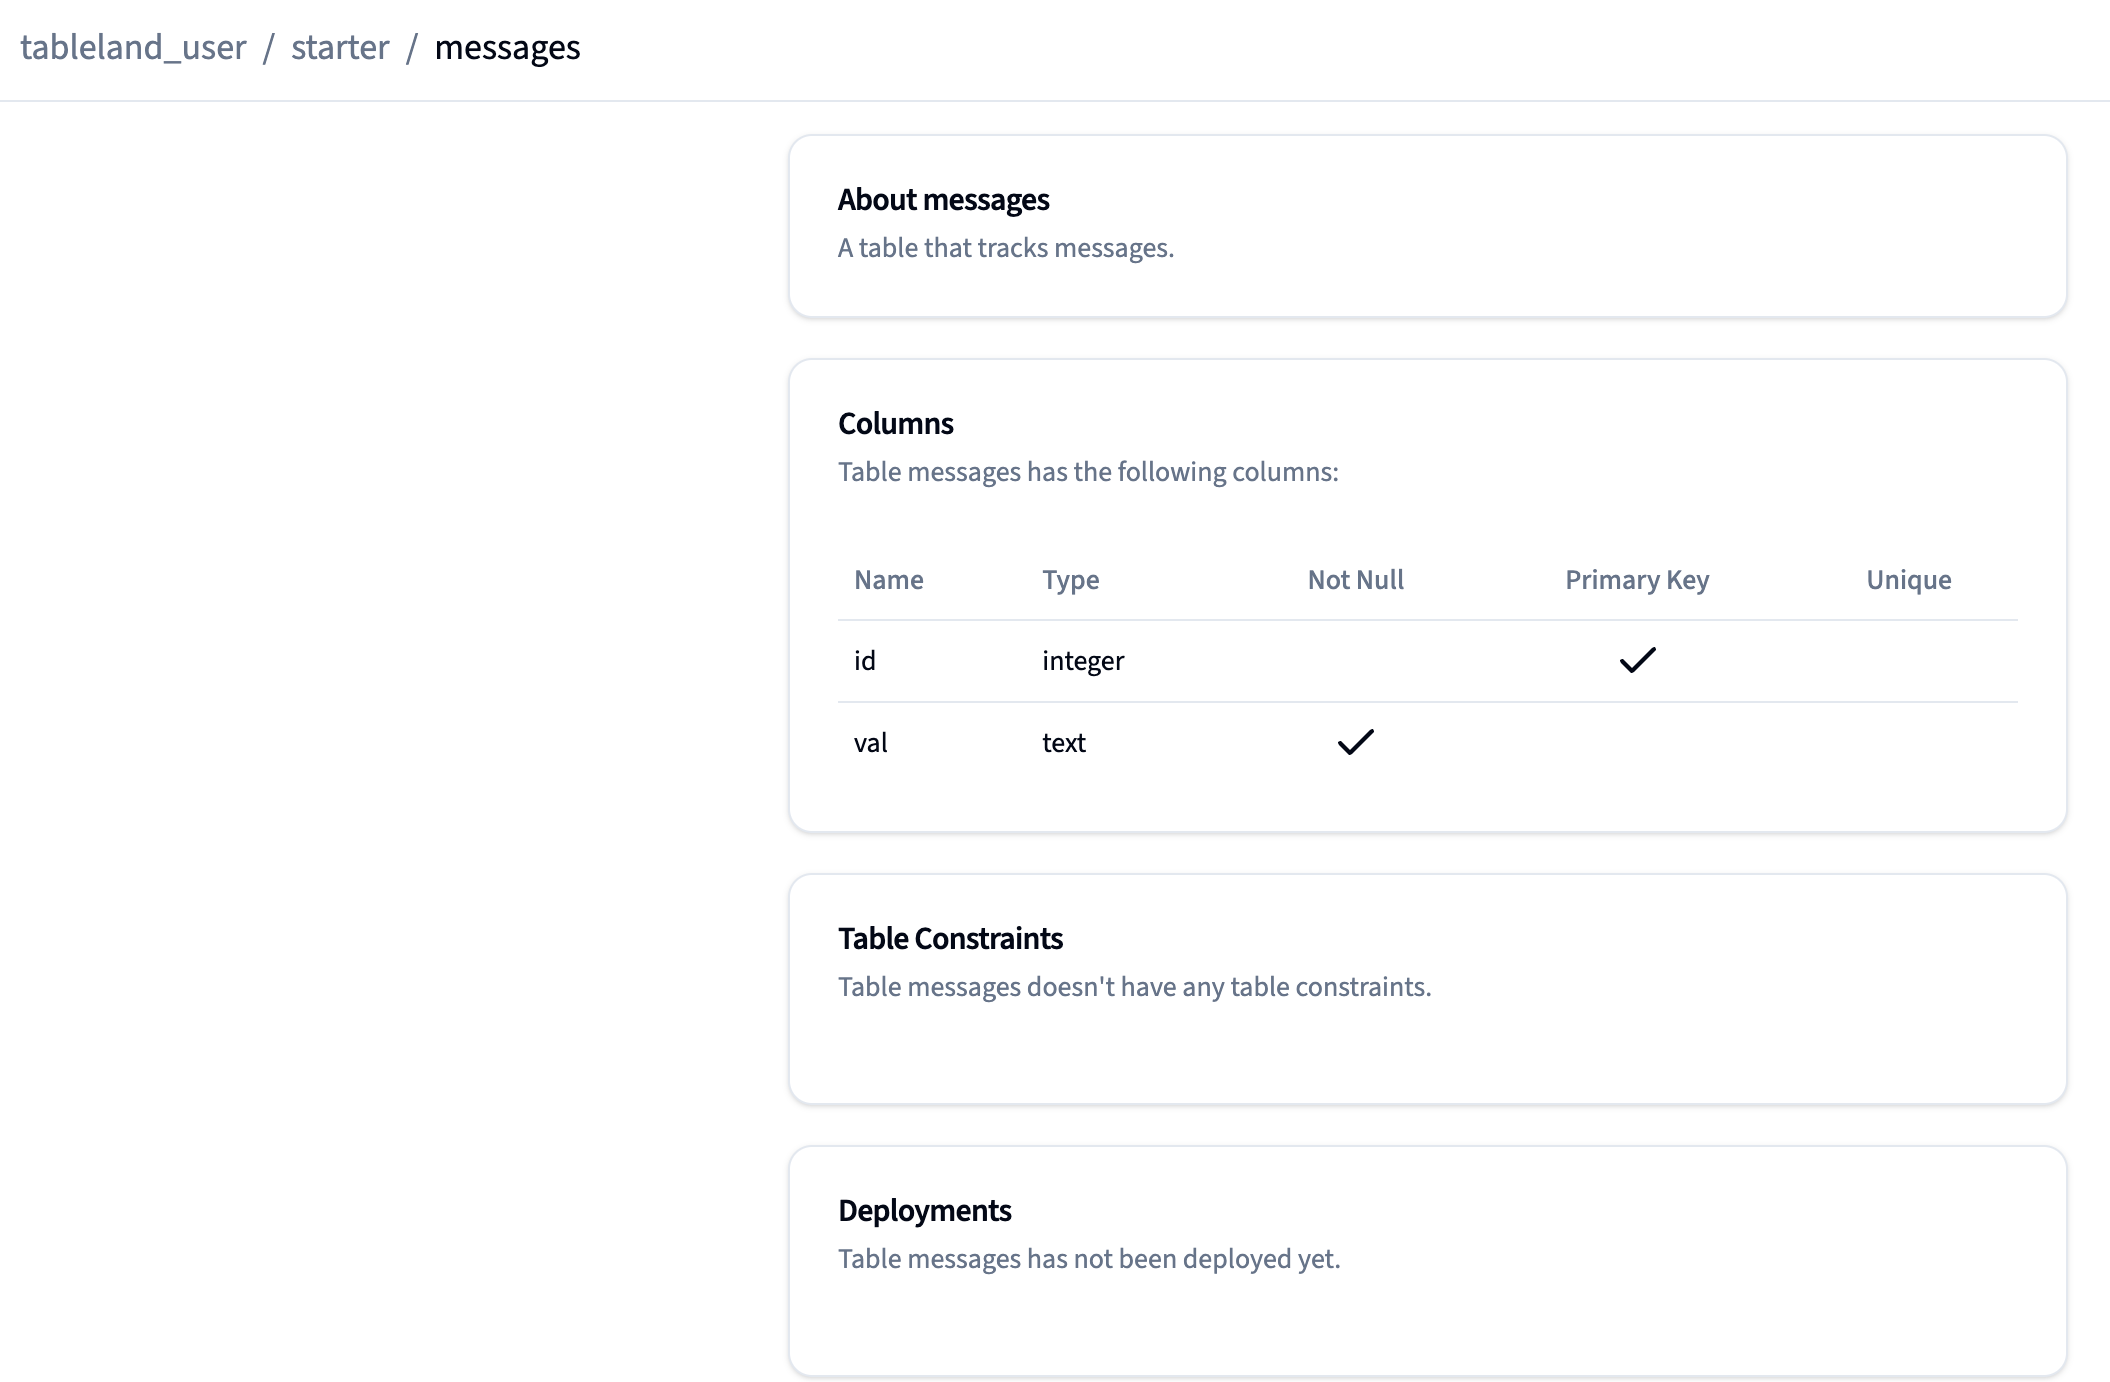
- The blueprint is now staged. You can further inspect the table definition by clicking on it within the project Blueprints page, which will show the information you just entered.
Deploy a table
With your blueprint set up, you're now ready to deploy the table!
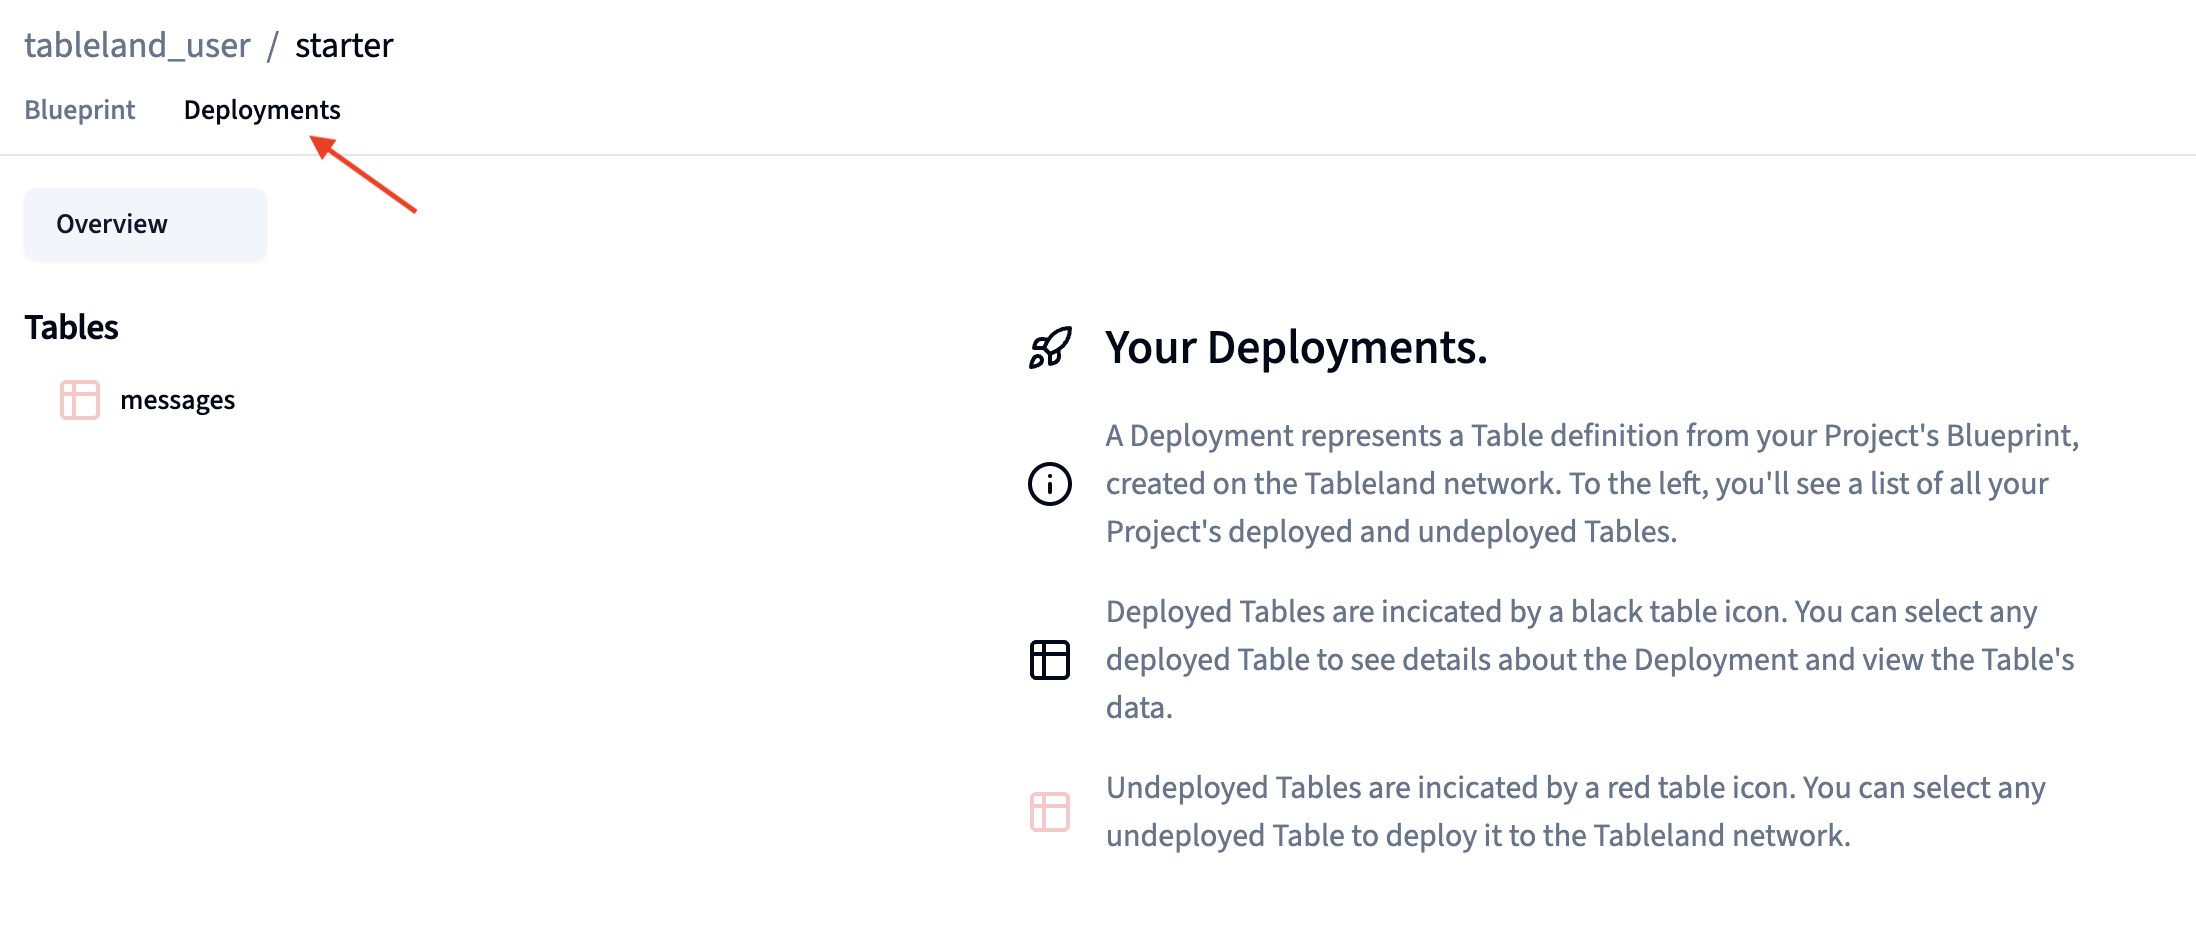
- Navigate to the Deployments tab and find the undeployed table on the left hand side. Any table with a red icon means it is only a blueprint and has not been launched to an EVM chain, yet; if the icon is black, that means it's live.
-
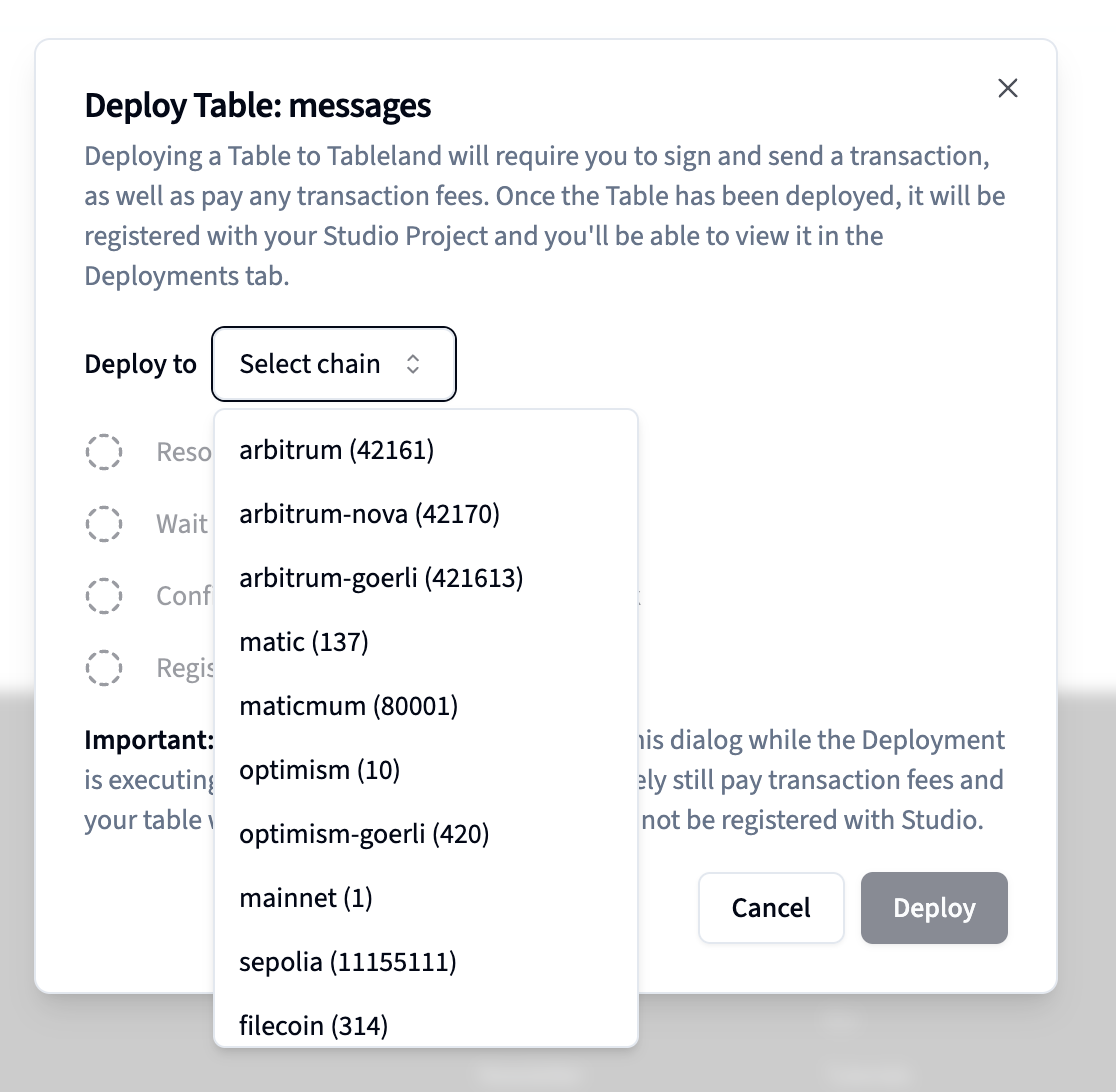
Click on the "messages" table to bring up the deployment screen. This will let you enter the desired chain you want the table to exist on. Once you've selected the chain, click Deploy.
-
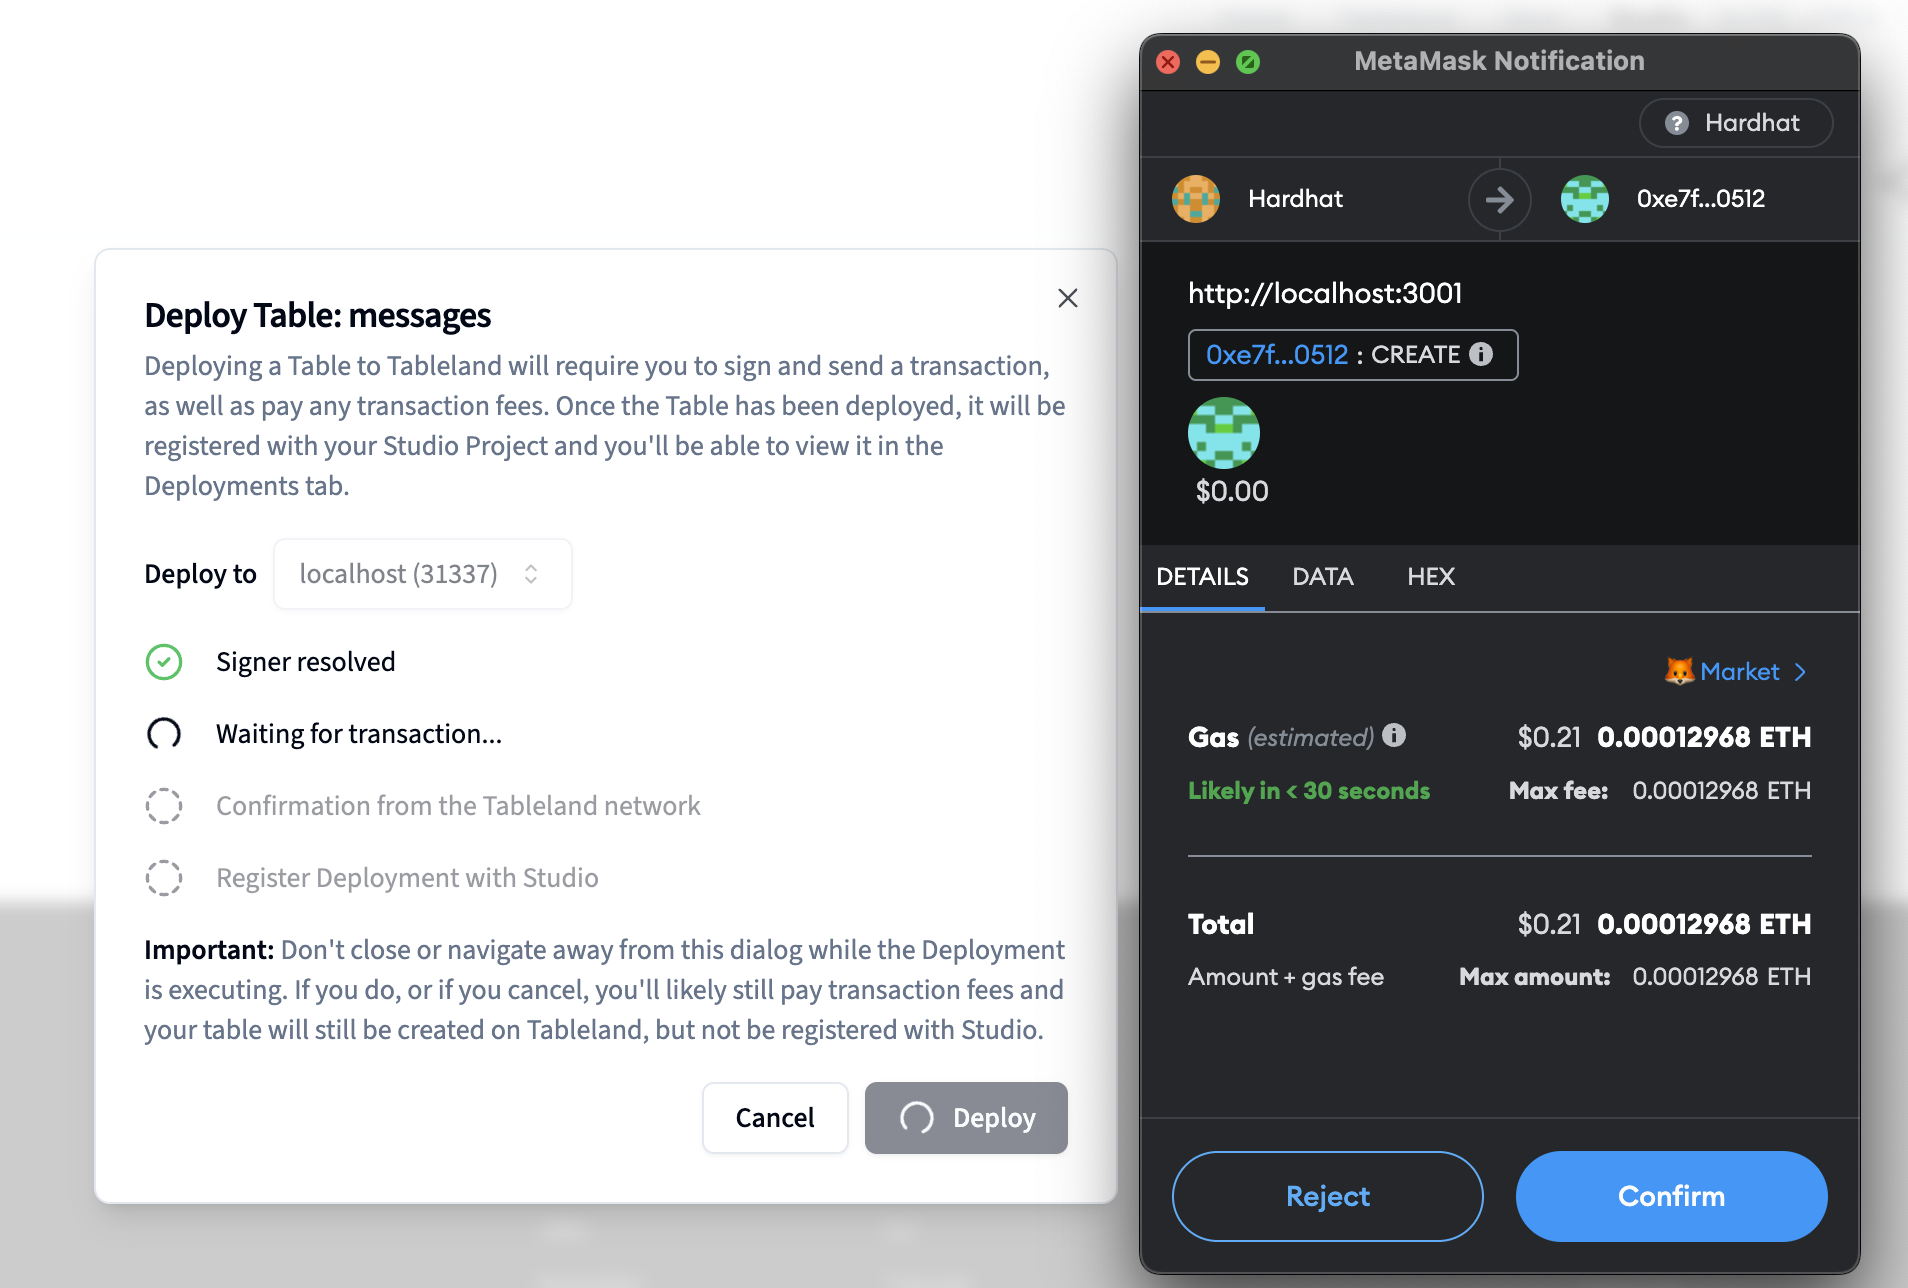
All table creates are onchain operations, so make sure you have enough funds in your wallet to cover the transaction fees; a confirmation action will be triggered to sign the transaction.
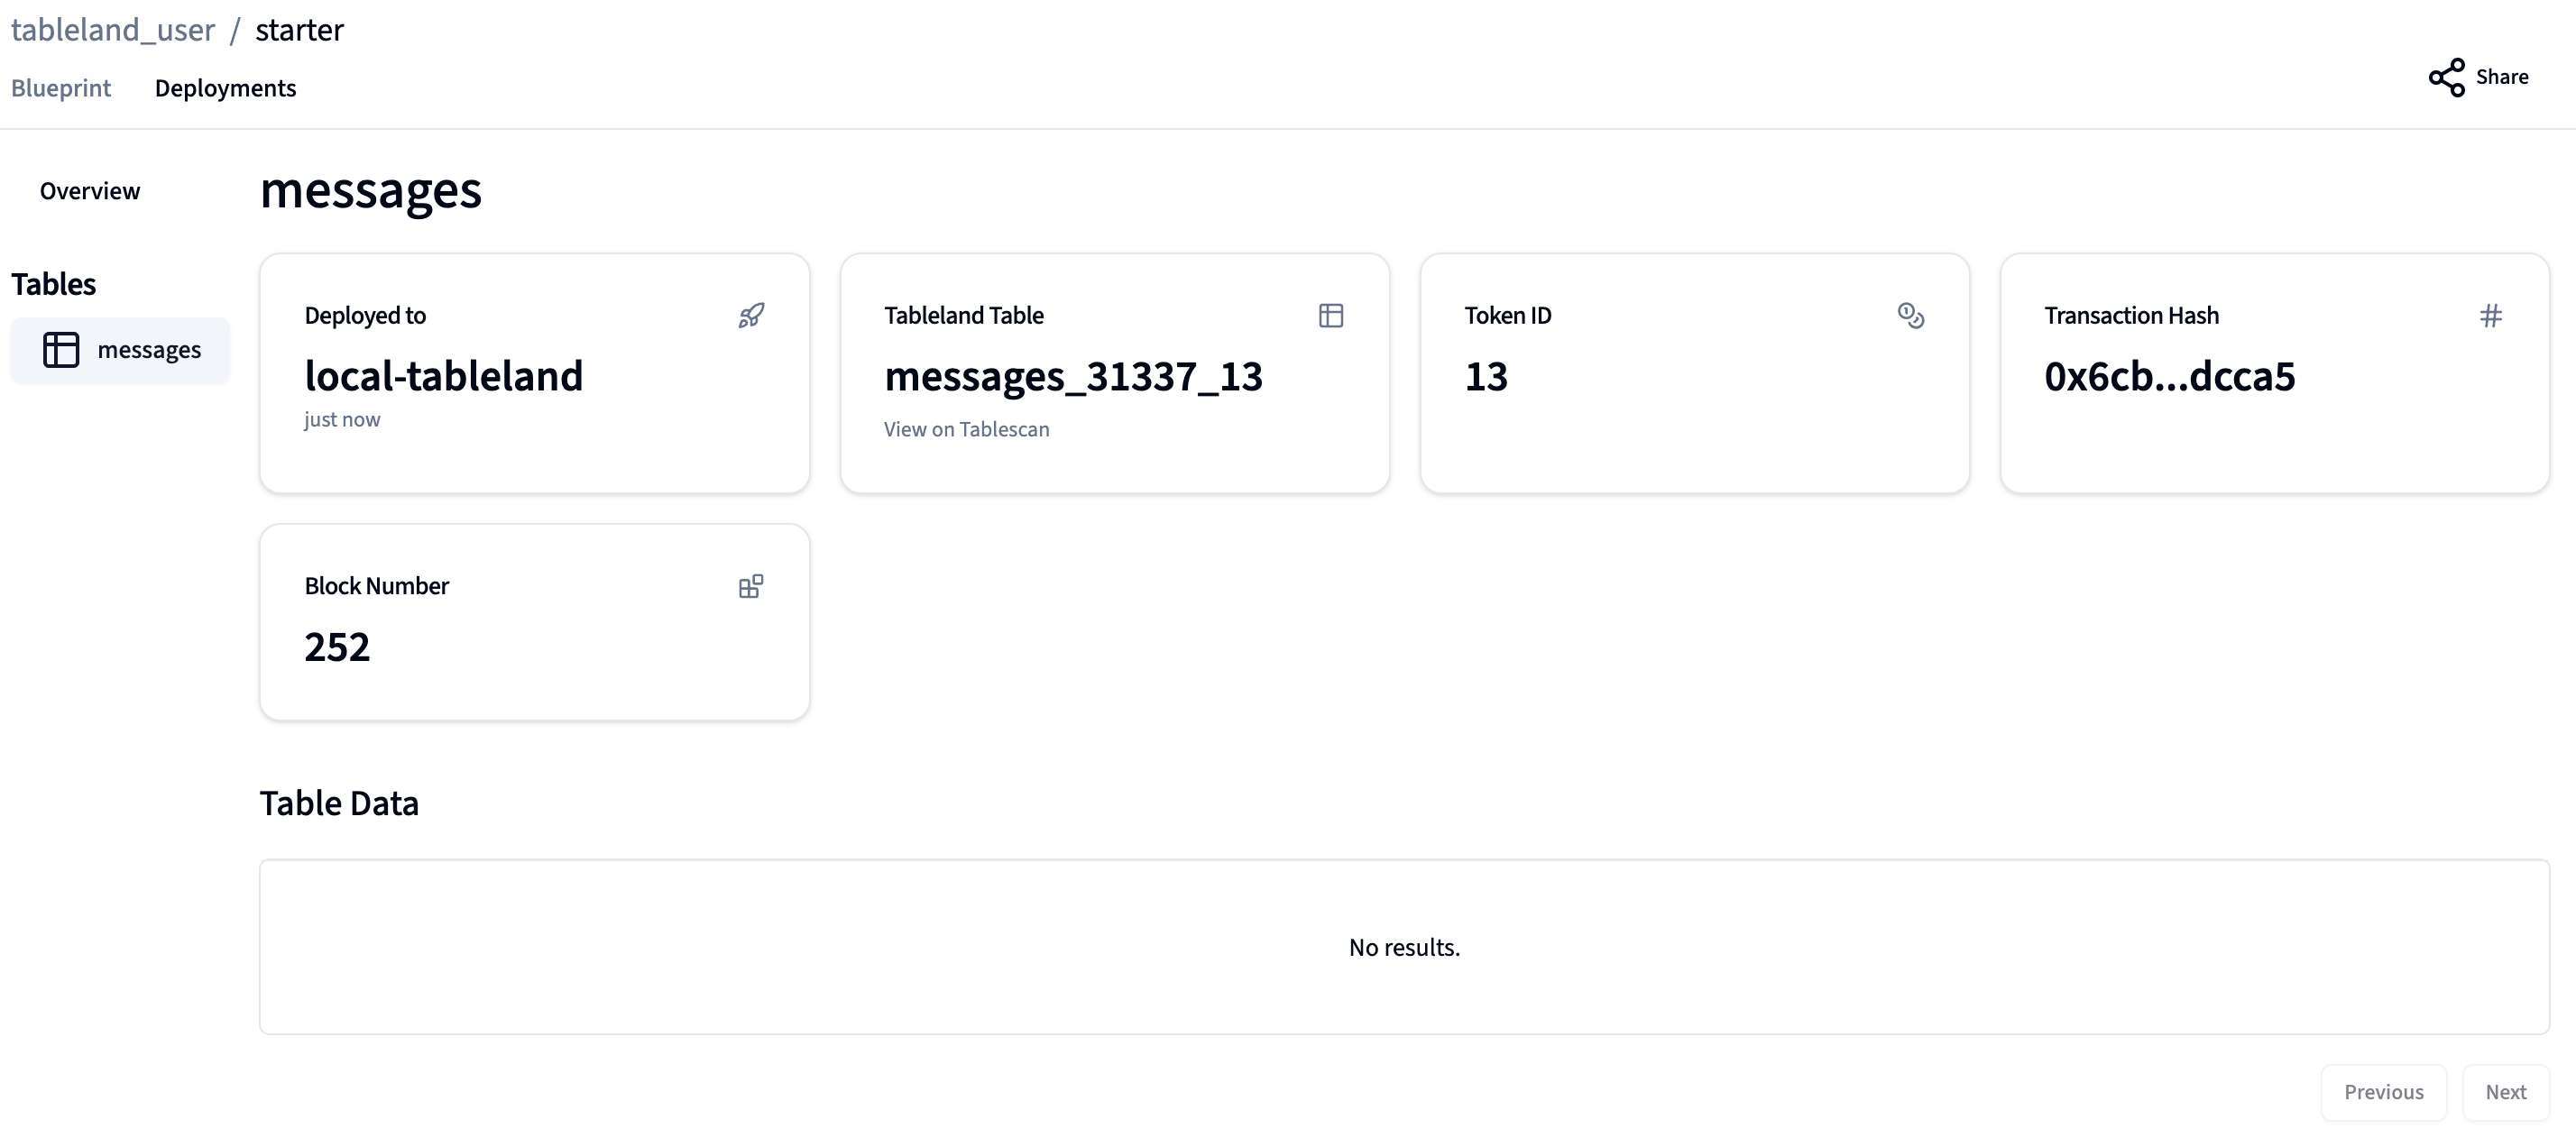
- After the table has been deployed, you'll see the Tableland-generated full table name, the chain it's deployed to, and some other metadata.
Next steps
With your table deployed, you can now interact with it from the Studio web app, Studio CLI, or from your own application that uses the Tableland SDK, smart contract, or "standard" CLI tool. There are other features possible in the Studio as well, so continue onward to understand what's possible.