Import a table
If you've already created a table outside of the Studio, you can still import it into your projects.
The Studio is just one component of the Tableland development stack. When you create tables with the Studio, you can then interact with those tables from other Tableland clients like the SDK or smart contracts. Similarly, if you create tables outside of the Studio, you can import them into your projects to manage them from the Studio.
Importing an existing table
To import an existing table, you'll need to know the table's full name in the form {prefix}_{chainId}_{tableId} since these are parameters required during the import. Typically, you'll also want to make sure that whatever wallet you're connected to in the Studio is the same account that created the table outside of the Studio. This example will use some "users" table that we've already created; however, it is possible to import a table that someone else created, even if you don't have write permissions on the table.
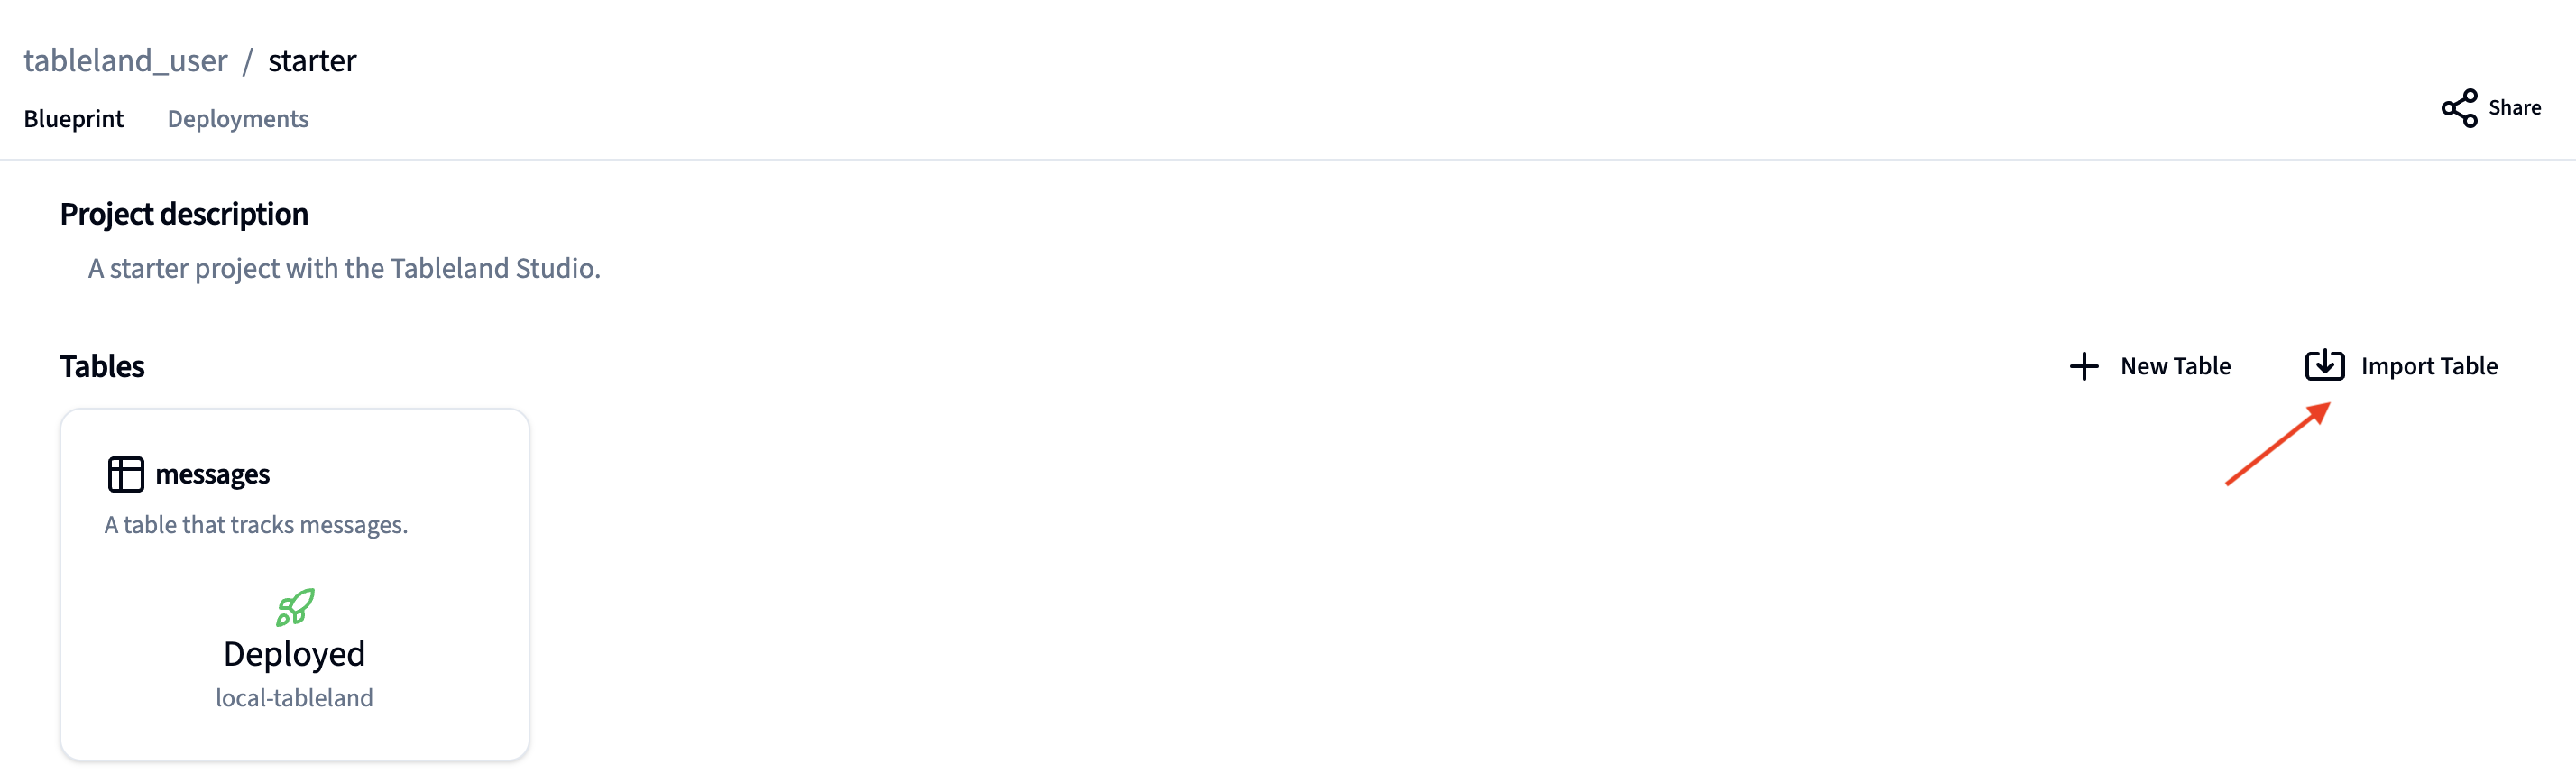
- Navigate to your project homepage and click the Import Table button in the top right corner.
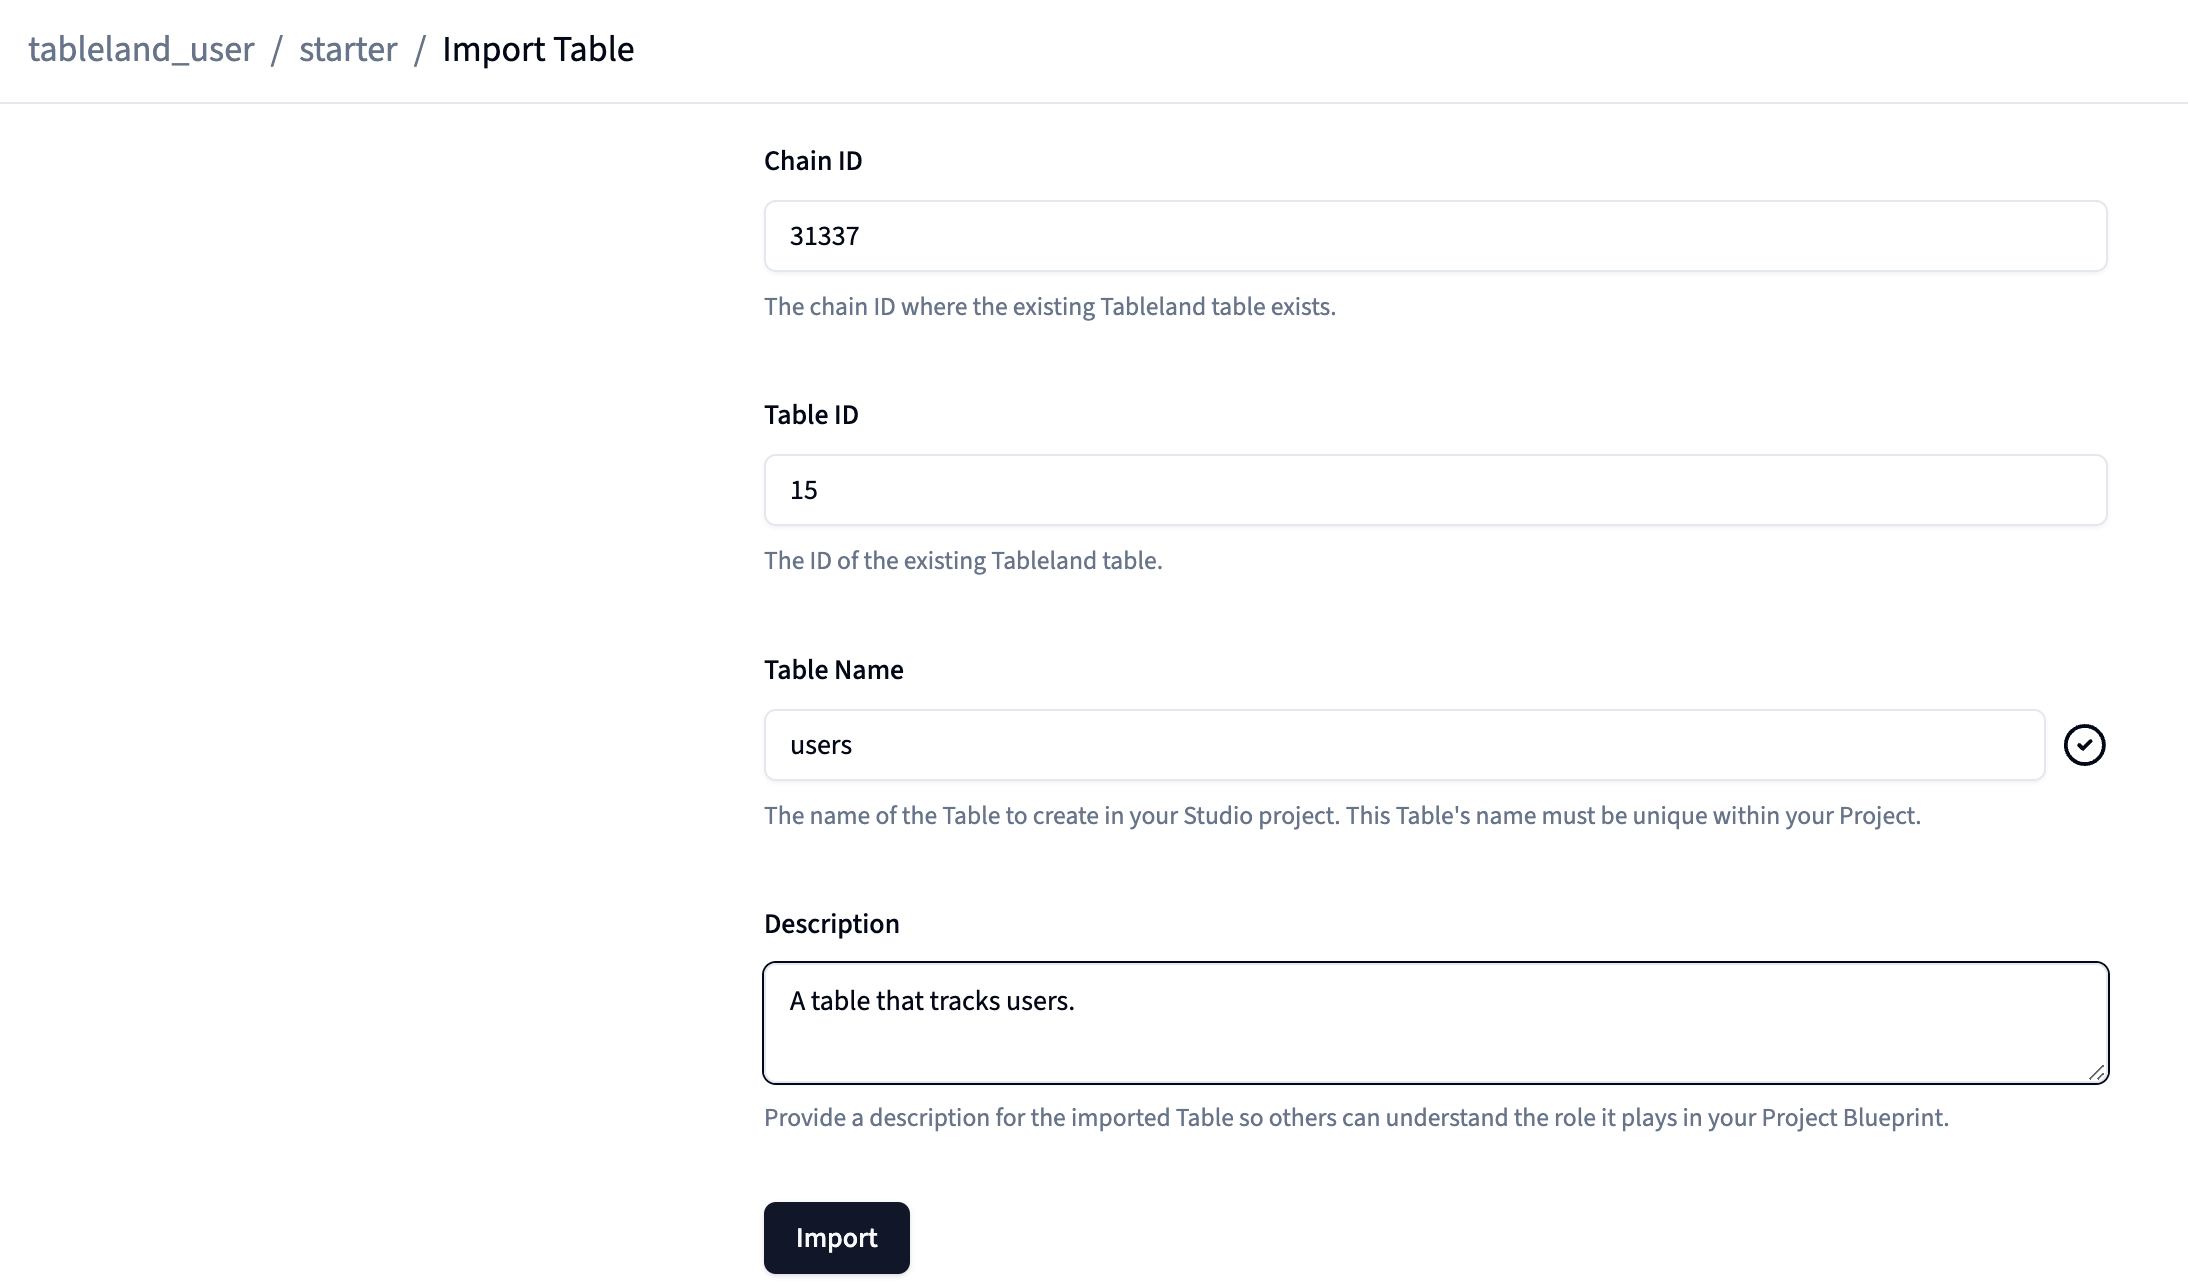
- Then, you'll need to enter the information from the universally unique table name—the prefix, chain ID, and table ID. E.g., if the original globally unique of the table is
users_31337_15, then you'd enterusersin the "name" section,31337for the chain ID (aka Local Tableland / Hardhat), and15for the table ID.
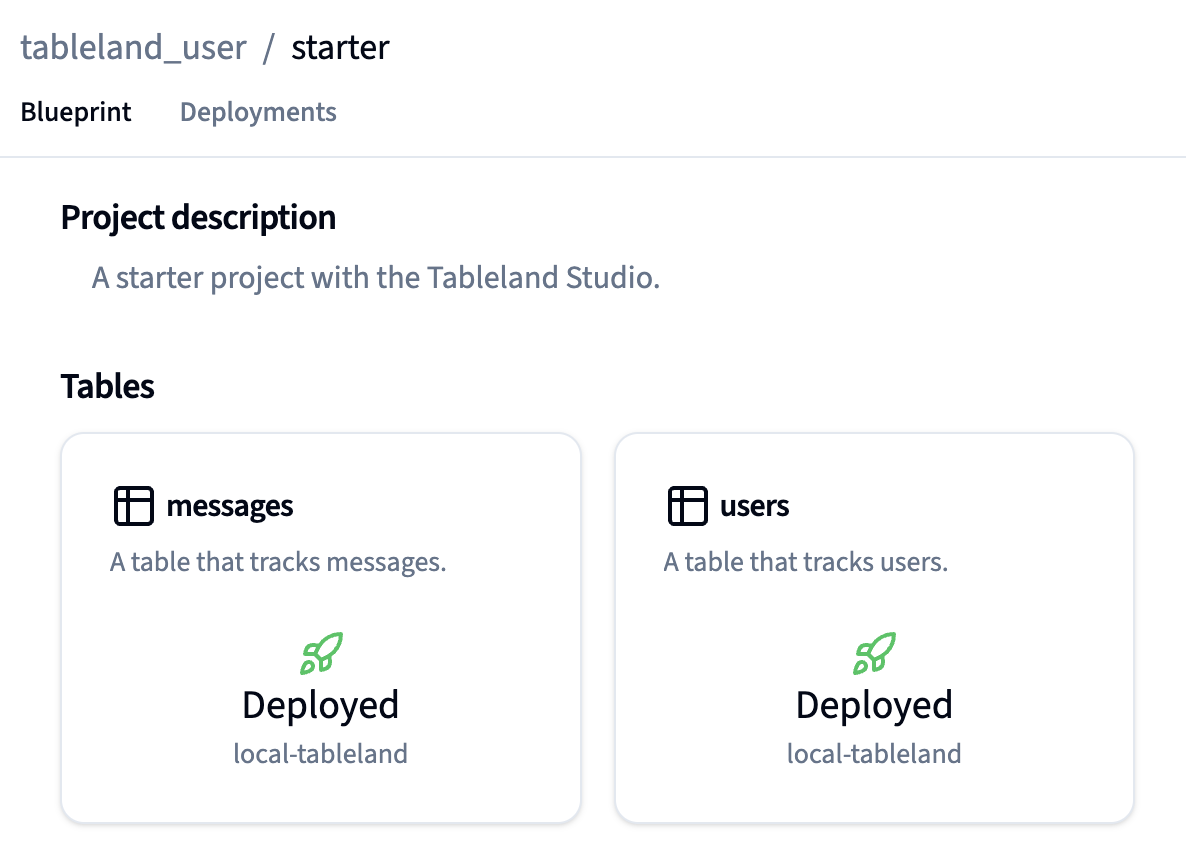
- Once completed, you should now see the imported table in your project! You can further inspect it by clicking on the table, just as you would with one created in the Studio.
Next steps
If you're collaborating with others, you can share project information with a view-only like or even create teams that are not restricted to your account alone. Or, if you'd like to take things to your terminal, you can use the Studio CLI to perform similar actions from the command line.